Wednesday, October 26, 2011

Hot Tamale!

I LOVE me some tamales!  My best friend is half Mexican and as is Mexican tradition, tamales were always served at the Christmas festivities in her house. Man, I loved going over there on Christmas eve to partake in the treat! One year I asked her mom how she made her tamales and she looked at me (like I was crazy), laughed and said "I'm not stupid, I order them from Cuca's!" (Cuca's being the local taco stand in town). She told me that they were way too labor intensive for her and that Cuca made them perfectly already. After hearing this, I concluded that tamale making was not going to be in my future and was best left to Cuca's.

As my cooking skills and love of food grew over the years, I decided to take on the
challenge. I made them once at home and decided that although they are time consuming, they really are not difficult and the reward is awesome. A few years ago, I mentioned to one of my lady friends that I wanted to make them again. She quickly invited herself to join, we added another friend to the party and began a new tradition of our own. Although we do not reserve this adventure for holidays, we do always have an adventure! Tamale day is sort of like Las Vegas for us (much less glamorours of course)...what happens or is said on tamale day, stays on tamale day!  It's an awesome opportunity to have some quality friend time. ***Due to this motto, I don't have pictures of the assembly process, but will get some posted soon***

All that said, while tamales are not hard to make, they are quite time consuming, so be prepared for a half day adventure. This recipe will yield 24-30 tamales, depending on how heavy handed you are with the dough. Even if you only want a few, I recommend that you go ahead and make a whole recipe, as they freeze beautifully!  And while your at it, double the recipe and keep the extras frozen for a nice afternoon treat, or a quick weekday lunch.

Ingredients:

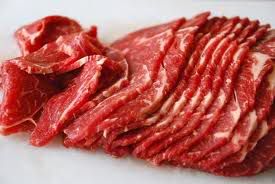
For the Meat Filling:
2 Pounds of boneless skinless chicken breasts
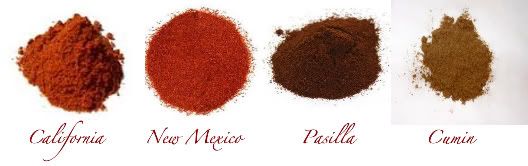
8 dried California chili peppers (can be found in the Mexican aisle of your grocery store)
1/2 teaspoon chili powder
1 teaspoons ground cumin
1/2 teaspoon ground coriander
1/4 teaspoon cayenne pepper
1 teaspoon kosher salt
1 small yellow onion, finely chopped
3 cloves of garlic, minced
1/2 cup of chicken stock
1/4 cup of juice from canned jalapenos

For the wrappers:
One bag of dried corn husks (can be found in the Mexican aisle of your local grocer)

For the dough:
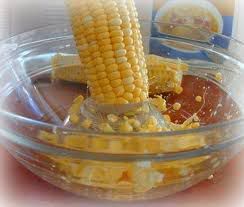
4 cups of masa harina
2 1/4 teaspoons baking powder
1 teaspoon of cumin
2/3 cup of lard
2 to 4 cups chicken broth
Salt to taste

Directions:

For the wrappers:
About an hour prior to the start of your adventure, place the husks in a large bowl or pot and cover completely in hot water. Soak the husks until they are soft and pliable, at least 45 minutes and up to 2 hours.

For the Meat:
Place the chicken breasts in a pot and cover with water.  Bring it to a boil, reduce the heat to keep them simmering and let cook until the chicken is cooked through (approx 20 minutes).

While this is happening, place your dried chili peppers in a small pan and cover with water.  Bring the water to a boil and turn off the heat.  Cover the pan and let the chili's steep for 15 minutes to soften them.  Once they have softened, remove the stems and place them in a blender (reserving the liquid).  Add the remaining "filling" ingredients and blend, adding the reserved chili liquid, one Tablespoon at a time, until a thick sauce is formed (about the same thickness as a gravy).

Remove the chicken from the hot liquid and let cool until handleable.  Shred the chicken and toss it with the red chili sauce.  Season to taste with salt and pepper.  Remember that this is the main source of flavor for your tamale, so make sure it is slightly hotter and more seasoned than you think it should be.  The bland flavor of the masa will tone down the flavor of the chicken mixture once it is combined.

For the dough:
In the bowl of a mixer, place the lard and mix on high speed until it is slightly fluffy looking.  Add the masa, cumin, and baking powder and mix to combine. Gradually add enough of the reserved cooking liquid, 2 to 4 cups to create a dough that is like thick mashed potatoes. The dough should be moist but not wet. Cover the bowl with a damp towel and set aside until ready to use.

To assemble the tamales:

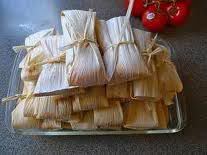
Remove two corn husk from the water and pat to remove excess water. Lay them together with the wide sides overlapping each other.  Spread about 1/3 of a cup of the dough in an even layer across the middle of the husk to within 1/2-inch of the edges. Spoon about a heaping Tablespoon of the meat mixture in a line down the center of the dough. Roll the husk so the dough surrounds the meat and fold the ends under to finish creating the tamale.  Use a string or a thin strip of the corn husks to tie aournd the middle of the tamale, holding the loose ends in place.  Repeat until all the husks, dough and filling are used.

To steam the tamales:

Place a steamer basket in the bottom of an 11-quart pot and add enough water to come to the bottom of the basket. Layer the tamales on top of the steamer basket.  Bring the water to a boil over medium heat, then cover and reduce the heat to maintain a simmer. Check the water level every 15 to 20 minutes, and add boiling water by pouring down the side of the pot, if necessary. Steam until the dough is firm and pulls away from the husk easily, 1 to 1 1/2 hours.

Serve warm. Store leftover tamales, tightly wrapped in plastic wrap, in the freezer, for up to a month. To reheat, remove the plastic wrap and steam until heated through.

Tuesday, October 25, 2011

Beef, It's what's for dinner

One of my favorite meals is Beef Stroganoff.  I've taken years to perfect it with just the right amount of rich beefy flavor and creamy goodness in the sauce.  The beauty of this dish is that you can use almost any cut of beef and while I have never done it with ground beef, I know it would be just as good.  There are not a lot of ingredients in it either, making for a nice "on the fly" meal.  This is delicious enough to serve for a dinner party, but easy enough to prepare on any hurried evening.  Although this is traditionally served over noodles, it is excellent served over steamed white rice.


Beef Stroganoff

Ingredients:

1 Pound of Wide Egg Noodles
2 Tablespoons of Butter
1 pound of beef (sirloin and rib eye are my favorites)
1 Tablespoon of flour
1 tsp salt
1/2 teaspoon pepper
1 pound of white mushrooms (although any kind would be good)
1 Medium yellow or white onion
2 cloves of garlic
1/2 cup white wine (optional)
3 cups of beef broth
1 teaspoon of dill
1 cup of sour cream

Directions:

Prepare the noodles as directed on the packaging.

While the noodles are cooking, slice the beef across the grain in as thin of slices as possible.  The thinner you slice, the more tender the beef will be once cooked and of course the faster it will cook.  To make this easier, I like to put my beef in the freezer for about 15 minutes prior to slicing it.  This will firm it up enough to make your slicing much easier.

Toss the sliced meat with the flour, salt and pepper to lightly coat your meat.  This is called dredging.  Set this aside while you prepare the remaining ingredients.

Chop the onion in medium dice
Slice the mushrooms (whatever thickness you like)
Crush the garlic cloves

Place a large skillet over high heat and put the butter in the pan.  As soon as it melts, add the beef and fry until it starts to brown and cooked through.  Add the mushrooms, onions and garlic and continue to cook until the onions and mushrooms are starting to soften.  Don't be afraid to get some good browning on your ingredients at this point.  The more you brown, the more flavor you get.  Although, be careful not to actually burn.  That flavor is not such a good one! 

Reduce the heat to medium and add the white wine.  Cook until the wine is reduced in half. 

Add the beef broth, increase heat to medium high and bring to a boil.  Add the dill and continue to cook until the broth is reduced by about half (approximately 5 minutes). ***Alternately, you can add one and a half cups of water and 1 Tbs of beef bullion paste and skip the reducing process, but do make sure to bring the liquid to a boil before proceeding*** 

Turn the heat off and stir in the sour cream.

Do not bring the stroganoff back to a boil once you have added in the sour cream, this will likely cause it to separate and create an unappealing texture to your sauce.

Serve piping hot over the warm egg noodles.

enJoy!

Sunday, October 16, 2011

Tom Kha Gai...I don't speak Thai..

But I sure do like their food. Haha!  Tom Kha Gai is that delicious Thai soup with coconut milk, chicken, mushrooms and as my friend calls them "leaves and twigs".  Don't eat the leaves and twigs, but they sure make the soup taste good.  I was astonished when I found out how easy this soup was to make.  It does require a few special ingredients, but most are available at your local grocer.  However, I would encourage you to venture into your local Asian food markets.  The items (specifically produce) that they sell are usually less expensive, and much better quality than what you find at your grocer.  Kaffir lime leaves really make a difference in this recipe, and you will most definitely not be able to get those at your regular grocer. Don't be intimidated!  Go in there and ask questions if you don't know what things are.  I have never been to an Asian market where they were not more than happy to help me identify things.  Please note that the chili paste in this recipe is similar to Sriracha, but a little thicker and spicier.  If you choose to use the sriracha, you will want to use a little bit more than what is called for.

Tom Kha Gai
Chicken Coconut soup with lemongrass

Ingredients:
Lemon Grass, Galangal Root, Kaffir Lime Leaves, Ginger Root

1 Tablespoon of red chili paste
2 shallots finely chopped
1 Tbs vegetable oil
4 cups chicken broth
8 large slices of peeled fresh galangal or 4 slices of fresh ginger (slices should be about 1/2 inch thick)
1 large lemongrass stalk.  One large stalk is equal to about 4 of the little ones found in most grocery stores or about 16 inches long.  Crush each piece with a hammer or the backside of a knife to release more flavor.
16 kaffir lime leaves or the grated zest of 1 large lime
2 14 ounce cans of coconut milk
1/4 cup of lime juice
2 Tablespoons Thai fish sauce
2 Tbs light brown sugar
1 pound of boneless skinless chicken breast cut into thin slices
1/2 pound of fresh white mushrooms sliced
Fresh cilantro for garnish

In a large soup pot over medium heat, place the oil and heat until shimmering.  Add the chili paste and shallots and stir until fragrant and shallots are slightly softened.  Add the broth, galangal, lemongrass, and lime leaves.  Bring to a boil and boil for 2 minute.

Reduce heat to low and add in the coconut milk.  Stir to combine and bring to a simmer.  Add the lime juice, fish sauce and brown sugar.  Simmer for 5 minutes.  Add the chicken pieces and simmer until tender.  The thinner your slices, the quicker they will cook, so keep an eye out so you do not over cook your chicken.  Add the mushrooms and simmer for 2 more minutes.

Serve piping hot, with extra Sriracha for those who like extra heat.

enJoy!

Wednesday, October 12, 2011

Meatballs!!!!!!!!!!!!

I was a nanny in Sweden for a year, and while  I missed my family intensely, I really LOVED my time there.  Believe me when I tell you that Swede's are serious about thier meatballs!  My mom made swedish meatballs for years, and it is one of my all time favorite meals to this day.  I have since learned that hers was not necessarily the most authentic recipe, but a classic in the King house none the less.  I have made a few adjustments to her recipe over the years, just to make it my own and man is it good!

Ingredients:

1 1/2 pounds of ground beef
2 tsp chopped fresh parsley
1 1/2 cups panko bread crumbs
1 large egg
1/4 cup of evaporated milk
1/2 cup finely chopped onion
1/3 cup finely chopped carrot
1 teaspoon ground cardamom (or 1/4 tsp nutmeg if you don't have cardamom)
1 1/2 teaspoons salt
1/2 teaspoon of pepper

1 cup of vegetable oil

1/4 cup of flour

 2-3 cups water
1 Tablespoon beef bullion

1/3 cup heavy cream

Directions:

Mix all of the ingredients in the first section.  Make sure not to overwork your mixture or the meat will take on and oddly pasty consistency.  Mix it just until all of the ingredients are evenly distributed.  Form golf ball sized balls and set aside.

Place the oil in a large saute pan until it is 1/2 an inch up the sides.  Heat on medium high heat until it is shimmery looking.  Place your meatballs in the pan and cook, turning them frequently so that they are brown on all sides and cooked through.  Remove your meat balls and drain all but a 1/4 cup of the oil.  Make sure not to loose all the little bits that have fallen off of your meatballs, this will add extra flavor to your gravy.

Place your pan back over medium heat (with the leftover oil in it) and add the flour.  Stir the mixture around until a paste forms.  Allow this to cook for about a minute.  This is called making a roux (pronounced roo) Add in your water and bullion, stirring to incorporate with the flour mixture.  Bring the mixture to a boil and cook for 2-3 minutes.  If your gravy is too think, add a little water.  If it is too thin, mix some more flour and water (one part flour, two parts water) and add into your gravy 1 Tablespoon at a time until your gravy is a good consistency.

Right before serving, put a dash of cardamom or nutmeg and the heavy cream and stir to incorporate.

Serve over the carbohydrate of your choice.  I personally like them over rice.  Swedish tradition is to serve with boiled potatoes, and it would certianly be good over wide egg noodle as well. Make it your own :-)

Swede's also serve a dollop of lingonberry jam on the side, which is the perfect compliment to the meatballs, and you can actually purchase lingonberry jam at IKEA stores if there is one near you.


enJoy!

Monday, October 10, 2011

Dip Me Frenchie!

I was craving a good brew pub type meal this weekend, and decided to try to replicate my favorite brew pub's french dip sandwich.  I successfully did so and this was unanimously agreed to be one of my best "restaurant" meals so far.  I have made french dips in many ways before, with pot roast, roast beef etc, but this time I decided to try a new approach.  I was watching "Diners, Drive In's and Dives" on the Food Network recently and Guy Fieri was at a diner who was sharing their secret to a perfect Philly Cheese steak sandwich.  They used ultra thin slices of rib eye steak, and of course the reaction from Guy when he ate the sandwich was convincing enough for me to take the plunge and purchase the pricey rib eye for my French Dip this time around.  I must say, that this is the secret to the perfect steak sandwich.  The extra marbling on a rib eye gives it the extra umph that it needs to be tender, melt in your mouth beefy goodness. I also made a batch of oven fries that were truly restaurant worthy.  I'll give you both recipes since this was the perfect combination. The recipe may seem sort of lengthy, but if you prep (slice, smash and season) all of your ingredients before begining, the actually is a pretty quick meal to prepare.  This recipe makes 4 generous sized sandwiches and plenty of fries to accompany.

Ingredients:


3 medium Russet potatoes
1/3 cup Olive Oil
5 Cloves of garlic (Smashed)
Salt
Pepper
1/2 tsp fresh or dried Rosemary


4 6-8 inch pub style sandwich buns
1- 1 1/2 Pounds of boneless Rib eye steak (depending on how meaty you would like your sandwiches)
2-3 teaspoons of Montreal Steak Seasoning
3 Tablespoons of Butter
1 Large sweet yellow onion, sliced thinly
1 Bell pepper (color of your choice), sliced thinly
1/2 pound button mushrooms, sliced
2 large Shallots, sliced thinly
1 cup of white wine
3 cups of beef stock
1/2 teaspoon of garlic powder
4 slices of Provolone Cheese

Begin by preheating your oven to 425 degrees.  Also at this point, place your steak in the freezer to let it firm up for ease of slicing.

Rinse and slice your potatoes into large steak fry sized pieces.  Imerse them in water to soak for at least 10 minutes.

Place your 1/3 cup of Olive Oil in a small saucepan along with crushed garlic.  Place on stove over medium heat.  As soon as you hear the garlic sizzle (2 minutes). remove the pan from heat and let sit for 3-4 minutes.  Strain out the garlic chunks and set aside to cool slightly.

Remove your potato "fries" from the water and pat to dry.  Arrange them on a large cookie sheet (with an edge) so that you have a single layer of potatoes.  You want each potato to touch the surface of the pan.  Drizzle with the garlic oil and sprinkle with Salt, pepper and rosemary.

Place in your oven and set the timer for 25 minutes.  When the timer goes off, you will want to take a spatula and carefuuly scrape your fries, turning them over to allow the other side to cook.  Cook for another 20 minutes or until lightly brown and tender when a knife is inserted.

Now, on to your steak sandwiches.  I would start making these right after you put your fries in the oven.  Remove steak from the freezer and trim the outside edges of the fat that may be there.  Don't worry, there is plenty of fat in the rest of the meat, you don't need the extra.  Place your steak on it's side and with a very sharp knife, start slicing the meat as thinly as you possibly can.  You may need to cut your steak into smaller more manageable pieces to accomodate the slicing process.  Once the steak is all sliced, sprinkile the montreal steak seasoning on it, toss to distribute and set aside.

Slice the onion, bell pepper mushroom, and shallot.

One warning here...Do NOT rinse your saute pan at any time during this process.  The caramelization from each step of cooking is an important part of the flavor for the sauce that you will make as the last step of this recipe.

In a medium sized skillet (not Non-Stick), place 1 Tablespoon of the butter over high heat.  Once the butter has melted, add your onions and bell peppers.  Reduce your heat to medium high, and saute until the oinons have started to caramelize.  Remove them from the pan and set aside.

Place another Tablespoon of the butter in your pan, along with the mushrooms.  Season with a little salt and saute them until the mushrooms are tender and slightly browned.  Remove from the pan and set aside.

Place the last Tablespoon of butter in your pan, along with the meat and increase the heat to high.  Saute the meat , stiring it frequently, almost stir fry style.  To prevent over cooking and since the meat is so thinly sliced, you will want to remove it from the heat while a little bit of pink remains.  Remember that the meat will continue to cook slightly once removed fromt the heat.  Remove your meat from the pan and set aside.  Preferably in a dish that you can keep on the stove top.  That way the meat will stay warm while you make the sauce.

In the pan that you have used to cook all of the other ingredients, place your shallots and saute for a minute to start softenening them.  Add in your white wine and bring to a boil.  Let the wine to reduce by half before proceeding.  Add the beef stock and garlic powder and bring to a boil.  Let boil for one minute and them remove from heat.  At this point, you will want to taste your sauce.  If it is too strong, add a little bit of water.  If it is too weak, add a little more beef stock, and of course salt and pepper as desired.

Now the assembly begins:  Slice the buns in half the long way, but do not slice them all the way through.  You will want a "hinge" on one side for easier assembly and eating.  Place a quarter of the meat in each bun.  Top with mushrooms, onions and bell peppers.  Lastly, Place a slice of the provolone cheese on top, you may need to break it in half to cover the surface adequately.  Place all 4 sandwiches on a cookie sheet and place under a hot broiler just long enough to melt the cheese.

Cut the sandwiches in half and plate them with a serving of fries and a cup of the sauce and enJoy!

Saturday, October 8, 2011

Holy Sweetness!

I love this recipe so much.  Well, don't I love them all really? These morning buns are so very simple to make, and so sinfully delicious.  I have actually done this recipe by making my own croissant dough, and while it's delicious, the work involved is really lengthy and intensive.  By purchasing the croissant dough, this recipe instantly becomes a super easy treat for any morning.  Curl up with one of these and a nice hot latte or cup of tea, and your day is bound to be an excellent one.

Ingredients:
1 Egg
2 Tablespoons Milk

2 teaspoons ground cinnamon
1/4 cup of granulated sugar
1/2 cup plus 2 Tablespoons firmly packed brown sugar

2 packages of croissant dough

1/2 cup of granulated sugar (optional)

Directions:

In a small bowl, whisk together the egg and milk.  Set aside.

In another bowl, combine the cinnamon and sugars.

Prepare two muffin tins by greasing each cup and the top edge lightly with non-stick spray.

Open one of your packages of dough and place it on a lightly floured counter top.  Roll it lightly to make a slightly larger rectangle and to get rid of the perforations that are there.  Brush the dough with half of the egg mixture, making sure to brush it all the way to the edges.  Sprinkle the entire surface with half of the sugar mixture.

Begin rolling your dough, jelly roll style into a long log, making sure to keep it tight. Pinch the seam closed and brush away any excess sugar.

With a very sharp or serrated knife, cut the log into 1 1/2 inch slices and place each piece into a cup in the muffin tin.

Repeat with the other package of dough.

Place your buns in a warm place to rise.  Cover loosely with plastic wrap or a damp towel.  let rise until the dough is slightly higher than the rim of your muffin cups.

Preheat the oven to  350 degrees.  Place the muffin tins on the middle rack of the oven and bake for 20-25 minutes until lightly golden brown and puffy.

Place your white sugar in a large cookie sheet or platter.  Turn the hot buns out of the muffin tin and onto the tray with sugar.  Immediately roll each bun around to coat with sugar and let cool.

Latte Love!

Merry Christmas!!!

Every Christmas, I make this coffee bread for Christmas breakfast.  One year I almost did not make it becuase I was so busy with other things, but everyone was so outraged that I ended up staying up until midnight on Christmas Eve to finish it.  The ruination of Christmas was almost on my head.  Can't have that people...no bueno!

Swedish Cardamom Coffee Bread

Dough:

3 cups bread flour
3/4 cup sugar
1/4 cup butter
1/4 cup crisco
2 Tablespoons yeast
3/4 teaspoon Salt
1 teaspoon ground cardamom
1/2 cup milk powder (I prefer whole if you can find it)
1 Large egg
2 cups hot water (110-115 degrees)
3 cups bread flour

Filling:
2/3 cup sugar
2/3 cup ground almonds or 1/2 cup almond paste and 1/2 gruond almonds.
1/3 teaspoon almond extract
3 Tablespoons butter
1 egg

Directions:
Divide your flour in half and set one half aside.  In a mixing  bowl, place one half of the flour and the remaining "dough" ingredients.  Turn your mixer onto medium speed and mix until a slimy liquid is formed.  Remove your whisk attachment and replace with a dough hook.  Gradually add the remaining flour until a soft dough is formed.  It should just barly stick to your fingers when you touch it.

Turn the dough into a greased bowl, grease the top of the dough and cover with plastic wrap.  Set in a warm place to rise.  Let rise until doubled  in volume.

Meanwhile, mix together all of your filling ingredients until a thick paste is formed.

Once dough has doubled in size, place a generous amount of flour on your counter top or a large cutting board.  Divide the dough in half and place one piece of the dough on the floured surface. Roll out into a large rectangle with a floured rolling pin.

Take half of your filling mixture and spread it onto your dough rectangle, leaving a 1/4 inch of dough around the edge with no filling.  With one long side, start rolling your dough into a log.  Just like you would do for cinnamon rolls.  Pinch the dough at your long seam to seal the edge closed.  Make sure it's sealed well, as you don't want it to open in the cooking process and lose all of your yummy filling.

Once you have rolled and pinched the dough, Place your log onto a parchment covered baking sheet and form the log into a large ring, like a wreath.  pinch the ends together and cover loosly with plastic wrap.  Set in a warm place to rise.  Repeat process with  second piece of dough and remaining filling mixture.

Let both rings rise until almost  doubled in size.  While they are rising, preheat your oven to 400 degrees.  Before baking, remove the plastic wrap and place in the center of your oven.  Bake for 20-25 minutes or until golden brown and firm to the touch.

Remove from the oven and let cool completely.  If you are not serving immediately, cover it with foil or place in tummerware to store.  WHen ready to serve, reheat it in a 300 degree oven for 10 minutes.

I like this bread with a light glaze on top, to sweeten it up a bit more.  You can make this by combining one cup of powdered sugar and a 1/3 cup of water or heavy cream.  Add in a dash of vanilla and drizzle over the top.

enJoy!

Friday, October 7, 2011

Mmmm....Soup

Ok, fall is officially here! There is nothing like a good hearty soup on a fall/winter eve. This recipe is from WIlliams Sonoma, and although it is a little more labor intensive due to the corn procedure described, I promise it's worth it! The sweet potatoes give it a surprising twist that make this so much more interesting than your normal corn chowder. And please don't leave out the hot sauce, it really gives this soup an acidic kick that makes it over the top good!


Sweet Potato Corn Chowder

Ingredients: 


5 ears of corn, husks and silk removed
3 Tbs. unsalted butter
1/2 cup diced firm, baked smoked ham
2 1/2 cups finely chopped yellow onion
2 red bell peppers, seeded and diced
3 1/2 cups chicken broth
1 large sweet potato, about 1 lb., peeled and cut
into 1/2-inch cubes
1 tsp. salt, plus more, to taste
2/3 cup heavy cream
1/2 tsp. hot-pepper sauce, such as Tabasco
Directions:
Holding 1 of the ears of corn by its pointed end and steadying its stalk end on a cutting board, cut down along the ear with a sharp knife to strip off the kernels, turning the ear with each cut. Repeat with 2 of the ears of corn. Put the kernels in a bowl and set aside.

Score the kernels on the remaining 2 ears of corn by running the tip of a sharp knife down the length of the ear. Place each ear in a bowl and, using the back of a knife, scrape down the length of the ear to squeeze out the pulp from the scored kernels. Set the pulp aside.

In a soup pot over medium heat, melt the butter. Add the ham and cook, stirring once or twice, until lightly browned, about 10 minutes. Using a slotted spoon, transfer to a bowl.

Add the onion and bell peppers to the pot, cover and cook, stirring once or twice, until tender, about 10 minutes. Add the broth, sweet potato and the 1 tsp. salt. Reduce the heat to low, partially cover and simmer for 10 minutes. Stir in the ham and corn kernels. Cover and cook until the potato is just tender, about 10 minutes. Stir in the corn pulp, cream and hot-pepper sauce. Cook just until heated through, 3 to 4 minutes. Taste and adjust the seasonings. Serve hot. Serves 8.

                                                                               enJoy!

Sunday, October 2, 2011

Baby it's not so cold outside!

I've talked a couple times about my love of fall, and although it's technically here, the weather thinks otherwise.  So what do I do?  Crank up the A/C and make chili.  I know people, it's not so eco friendly, but I really needed this pick me up :-)

There are a 100,000 chili recipes out there, so deciding on one is truly a difficult task.  My mom always just bought the chili seasoning packets, but that goes against my "scratch" philosophy of cooking so my search ensued.  Here is what I came up with for today, I kind of combined three different recipes, as each of them had things that looked particularly good to me.  This chili is really rich, with a nice heat level that warms you up without burning off your taste buds and is sort of a cross between classic and southwestern chili.

Ingredients:

2 Tablespoons of Olive Oil
1 1/2 pounds ground meat ( I like ground chuck)
1 1/2 cups chopped onion (yellow or white preferably)
8 cloves of Garlic - minced
2 teaspoons California Chili powder
2 teaspoon New Mexico Chili powder
2 teaspoon Pasilla Chili powder
1/2 teaspoon paprika
2 teaspoon Ground Cumin
1 teaspoon dried Basil
1/2 teaspoon dried oregano
1/2 teaspoon dried thyme
1/2 teaspoon ground cinnamon
1/2 teaspoon salt
1, 28 ounce can crushed tomatoes
14 1/2 ounces chicken stock
3 Tablespoons tomato paste
2, 15-16 ounce cans of prepared chili beans (Pintos with jalapenos and seasoning)

1/4 cup flour or Masa Harina if you want a more southwest flavor
1/2 cup water

Directions:

Combine all of your dry seasonings in a small bowl and set aside.

In a large pot, heat your olive oil on high heat until shimmery.  Add and brown your ground beef, onion and garlic together until the beef is almost cooked through.  Add your dry seasonings and saute until fragrant.

Add all of your liquid ingredients and beans and bring to a simmer.

Cover and simmer on low heat for an hour to allow the spices to fully bloom.   Combine the flour and water and mix until no lumps remain.  Add the mixture to your chili and let simmer for another 10 minutes to allow the flour to cook through and thicken your chili.

Serve with grated cheese, sour cream, tortilla chips... really whatever your little heart desires.

enJoy!