Sunday, August 28, 2011

Apple Cheddar Salad with Sweet Cream Vinaigrette

I had this salad at my sisters house a couple of years ago.  It is so good, that I almost always volunteer to bring salad to dinner parties and potlucks, just so I can bring this one.  This is definitely a fan favorite!  My favorite white cheddar is made by Tillamook cheese, and comes in a brick with black wrapping.  It's the most creamy and rich white cheddar.  This salad is good with almost everything, but particularly with grilled meat, which is fortunate since it's still summer, and bbq's are plentiful these days.


Ingredients:

1 cup Pecan Halves
1 Tablespoon Butter
1 Tablespoon Sugar
1 pinch salt
1/4 cup White Vinegar
1/4 cup Olive Oil
2 Tablespoons Chives, Fresh, chopped
1 Tablespoon Sugar
1 teaspoon Salt
1/8 teaspoon Crushed red pepper flakes
1/2 cup heavy cream
1 whole Apple, Braeburn or sweet red
10 ounces lettuce, baby greens mix
3 ounces cheddar cheese, preferably white, and shaved
My Favorite White Cheddar
Well any cheddar for that matter
Directions:
1. In a saute pan, combine the pecans, sugar and butter.  Heat until the sugar and butter are melted and coating the pecans.
2. Pour the pecans onto a cookie sheet, spreading out in one layer, and sprinkle with the pinch of salt.  Set aside to cool.
3. In a small bowl or blender, blend together the vinegar, oil, chives, sugar, salt and red pepper flakes.
4. Add the heavy cream and stir in.  Be careful not to over mix, as you could end up whipping the cream.
5. Core and slice the apples into thin wedges.  Toss them into the salad mix along with the pecans and shaved cheddar cheese.
6. Dress and serve.

Tuesday, August 23, 2011

Dreaming of Autumn


I realize it's not yet fall, as the heat summer still hangs in the air, but a girl can dream right? Fall is my favorite season. With bright sunny days that have a sweet chill to the air, easing us into the fridgid winter days ahead. The leaves turning thier amazing brilliant colors in preparation of dormancy. It's not yet cold enough to make me want to hibernate, but the buzz of holidays and cozy blankets is in the air. And of course there's always the baking. I think I could bake 10 hours a day throughout fall and winter and be perfectly happy.

In my dreaming of autumn, I made a pecan pie. While there is great debate about what makes the perfect pecan pie, mostly originating from north/south loyalties, I'm not a discriminator :-) It's all pretty much pecan pie to me. This recipe is a little different than the usual sweet sticky caro corn syrup concoctions, and I really love it. With a decent amount of maple in the filling, this recipe can be a wee bit more costly, but it is truly a treat for pecan pie lovers.

Maple Pecan Pie

Ingredients:

1 rolled-out round of basic pie dough
1 cup pure maple syrup
1/2 cup light corn syrup
1/2 cup dark corn syrup
2 eggs, lightly beaten
1/4 cup firmly packed light or dark brown sugar
1/8 tsp. salt
2 Tbs. unsalted butter, melted
1 tsp. vanilla extract
1 1/2 cups pecans, coarsely chopped

Directions:

Fold the dough round in half and carefully transfer to a 9-inch pie pan or dish. Unfold and ease the round into the pan, without stretching it, and pat it into the bottom and firmly up the sides of the pan. Using kitchen scissors, trim the edge of the dough, leaving 3/4 inch of overhang. Fold the overhang under itself and pinch it together to create a high edge on the pans rim. Flute the edge decoratively.

Refrigerate or freeze the pie shell until firm, about 30 minutes. Meanwhile, position a rack in the lower third of an oven and preheat to 375°F.

Line the pastry shell with aluminum foil or parchment paper and fill with pie weights or raw short-grain rice. Bake for 20 minutes, then lift an edge of the foil. If the dough looks wet, continue to bake, checking every 5 minutes, until the dough is pale gold, for a total baking time of 25 to 30 minutes. Transfer to a wire rack. Reduce the oven temperature to 350°F.

In a saucepan over medium-high heat, bring the maple syrup to a boil and boil for 8 to 10 minutes to reduce. Remove from the heat and pour into a heatproof measuring pitcher. The syrup should be reduced to 1 1/2 cups. If necessary, return the syrup to the saucepan and continue to boil until sufficiently reduced. Let cool to room temperature before proceeding.

In a bowl, stir together the eggs, brown sugar, reduced maple syrup, salt, melted butter and vanilla until well mixed. Add the pecans and stir well. Pour into the partially baked pie shell, making sure the pecans are evenly distributed.

Bake the pie until the center is slightly puffed and firm to the touch, 30 to 35 minutes. Transfer to a wire rack and let cool until just slightly warm.

Serve with whipped vanilla cream of course :-)

Thursday, August 11, 2011

The best chocolate chip cookies EVER!

I love me some cookies!  I don't have a huge sweet tooth, but cookies are my weakness.  I have searched high and low for a chocolate chip cookie recipe that has just the right combination of chew and crisp, and this one hits the nail square on the head.  The increase amount of brown sugar aids in not only the rich flavor, but the chewy texture.  The melted butter is a surprise, and the first time I've seen it called for in a cookie recipe.  Whatever the purpose is, it works!

These were my dad's favorite cookies, and every time I make them, I smile at the success in finding a chocolate chip cookie recipe that truly made him happy :-)  Cookie cheers to you Dad!

Dad's favorite Chocolate Chip Cookies

2 1/8 cups of flour
1/2 teaspoon of salt
1/2 teaspoon of baking soda
12 Tablespoons of butter, melted and cooled slightly
1 cup of brown sugar
1/2 cup sugar
1 egg
1 egg yolk
2 teaspoons vanilla extract
1-2 cups of chocolate chips.

Preheat the oven to 325 degrees and place the rack in the center of the oven.

In a microwave safe bowl, melt the butter and set aside to cool slightly.  In the bowl of a mixer, place both of the sugars and butter.  Mix on medium high speed until slightly lighter in color and well incorporated.  Add the eggs and vanilla and stir to incorporate.  Add the remaining dry ingredients (except the chocolate chips) and blend well to incorporate.  Remove your bowl from the mixer and fold in the chocolate chips.

Use a 1/4 cup measuring cup to scoop out the dough and place on an un greased cookie sheet.  Bake for 15-18 minutes.

**Note: this is the perfect time to use your silpat baking mats as mentioned on the "tools" page.

Fun ideas:
Use one cup of chocolate chips and 1 cup nuts of your choice.
Use one cup of chocolate chips, 1/2 cup of toffee bits and 1/2 cup nuts of your choice.
Use one cup of chocolate chips, 1/2 cup of toffee bits, 1/2 cup of shredded coconut.
Use one cup of chocolate chips, 1/2 cup of caramel pieces and 1/2 cup of coconut.

Enjoy!

Wednesday, August 10, 2011

Meatloaf? Really?

Always look your best
in case the mister comes home early!
  • I have never been a fan of meatloaf.  I've tend to be slightly aloof to the typical American family dinners that tend to be heavy boring fare that was popular in the 50's and 60's.  This is probably an opinion fostered by my childhood spent in Indonesia, where my first favorite dish as a child was an Indonesian version of Chicken soup (recipe to come later), loaded with lemon grass, ginger and tons of other ingredients.  Polar opposite of your typical American family dinner, our house was not one of mediocre fare on any day of the week.  Thus my opinion has always been that meatloaf and pot roast are boring dishes that usually come in a microwave container.   My lovely sister ( who loves to prove me wrong :-) introduced me to this recipe.  Thank goodness too, because this recipe is a true winner.  I find that the addition of a few vegetables and the balsamic vinegar make this meatloaf an over the top delicious version. 
  •  
    This recipe makes a large loaf, with a total of 2 pounds of meat.  If you don't have a large family, I would encourage you to either half the recipe, or make two loaves and freeze one of them for re-heating at a later date.  If you choose to make and freeze, please cook it before you freeze it.  Lowering the temperature of your meat and combining it with all of the ingredients, will cause the start of bacteria growth.  Refreezing it without cooking is not really the safest thing to do.

    This recipe also calls for three different types of meat.  While this gives it an amazing well rounded flavor, please don't be afraid to use your own combination of meats.  All beef, beef and veal, or even pork and beef.  Be creative, it's my first rule in cooking.

    Roasted Vegetable Meatloaf

    3 tablespoons olive oil
  • 1 large zucchini, finely diced
  • 1 red bell pepper, finely diced
  • 1 yellow pepper, finely diced
    1 small yellow onion, finely diced
  • 5 cloves garlic, smashed
  • 1/2 teaspoon red pepper flakes, divided
  • Salt and freshly ground black pepper
  • 2 large eggs, lightly beaten
  • 2 teaspoons finely chopped fresh thyme leaves
  • 1/4 cup chopped fresh parsley leaves, plus more for garnish
  • 1/2 pound ground pork
  • 1/2 pound ground veal
  • 1 pound ground beef chuck
  • 1 cup panko (Japanese) bread crumbs
  • 1/2 cup freshly grated Romano or Parmesan
  • 1 cup ketchup, divided
  • 1/4 cup plus 2 tablespoons balsamic vinegar

Directions

Preheat oven to 425 degrees F.
Heat the oil in a large saute pan over high heat. Add the zucchini, peppers, onion, garlic paste, 1/4 teaspoon red pepper flakes, and salt and pepper, to taste, and cook until almost soft, 5 minutes. Set aside to cool.
Whisk together the eggs and herbs in a large bowl. Add the meat, bread crumbs, cheese, 1/2 cup of the ketchup, 2 tablespoons of the balsamic vinegar, and the cooled vegetables and mix until just combined.
Mold the meatloaf on a baking sheet lined with parchment paper. Whisk together the remaining ketchup, balsamic vinegar, and red pepper flakes in a small bowl. Brush the mixture over the entire loaf. Bake themeatloaf for 1 to 1 1/4 hours. Remove from the oven and let rest for 10 minutes before slicing.

Enjoy!

Tuesday, August 9, 2011

Easy weeknight dinner

I made this pasta for the first time about a four years ago and liked it so much that I make it at least once a month.  This is pretty good for a someone who rarely makes the same thing twice.  I love this dish because it's almost as easy as making hamburger helper, but tastes just like a restaurant dish.  I have added and subtracted may of the ingredients at one time or other and it always turns out great, as long as you always include the Italian sausage.  And please do not substitute the Italian for any other sausage.  You will not get the flavor that you need for this dish out of any other sausage.  I would also recommend sticking with pork sausage, but that is because I can't imagine it any other way :-)

This is Cavatappi Pasta


Italian Sausage Pasta

1 pound of cavatappi pasta (anything curly or with grooves in it, i.e fusili, rigatoni etc)
1 Tbs Olive Oil
1 Pound ground Italian Sausage, loose or casings removed  (I like the hot kind)

1 pkg of sliced mushrooms
1/2 of a medium onion, diced finely

1/2 cup of white wine
1 medium Can of crushed or diced tomatoes (I prefer diced)
1/2 cup of heavy cream
1 cup of shredded Parmesan cheese, divided in half

Direction:

Cook your pasta according to the package directions, drain and set aside.  Do NOT rinse the pasta.  The starch that is on your pasta needs to stay there.  This will help the sauce cling to the pasta better once you combine your pasta and sauce.

Place your oil in a large saute pan on medium high heat.  Add the sausage and break up into chunks, cooking until it is almost done, but little bit of pink still shows.  Add in your onions and mushrooms and saute until the onions are translucent and sausage is cooked through.  Turn the heat down to medium and pour the wine into the pan and let reduce for two minutes.  Add the can of tomatoes and reduce until almost all of the liquid is gone, approximately three to four minutes.  Add the heavy cream and 1/2 cup of the Parmesan cheese.  Stir to combine and pour the sauce over the pasta.  Garnish with more Parmesan cheese as desired.

enJoy!

Saturday, August 6, 2011

Saturday Salmon

I've made this salmon two Saturday's in a row now, and I'm still not tired of it!  This fabulous recipe came from my sister Amy and her grill loving husband Neil.  The first time I had it, I did not think I was going to like it because if the profuse amount of parsley and sun dried tomatoes, but it is so good, I promise.  It is fresh, light, easy and really quite healthy.  I usually serve this on steamed white rice or quinoa.

Saturday Salmon


4 6oz Salmon Filet's
1bunch of parsley
1 8oz Jar of sun dried tomatoes
Purchased jar of sun dried tomato and oregano vinaigrette
3/4 cup Olive oil
salt and pepper to taste
2 untreated cedar planks for grilling.


12-24 hours ahead of time, immerse your cedar planks in water and let soak overnight.


Preheat your grill and set it to medium/medium low depending on your grill and prepare your salmon.


Remove the stems from your parsley and chop it fairly small.  Place in a bowl and set aside.  Drain your sun dried tomatoes and chop them to the same size pieces as the parsley.  Combine with the parsley and 1 Tbs of the dressing and toss well.


Brush your cedar planks with olive oil.  Brush your salmon with olive oil and place your salmon fillets on the cedar plank, at least an inch apart.  Take your tomato parsley mixture, divide it into 4 portions and heap it on top of each salmon fillet.  Sprinkle with salt and pepper.


Place the planks with the salmon on your grill and close lid.  Cook for 15 -20 minutes.  When the fish is almost done. drizzle it one last time with some of the vinaigrette dressing.   Fish is done when it can be flaked with a fork.


Please note:  I have made this numerous times without the cedar planks, by placing each fillet on a piece of foil .  It is equally good, but does not have the slightly smoky flavor that the cedar planks impart.  Also, make sure you watch it carefully when cooking as the salmon will cook faster when it is on foil rather than the planks.
You can also substitute any vinaigrette dressing for the sun dried tomato oregano one if it cannot be found.  I have used Italian vinaigrette and added in the oil from the sun dried tomatoes, and that works really well.


enJoy!

Wednesday, August 3, 2011

Tarragon, how have we never met before?

I hate to admit this, but for you I will...  I have never used or tasted fresh tarragon.  I consider myself a spice/herb connoisseur and I've tasted just about any spice you can think of, and some you've probably never heard of.  So to not have ever tried tarragon is really unthinkable I must say.  In my weekly grocery run this weekend, I spied it in the fresh herb section and decided that now was the time.  After all. if I'm to be a responsible foodie/food blogger, I must know this herb.

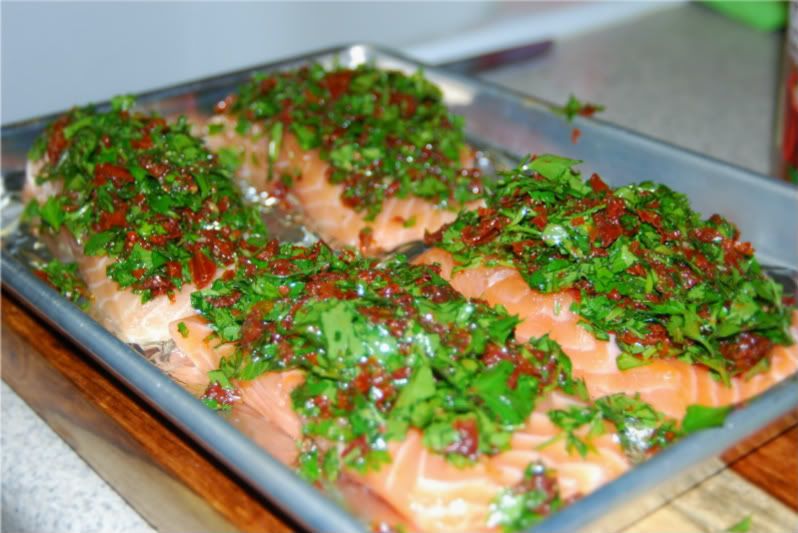
Tarragon has a light licorice like scent to it, and a unique but delicate flavor.  It suites white meats and creamy sauces very well.  I decided to properly highlight the flavor,  I would make a risotto and served it with some simple pan fried chicken breasts.  The risotto was so good on it's own, that the chicken seemed pointless.  therefore, I will give you the risotto recipe on it's own.

Spring Fresh Risotto

4 slices of bacon, chopped into 1/2" pieces
2 Tbs Olive Oil
1 medium zucchini, chopped into 1/2" cubes
1 medium yellow squash, chopped into 1/2" cubes
1 cup corn kernels (preferably fresh.  I used roasted corn left over from a barbecue)
1 shallot, finely diced
1 clove garlic, chopped finely
1/2 white wine
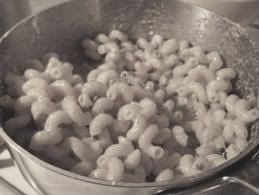
1/1/2 cups dry arborio rice (no substitute)
6 cups warm chicken broth
1 Tbs finely chopped fresh tarragon
Salt

In a large saute pan, add one tablespoon of the olive oil and the bacon.  Cook until almost crisp, but not crunchy.  Remove from pan and set aside.

Turn your pan on medium high heat and add the squash, zucchini and corn.  Cook for approximately three minutes (should still be slightly firm when bitten into). If your pan becomes too dry, add a little water and continue to saute.  Once the veggies are starting to soften, remove and set aside.

Over medium high heat, add the remaining tablespoon of olive oil to the pan, and throw in the shallot and garlic.  Saute until the shallot is turning translucent.  Add the white wine and reduce by half (approximately 1/4 cup of liquid is left in the pan).  Add the dry rice and saute for 30 seconds to absorb the remaining oil in the pan.

Add the chicken stock 1 cup at a time, cooking until almost completely absorbed before making your next addition, stirring constantly.  Continue adding the broth 1 cup at a time until the rice has puffed up and become creamy looking.  Rice should be tender, but with a slight bite left to it.  Once you have reached this consistency, add the vegetables back into the rice along with the fresh tarragon and stir well to combine.  Salt to taste and remove from the heat.  If your rice has become too dry, add more liquid to it.  Your finished product should look saucy and creamy.

Serve warm, topped with the bacon bits.

enJoy!