
Saturday, December 24, 2011
Arancini
I love the Holiday's. As you can guess, the food is the best and most memorable part for me. It is both what I enjoy doing and what I enjoy giving the most. Thank God for such delicious food stuffs with which to spend countless hours perfecting over the holidays. I certainly hope that my friends and family have as much fun consuming as I do creating. I think they do, there are usually smiles on faces :-) Christmas Eve at home is usually spent munching on a plethora of appetizer like things, while making more appetizer like things and wrapping gifts and just about any game you can think of that takes 4 or more people is being played.
Bare with me here while I take a time warp....A couple of years ago, part of my family took a proper voyage to Europe. My poor brother in law was the only male amongst 4 women. He has since dubbed it estrogen fest 07'. One of the grand prizes of our trip was stumbling on "Arancini" in the Italian convenience stores. I know... strange that one of the more memorable items of Italian food was found at the gas'n'go. Oh well. They are such a cool little treat. They are now one of our favorite appetizers, and I find myself preparing to make them this Christmas Eve. Hopefully Neil doesn't have unpleasant memories...I wouldn't want to ruin this day...never mind, Arancini are so good they can only shade his memory so as to remember only the pleasantness of our grand journey.
These fried stuffed rice balls, or "little oranges," in Italian (due to their shape), are found all over Italy but are especially favored in the south, where oranges are a major crop. Available both in restaurants and at street stands, arancini are delicious either piping hot or at room temperature. At home, they make a satisfying first course. If you like, make them even smaller and pass them on appetizer trays. The best way to work with the sticky rice mixture is to use one hand for holding and shaping the rice, while keeping the other hand somewhat clean for handling the spoon.
Ingredients:
1/4 cup extra-virgin olive oil, plus more for frying
1 small yellow onion, finely chopped
1 celery stalk, finely chopped
1 carrot, finely chopped
1/2 lb. ground veal and/or pork
1 cup dry Marsala wine
1/2 cup shelled fresh English peas
1 cup meat stock
1 Tbs. tomato paste
2 Tbs. minced fresh flat-leaf parsley
Salt and freshly ground pepper, to taste
3 cups Baldo or Arborio rice
6 eggs
1/4 cup freshly grated Parmigiano-Reggiano cheese
Pinch of saffron threads, soaked in 2 Tbs. warm water
1 cup all-purpose flour
1 cup fine dried bread crumbs
Directions:
In a large, heavy saucepan over medium heat, warm the 1/4 cup olive oil. Add the onion, celery and carrot and sauté until softened, about 4 minutes. Add the meat, breaking it up, and cook until browned, 4 to 5 minutes. Add the wine and deglaze the pan, stirring to scrape up the browned bits from the bottom. Increase the heat to high and cook until the liquid is reduced by half. Add the peas, stock, tomato paste and parsley, reduce the heat to medium-low and cook until thickened, 15 to 20 minutes. Season with salt and pepper. Set aside.
Bring a large pot of salted water to a boil over medium heat. Add the rice and cook, stirring often, until tender to the bite but slightly firm in the center, 15 to 20 minutes, depending on the variety. Drain and spread the rice on a baking sheet to cool.
Preheat an oven to 200°F.
In a small bowl, beat 3 of the eggs. Place the cooled rice in another bowl and add the beaten eggs, the cheese and the saffron mixture. Mix well. Season with salt and pepper.
Place a large spoonful of the rice mixture in your palm, pack it lightly and make an indentation in the center. Place a tablespoonful of the meat mixture in the indentation. Cover the meat with another large spoonful of rice, sealing the meat in the center. Pack firmly into balls about 2 inches in diameter. Set aside.
In a small, deep bowl, beat the remaining 3 eggs. Put the flour and bread crumbs into separate small, deep bowls. Coat each rice ball with flour, then with egg and then crumbs. Set aside.
In a large fry pan over medium heat, pour in oil to a depth of 1 inch and heat until the oil shimmers. Working in batches, fry the rice balls, turning frequently, until golden brown, 3 to 4 minutes. Using a slotted spoon, transfer to paper towels to drain. Keep the rice balls warm in the oven while frying the remaining balls. Serve immediately. Makes about 24 balls; serves 6.
Adapted from Williams-Sonoma Collection Series, Risotto, by Pamela Sheldon Johns (Simon & Schuster, 2002).
Saturday, November 26, 2011
Creamy Turkey Verde Enchiladas
So a 25 pound turkey was definitely not made for 7 people. But of course why would you only make enough for Thanksgiving dinner. After all, the leftovers are just as much a ritual as the actual day of turkey feast. This year I decided to make turkey enchiladas with some of the left over meat. After a challenge from a friend, we decided to have a turkey enchilada off. I'm happy to report that mine won! I also made yellow rice to go along with them, and it's the perfect combination!
Enchilada's:
3 cups of turkey meat, cut into bite size pieces
1 Tablespoon of Oil
1/2 onion, finely chopped
1 large clove of garlic
1 teaspoon cumin
1 cup salsa verde
1 cup sour cream
1 Tablespoon chopped jalapenos (from the can)
1 cup of cotija cheese, shredded or crumbled
1/2 cup shredded Mexican cheese blend
1/2 cup cream cheese
1/2 cup turkey or chicken stock
10 6 inch corn tortillas
Rice:
2 cups long grain rice
1 Tbs turmeric powder
4 cups water
1 tsp salt
2 bay leaves
2 garlic cloves smashed
For rice:
Combine all ingredients, over high heat. As soon as it comes to a boil, reduce the heat and simmer for 20 minutes or until water is absorbed. Fluff with a fork and serve alongside the enchiladas.
For Enchiladas:
In a small bowl, combine the salsa verde, 1/2 cup of the sour cream and the chopped jalapenos. Stir together and set aside.
In a saute pan over high heat, place 1 Tablespoon of oil, heat to shimmering and place the onions and garlic and cumin in the pan. Reduce heat to medium and stir until the onions are soft and translucent.
Add the chopped turkey meat, half of the salsa mixture, half of the cream cheese, half of the shredded cheese and half of the cotija cheese, and turkey stock. Heat to combine and melt the cheeses.
Grease a 9x13 inch pan.
Working with one tortilla at a time, fill with 2 heaping tablespoons of filling, roll them cigar style and lay seam side down in the casserole dish. Continue until all of the tortillas are filled. Pour the remaining salsa mixture over the top and top with all of the remaining cheeses and sour cream.
Place in 350 degree oven and bake for 20 minutes or until the cheese is golden and bubbly.
Serve with rice and enJoy!
Sunday, November 20, 2011
Gobble Gobble
As is evidenced by this blog, I LOVE to cook! I inherited this gift from my mother and as a result, holiday's around our house means food wars between my mother and me. Only occasionally does it get ugly. We usually manage to keep the peace. Our wars always revolve around the food choices. My mom tends to prefer the traditional and I tend to prefer the out of ordinary fare. I might make mashed potatoes, but they will have browned butter, or boursin cheese stirred in. In order to keep the peace, I have made it my goal to find ways to improve on texture and taste while keeping the traditional aspect alive. This turkey recipe is the absolute best way to make a turkey hands down. Please don't feel like you have to use the exact same flavors as I have listed here, but the basic recipe is essential. I like the flavors of classic sage, rosemary and thyme, but I don't like them to be too bold, so I have toned them down with the addition of citrus, apples and onions. But please don't skip on the brining process, it surely creates the most moist and flavorful meat possible.
Please note that you will need to plan ahead, as the brining process takes 24 hours prior to cooking your turkey.
Brine:
Position a rack in the lower third of an oven and preheat to 400°F.
In a bowl, using a wooden spoon, beat the butter, herbs, orange zest, salt and pepper until well blended. Set aside.
Gently slide your fingers under the breast to loosen the skin and work your fingers down to the thigh, being careful not to tear the skin. Spread one-third of the butter mixture evenly under the skin. Spread one-third of the mixture inside the body cavity, then spread the remaining mixture evenly on the outside of the turkey. Truss the turkey if desired using kitchen twine.
Place the turkey, breast side up, on a rack in a large roasting pan and roast for 45 minutes. Reduce the heat to 325°F and continue roasting, basting every 30 minutes with the pan juices. After about 2 1/2 hours of total roasting time, begin testing for doneness by inserting an instant-read thermometer into the thickest part of the breast and thigh, away from the bone. The breast should register 165°F and the thigh, 175°F. If the breast begins to cook too quickly, tent it loosely with aluminum foil. Total roasting time should be 3 to 3 3/4 hours.
Transfer the turkey to a carving board, cover loosely with foil and let rest for 20 minutes before carving.
Serves 12 hungry people.
Please note that you will need to plan ahead, as the brining process takes 24 hours prior to cooking your turkey.
Brine:
- 3/4 cup salt
1/2 cup brown sugar
2 oranges, quartered
2 lemons, quartered - 2 Apples, quartered
- 4 sprigs thyme
4 sprigs rosemary - 4 leaves of fresh sage
- One large onion sliced thickly
- To make the brining solution, dissolve the salt and sugar in 2 gallons of cold water in a non-reactive container (such as a clean bucket or large stockpot, or a clean, heavy-duty, plastic garbage bag.) Add the oranges, lemons, apples, thyme, rosemary, sage and onion.
Note: if you have a big turkey and need more brine than this, use 1/2 cup salt and 1/2 cup brown sugar for every gallon of water.
Turkey Ingredients:
8 Tbs. (1 stick) unsalted butter, at room
temperature
2 tsp fresh Thyme - 2 teaspoons fresh rosemary
- 1 tsp fresh sage
- Finely grated zest of 2 oranges
Finely grated zest of 1 lemon
1/2 tsp. freshly ground pepper
Directions:
Remove the turkey from the brine, rinse well with cold water, pat dry and let the turkey stand at room temperature for 1 hour.
Position a rack in the lower third of an oven and preheat to 400°F.
In a bowl, using a wooden spoon, beat the butter, herbs, orange zest, salt and pepper until well blended. Set aside.
Gently slide your fingers under the breast to loosen the skin and work your fingers down to the thigh, being careful not to tear the skin. Spread one-third of the butter mixture evenly under the skin. Spread one-third of the mixture inside the body cavity, then spread the remaining mixture evenly on the outside of the turkey. Truss the turkey if desired using kitchen twine.
Place the turkey, breast side up, on a rack in a large roasting pan and roast for 45 minutes. Reduce the heat to 325°F and continue roasting, basting every 30 minutes with the pan juices. After about 2 1/2 hours of total roasting time, begin testing for doneness by inserting an instant-read thermometer into the thickest part of the breast and thigh, away from the bone. The breast should register 165°F and the thigh, 175°F. If the breast begins to cook too quickly, tent it loosely with aluminum foil. Total roasting time should be 3 to 3 3/4 hours.
Transfer the turkey to a carving board, cover loosely with foil and let rest for 20 minutes before carving.
Serves 12 hungry people.
Monday, November 7, 2011
Simple Herb Roast Chicken
There is something very warm and comforting about a simple roasted chicken on a chilly autumn evening. It need not be complicated in flavor or preparation, but there are a few key points to getting it just right. Start with a high-quality bird, season it correctly, cook it at a high temperature for the ideal amount of time for its weight and let it rest before you carve it.
The herbs listed here are ones that make a good simple roast chicken, but of course you can add any of your favorite herbs. I sometimes add lemon or orange slices as well. Slice them very thinly and slip a few slices under the skin with your herbs, and don't forget to stick a few in the cavity as well. The juices from the citrus will steam on the inside, infusing the chicken with even more flavor.
This can be served with just about anything from mashed potatoes to buttered noodles and of course the leftovers are just as versatile. Use them for soup, chicken tacos, sandwiches, pasta... Be creative!
Ingredients:
1 roasting chicken, 4 to 5 lb.
2 teaspoons chopped fresh rosemary, plus one 4-inch sprig
1 Tablespoon chopped fresh thyme, plus 3 bushy sprigs
1 Tablespoon chopped parsley (preferably Italian Flat leaf)
1/4 cup extra-virgin olive oil, plus more for rubbing
Freshly ground pepper, to taste
2 tsp. kosher salt, plus more, to taste
1/2 small yellow onion
3 large garlic cloves
Directions:
Preheat the oven to 425°F. Cut off the chicken’s tail with kitchen scissors. Remove the giblets and remove the excess skin and fat from the cavity and neck.
In a small bowl, stir together the chopped rosemary, thyme and parsley and the 1/4 cup olive oil and season with pepper. Gently separate the chicken skin from the meat with your fingers, being careful not to tear the skin. Loosen the skin above the cavity the same way, reaching in as far as possible to loosen the skin on the tops of the thighs and legs. Slip the herb mixture between the skin and flesh, and rub it evenly over the exposed meat, covering it as much as possible. Pat the skin back into place and tuck the wing tips under.
Season the cavity with the 2 tsp. salt, then stuff with the herb sprigs, onion and garlic, pushing them in as far as they will go. Tie the legs together with kitchen string.
Rub the outside of the chicken with olive oil and season well with salt. Place, breast side up, in a roasting pan. Roast the chicken until the juices run clear when the thigh is pierced, about 1 hour and 10 minutes (12 to 15 minutes per pound), or a thermometer inserted in the thickest part of the thigh (not touching bone) registers 165°F. THIS IS VERY IMPORTANT: Let the chicken rest for 15 minutes before carving. This will allow the juices in the chicken to re-distribute into the meat, making it stay moist, tender and flavorful.
enJoy!
The herbs listed here are ones that make a good simple roast chicken, but of course you can add any of your favorite herbs. I sometimes add lemon or orange slices as well. Slice them very thinly and slip a few slices under the skin with your herbs, and don't forget to stick a few in the cavity as well. The juices from the citrus will steam on the inside, infusing the chicken with even more flavor.
This can be served with just about anything from mashed potatoes to buttered noodles and of course the leftovers are just as versatile. Use them for soup, chicken tacos, sandwiches, pasta... Be creative!
 |
| This is my niece Elisa in Versailles in 2007 I know this has nothing to do with Roast Chicken, but I'm feeling nostalgic. France is incredibly beautiful in the fall. |
1 roasting chicken, 4 to 5 lb.
2 teaspoons chopped fresh rosemary, plus one 4-inch sprig
1 Tablespoon chopped fresh thyme, plus 3 bushy sprigs
1 Tablespoon chopped parsley (preferably Italian Flat leaf)
1/4 cup extra-virgin olive oil, plus more for rubbing
Freshly ground pepper, to taste
2 tsp. kosher salt, plus more, to taste
1/2 small yellow onion
3 large garlic cloves
Directions:
Preheat the oven to 425°F. Cut off the chicken’s tail with kitchen scissors. Remove the giblets and remove the excess skin and fat from the cavity and neck.
In a small bowl, stir together the chopped rosemary, thyme and parsley and the 1/4 cup olive oil and season with pepper. Gently separate the chicken skin from the meat with your fingers, being careful not to tear the skin. Loosen the skin above the cavity the same way, reaching in as far as possible to loosen the skin on the tops of the thighs and legs. Slip the herb mixture between the skin and flesh, and rub it evenly over the exposed meat, covering it as much as possible. Pat the skin back into place and tuck the wing tips under.
Season the cavity with the 2 tsp. salt, then stuff with the herb sprigs, onion and garlic, pushing them in as far as they will go. Tie the legs together with kitchen string.
Rub the outside of the chicken with olive oil and season well with salt. Place, breast side up, in a roasting pan. Roast the chicken until the juices run clear when the thigh is pierced, about 1 hour and 10 minutes (12 to 15 minutes per pound), or a thermometer inserted in the thickest part of the thigh (not touching bone) registers 165°F. THIS IS VERY IMPORTANT: Let the chicken rest for 15 minutes before carving. This will allow the juices in the chicken to re-distribute into the meat, making it stay moist, tender and flavorful.
enJoy!
Wednesday, October 26, 2011
Hot Tamale!
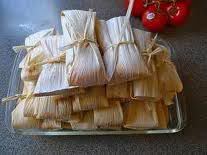
As my cooking skills and love of food grew over the years, I decided to take on the

All that said, while tamales are not hard to make, they are quite time consuming, so be prepared for a half day adventure. This recipe will yield 24-30 tamales, depending on how heavy handed you are with the dough. Even if you only want a few, I recommend that you go ahead and make a whole recipe, as they freeze beautifully! And while your at it, double the recipe and keep the extras frozen for a nice afternoon treat, or a quick weekday lunch.
Ingredients:
For the Meat Filling:
2 Pounds of boneless skinless chicken breasts
8 dried California chili peppers (can be found in the Mexican aisle of your grocery store)
1/2 teaspoon chili powder
1 teaspoons ground cumin
1/2 teaspoon ground coriander
1/4 teaspoon cayenne pepper
1 teaspoon kosher salt
1 small yellow onion, finely chopped
3 cloves of garlic, minced
1/2 cup of chicken stock
1/4 cup of juice from canned jalapenos
For the wrappers:
One bag of dried corn husks (can be found in the Mexican aisle of your local grocer)
For the dough:
4 cups of masa harina
2 1/4 teaspoons baking powder
1 teaspoon of cumin
2/3 cup of lard
2 to 4 cups chicken broth
Salt to taste
Directions:
For the wrappers:
About an hour prior to the start of your adventure, place the husks in a large bowl or pot and cover completely in hot water. Soak the husks until they are soft and pliable, at least 45 minutes and up to 2 hours.
For the Meat:
Place the chicken breasts in a pot and cover with water. Bring it to a boil, reduce the heat to keep them simmering and let cook until the chicken is cooked through (approx 20 minutes).
While this is happening, place your dried chili peppers in a small pan and cover with water. Bring the water to a boil and turn off the heat. Cover the pan and let the chili's steep for 15 minutes to soften them. Once they have softened, remove the stems and place them in a blender (reserving the liquid). Add the remaining "filling" ingredients and blend, adding the reserved chili liquid, one Tablespoon at a time, until a thick sauce is formed (about the same thickness as a gravy).
Remove the chicken from the hot liquid and let cool until handleable. Shred the chicken and toss it with the red chili sauce. Season to taste with salt and pepper. Remember that this is the main source of flavor for your tamale, so make sure it is slightly hotter and more seasoned than you think it should be. The bland flavor of the masa will tone down the flavor of the chicken mixture once it is combined.
For the dough:
In the bowl of a mixer, place the lard and mix on high speed until it is slightly fluffy looking. Add the masa, cumin, and baking powder and mix to combine. Gradually add enough of the reserved cooking liquid, 2 to 4 cups to create a dough that is like thick mashed potatoes. The dough should be moist but not wet. Cover the bowl with a damp towel and set aside until ready to use.
To assemble the tamales:
Remove two corn husk from the water and pat to remove excess water. Lay them together with the wide sides overlapping each other. Spread about 1/3 of a cup of the dough in an even layer across the middle of the husk to within 1/2-inch of the edges. Spoon about a heaping Tablespoon of the meat mixture in a line down the center of the dough. Roll the husk so the dough surrounds the meat and fold the ends under to finish creating the tamale. Use a string or a thin strip of the corn husks to tie aournd the middle of the tamale, holding the loose ends in place. Repeat until all the husks, dough and filling are used.
To steam the tamales:
Place a steamer basket in the bottom of an 11-quart pot and add enough water to come to the bottom of the basket. Layer the tamales on top of the steamer basket. Bring the water to a boil over medium heat, then cover and reduce the heat to maintain a simmer. Check the water level every 15 to 20 minutes, and add boiling water by pouring down the side of the pot, if necessary. Steam until the dough is firm and pulls away from the husk easily, 1 to 1 1/2 hours.
Serve warm. Store leftover tamales, tightly wrapped in plastic wrap, in the freezer, for up to a month. To reheat, remove the plastic wrap and steam until heated through.
Tuesday, October 25, 2011
Beef, It's what's for dinner
One of my favorite meals is Beef Stroganoff. I've taken years to perfect it with just the right amount of rich beefy flavor and creamy goodness in the sauce. The beauty of this dish is that you can use almost any cut of beef and while I have never done it with ground beef, I know it would be just as good. There are not a lot of ingredients in it either, making for a nice "on the fly" meal. This is delicious enough to serve for a dinner party, but easy enough to prepare on any hurried evening. Although this is traditionally served over noodles, it is excellent served over steamed white rice.

Beef Stroganoff
Ingredients:
1 Pound of Wide Egg Noodles
2 Tablespoons of Butter
1 pound of beef (sirloin and rib eye are my favorites)
1 Tablespoon of flour
1 tsp salt
1/2 teaspoon pepper
1 pound of white mushrooms (although any kind would be good)
1 Medium yellow or white onion
2 cloves of garlic
1/2 cup white wine (optional)
3 cups of beef broth
1 teaspoon of dill
1 cup of sour cream
Directions:
 Prepare the noodles as directed on the packaging.
While the noodles are cooking, slice the beef across the grain in as thin of slices as possible. The thinner you slice, the more tender the beef will be once cooked and of course the faster it will cook. To make this easier, I like to put my beef in the freezer for about 15 minutes prior to slicing it. This will firm it up enough to make your slicing much easier.
Toss the sliced meat with the flour, salt and pepper to lightly coat your meat. This is called dredging. Set this aside while you prepare the remaining ingredients.
Chop the onion in medium dice
Slice the mushrooms (whatever thickness you like)
Crush the garlic cloves
Place a large skillet over high heat and put the butter in the pan. As soon as it melts, add the beef and fry until it starts to brown and cooked through. Add the mushrooms, onions and garlic and continue to cook until the onions and mushrooms are starting to soften. Don't be afraid to get some good browning on your ingredients at this point. The more you brown, the more flavor you get. Although, be careful not to actually burn. That flavor is not such a good one!
Reduce the heat to medium and add the white wine. Cook until the wine is reduced in half.
Add the beef broth, increase heat to medium high and bring to a boil. Add the dill and continue to cook until the broth is reduced by about half (approximately 5 minutes). ***Alternately, you can add one and a half cups of water and 1 Tbs of beef bullion paste and skip the reducing process, but do make sure to bring the liquid to a boil before proceeding***
Turn the heat off and stir in the sour cream.
Do not bring the stroganoff back to a boil once you have added in the sour cream, this will likely cause it to separate and create an unappealing texture to your sauce.
Serve piping hot over the warm egg noodles.
enJoy!
Beef Stroganoff
Ingredients:
1 Pound of Wide Egg Noodles
2 Tablespoons of Butter
1 pound of beef (sirloin and rib eye are my favorites)
1 Tablespoon of flour
1 tsp salt
1/2 teaspoon pepper
1 pound of white mushrooms (although any kind would be good)
1 Medium yellow or white onion
2 cloves of garlic
1/2 cup white wine (optional)
3 cups of beef broth
1 teaspoon of dill
1 cup of sour cream
Directions:
While the noodles are cooking, slice the beef across the grain in as thin of slices as possible. The thinner you slice, the more tender the beef will be once cooked and of course the faster it will cook. To make this easier, I like to put my beef in the freezer for about 15 minutes prior to slicing it. This will firm it up enough to make your slicing much easier.
Toss the sliced meat with the flour, salt and pepper to lightly coat your meat. This is called dredging. Set this aside while you prepare the remaining ingredients.
Chop the onion in medium dice
Slice the mushrooms (whatever thickness you like)
Crush the garlic cloves
Place a large skillet over high heat and put the butter in the pan. As soon as it melts, add the beef and fry until it starts to brown and cooked through. Add the mushrooms, onions and garlic and continue to cook until the onions and mushrooms are starting to soften. Don't be afraid to get some good browning on your ingredients at this point. The more you brown, the more flavor you get. Although, be careful not to actually burn. That flavor is not such a good one!
Reduce the heat to medium and add the white wine. Cook until the wine is reduced in half.
Add the beef broth, increase heat to medium high and bring to a boil. Add the dill and continue to cook until the broth is reduced by about half (approximately 5 minutes). ***Alternately, you can add one and a half cups of water and 1 Tbs of beef bullion paste and skip the reducing process, but do make sure to bring the liquid to a boil before proceeding***
Turn the heat off and stir in the sour cream.
Do not bring the stroganoff back to a boil once you have added in the sour cream, this will likely cause it to separate and create an unappealing texture to your sauce.
Serve piping hot over the warm egg noodles.
enJoy!
Sunday, October 16, 2011
Tom Kha Gai...I don't speak Thai..

Tom Kha Gai
Chicken Coconut soup with lemongrass
Ingredients:
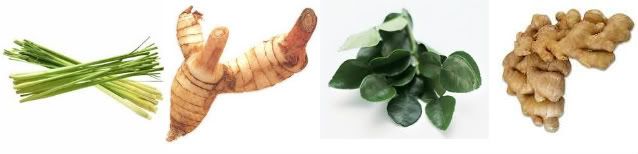 |
| Lemon Grass, Galangal Root, Kaffir Lime Leaves, Ginger Root |
1 Tablespoon of red chili paste
2 shallots finely chopped
1 Tbs vegetable oil
4 cups chicken broth
8 large slices of peeled fresh galangal or 4 slices of fresh ginger (slices should be about 1/2 inch thick)
1 large lemongrass stalk. One large stalk is equal to about 4 of the little ones found in most grocery stores or about 16 inches long. Crush each piece with a hammer or the backside of a knife to release more flavor.
16 kaffir lime leaves or the grated zest of 1 large lime
2 14 ounce cans of coconut milk
1/4 cup of lime juice
2 Tablespoons Thai fish sauce
2 Tbs light brown sugar
1 pound of boneless skinless chicken breast cut into thin slices
1/2 pound of fresh white mushrooms sliced
Fresh cilantro for garnish
In a large soup pot over medium heat, place the oil and heat until shimmering. Add the chili paste and shallots and stir until fragrant and shallots are slightly softened. Add the broth, galangal, lemongrass, and lime leaves. Bring to a boil and boil for 2 minute.
Reduce heat to low and add in the coconut milk. Stir to combine and bring to a simmer. Add the lime juice, fish sauce and brown sugar. Simmer for 5 minutes. Add the chicken pieces and simmer until tender. The thinner your slices, the quicker they will cook, so keep an eye out so you do not over cook your chicken. Add the mushrooms and simmer for 2 more minutes.
Serve piping hot, with extra Sriracha for those who like extra heat.
enJoy!
Wednesday, October 12, 2011
Meatballs!!!!!!!!!!!!

Ingredients:
1 1/2 pounds of ground beef
2 tsp chopped fresh parsley
1 1/2 cups panko bread crumbs
1 large egg
1/4 cup of evaporated milk
1/2 cup finely chopped onion
1/3 cup finely chopped carrot
1 teaspoon ground cardamom (or 1/4 tsp nutmeg if you don't have cardamom)
1 1/2 teaspoons salt
1/2 teaspoon of pepper
1 cup of vegetable oil
1/4 cup of flour
2-3 cups water
1 Tablespoon beef bullion
1/3 cup heavy cream
Directions:
Mix all of the ingredients in the first section. Make sure not to overwork your mixture or the meat will take on and oddly pasty consistency. Mix it just until all of the ingredients are evenly distributed. Form golf ball sized balls and set aside.
Place the oil in a large saute pan until it is 1/2 an inch up the sides. Heat on medium high heat until it is shimmery looking. Place your meatballs in the pan and cook, turning them frequently so that they are brown on all sides and cooked through. Remove your meat balls and drain all but a 1/4 cup of the oil. Make sure not to loose all the little bits that have fallen off of your meatballs, this will add extra flavor to your gravy.
Place your pan back over medium heat (with the leftover oil in it) and add the flour. Stir the mixture around until a paste forms. Allow this to cook for about a minute. This is called making a roux (pronounced roo) Add in your water and bullion, stirring to incorporate with the flour mixture. Bring the mixture to a boil and cook for 2-3 minutes. If your gravy is too think, add a little water. If it is too thin, mix some more flour and water (one part flour, two parts water) and add into your gravy 1 Tablespoon at a time until your gravy is a good consistency.
Right before serving, put a dash of cardamom or nutmeg and the heavy cream and stir to incorporate.
Serve over the carbohydrate of your choice. I personally like them over rice. Swedish tradition is to serve with boiled potatoes, and it would certianly be good over wide egg noodle as well. Make it your own :-)
Swede's also serve a dollop of lingonberry jam on the side, which is the perfect compliment to the meatballs, and you can actually purchase lingonberry jam at IKEA stores if there is one near you.

Monday, October 10, 2011
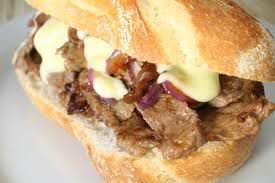
Dip Me Frenchie!
Ingredients:
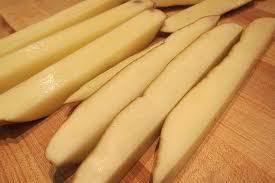
3 medium Russet potatoes
1/3 cup Olive Oil
5 Cloves of garlic (Smashed)
Salt
Pepper
1/2 tsp fresh or dried Rosemary
4 6-8 inch pub style sandwich buns
1- 1 1/2 Pounds of boneless Rib eye steak (depending on how meaty you would like your sandwiches)
2-3 teaspoons of Montreal Steak Seasoning
3 Tablespoons of Butter
1 Large sweet yellow onion, sliced thinly
1 Bell pepper (color of your choice), sliced thinly
1/2 pound button mushrooms, sliced
2 large Shallots, sliced thinly
1 cup of white wine
3 cups of beef stock
1/2 teaspoon of garlic powder
4 slices of Provolone Cheese
Begin by preheating your oven to 425 degrees. Also at this point, place your steak in the freezer to let it firm up for ease of slicing.
Rinse and slice your potatoes into large steak fry sized pieces. Imerse them in water to soak for at least 10 minutes.
Place your 1/3 cup of Olive Oil in a small saucepan along with crushed garlic. Place on stove over medium heat. As soon as you hear the garlic sizzle (2 minutes). remove the pan from heat and let sit for 3-4 minutes. Strain out the garlic chunks and set aside to cool slightly.
Remove your potato "fries" from the water and pat to dry. Arrange them on a large cookie sheet (with an edge) so that you have a single layer of potatoes. You want each potato to touch the surface of the pan. Drizzle with the garlic oil and sprinkle with Salt, pepper and rosemary.
Place in your oven and set the timer for 25 minutes. When the timer goes off, you will want to take a spatula and carefuuly scrape your fries, turning them over to allow the other side to cook. Cook for another 20 minutes or until lightly brown and tender when a knife is inserted.
Now, on to your steak sandwiches. I would start making these right after you put your fries in the oven. Remove steak from the freezer and trim the outside edges of the fat that may be there. Don't worry, there is plenty of fat in the rest of the meat, you don't need the extra. Place your steak on it's side and with a very sharp knife, start slicing the meat as thinly as you possibly can. You may need to cut your steak into smaller more manageable pieces to accomodate the slicing process. Once the steak is all sliced, sprinkile the montreal steak seasoning on it, toss to distribute and set aside.
Slice the onion, bell pepper mushroom, and shallot.
One warning here...Do NOT rinse your saute pan at any time during this process. The caramelization from each step of cooking is an important part of the flavor for the sauce that you will make as the last step of this recipe.
In a medium sized skillet (not Non-Stick), place 1 Tablespoon of the butter over high heat. Once the butter has melted, add your onions and bell peppers. Reduce your heat to medium high, and saute until the oinons have started to caramelize. Remove them from the pan and set aside.
Place another Tablespoon of the butter in your pan, along with the mushrooms. Season with a little salt and saute them until the mushrooms are tender and slightly browned. Remove from the pan and set aside.
Place the last Tablespoon of butter in your pan, along with the meat and increase the heat to high. Saute the meat , stiring it frequently, almost stir fry style. To prevent over cooking and since the meat is so thinly sliced, you will want to remove it from the heat while a little bit of pink remains. Remember that the meat will continue to cook slightly once removed fromt the heat. Remove your meat from the pan and set aside. Preferably in a dish that you can keep on the stove top. That way the meat will stay warm while you make the sauce.
In the pan that you have used to cook all of the other ingredients, place your shallots and saute for a minute to start softenening them. Add in your white wine and bring to a boil. Let the wine to reduce by half before proceeding. Add the beef stock and garlic powder and bring to a boil. Let boil for one minute and them remove from heat. At this point, you will want to taste your sauce. If it is too strong, add a little bit of water. If it is too weak, add a little more beef stock, and of course salt and pepper as desired.
Now the assembly begins: Slice the buns in half the long way, but do not slice them all the way through. You will want a "hinge" on one side for easier assembly and eating. Place a quarter of the meat in each bun. Top with mushrooms, onions and bell peppers. Lastly, Place a slice of the provolone cheese on top, you may need to break it in half to cover the surface adequately. Place all 4 sandwiches on a cookie sheet and place under a hot broiler just long enough to melt the cheese.
Cut the sandwiches in half and plate them with a serving of fries and a cup of the sauce and enJoy!

Saturday, October 8, 2011
Holy Sweetness!

Ingredients:
1 Egg
2 Tablespoons Milk
2 teaspoons ground cinnamon
1/4 cup of granulated sugar
1/2 cup plus 2 Tablespoons firmly packed brown sugar
2 packages of croissant dough
1/2 cup of granulated sugar (optional)
Directions:
In a small bowl, whisk together the egg and milk. Set aside.
In another bowl, combine the cinnamon and sugars.
Prepare two muffin tins by greasing each cup and the top edge lightly with non-stick spray.
Open one of your packages of dough and place it on a lightly floured counter top. Roll it lightly to make a slightly larger rectangle and to get rid of the perforations that are there. Brush the dough with half of the egg mixture, making sure to brush it all the way to the edges. Sprinkle the entire surface with half of the sugar mixture.
Begin rolling your dough, jelly roll style into a long log, making sure to keep it tight. Pinch the seam closed and brush away any excess sugar.
With a very sharp or serrated knife, cut the log into 1 1/2 inch slices and place each piece into a cup in the muffin tin.
Repeat with the other package of dough.
Place your buns in a warm place to rise. Cover loosely with plastic wrap or a damp towel. let rise until the dough is slightly higher than the rim of your muffin cups.
Preheat the oven to 350 degrees. Place the muffin tins on the middle rack of the oven and bake for 20-25 minutes until lightly golden brown and puffy.
Place your white sugar in a large cookie sheet or platter. Turn the hot buns out of the muffin tin and onto the tray with sugar. Immediately roll each bun around to coat with sugar and let cool.
 |
| Latte Love! |
Merry Christmas!!!
Every Christmas, I make this coffee bread for Christmas breakfast. One year I almost did not make it becuase I was so busy with other things, but everyone was so outraged that I ended up staying up until midnight on Christmas Eve to finish it. The ruination of Christmas was almost on my head. Can't have that people...no bueno!
Swedish Cardamom Coffee Bread
Dough:
3 cups bread flour
3/4 cup sugar
1/4 cup butter
1/4 cup crisco
2 Tablespoons yeast
3/4 teaspoon Salt
1 teaspoon ground cardamom
1/2 cup milk powder (I prefer whole if you can find it)
1 Large egg
2 cups hot water (110-115 degrees)
3 cups bread flour
Filling:
2/3 cup sugar
2/3 cup ground almonds or 1/2 cup almond paste and 1/2 gruond almonds.
1/3 teaspoon almond extract
3 Tablespoons butter
1 egg
Directions:
Divide your flour in half and set one half aside. In a mixing bowl, place one half of the flour and the remaining "dough" ingredients. Turn your mixer onto medium speed and mix until a slimy liquid is formed. Remove your whisk attachment and replace with a dough hook. Gradually add the remaining flour until a soft dough is formed. It should just barly stick to your fingers when you touch it.
Turn the dough into a greased bowl, grease the top of the dough and cover with plastic wrap. Set in a warm place to rise. Let rise until doubled in volume.
Meanwhile, mix together all of your filling ingredients until a thick paste is formed.
Once dough has doubled in size, place a generous amount of flour on your counter top or a large cutting board. Divide the dough in half and place one piece of the dough on the floured surface. Roll out into a large rectangle with a floured rolling pin.
Take half of your filling mixture and spread it onto your dough rectangle, leaving a 1/4 inch of dough around the edge with no filling. With one long side, start rolling your dough into a log. Just like you would do for cinnamon rolls. Pinch the dough at your long seam to seal the edge closed. Make sure it's sealed well, as you don't want it to open in the cooking process and lose all of your yummy filling.
Once you have rolled and pinched the dough, Place your log onto a parchment covered baking sheet and form the log into a large ring, like a wreath. pinch the ends together and cover loosly with plastic wrap. Set in a warm place to rise. Repeat process with second piece of dough and remaining filling mixture.
Let both rings rise until almost doubled in size. While they are rising, preheat your oven to 400 degrees. Before baking, remove the plastic wrap and place in the center of your oven. Bake for 20-25 minutes or until golden brown and firm to the touch.
Remove from the oven and let cool completely. If you are not serving immediately, cover it with foil or place in tummerware to store. WHen ready to serve, reheat it in a 300 degree oven for 10 minutes.
I like this bread with a light glaze on top, to sweeten it up a bit more. You can make this by combining one cup of powdered sugar and a 1/3 cup of water or heavy cream. Add in a dash of vanilla and drizzle over the top.
enJoy!
Friday, October 7, 2011
Mmmm....Soup
Ok, fall is officially here! There is nothing like a good hearty soup on a fall/winter eve. This recipe is from WIlliams Sonoma, and although it is a little more labor intensive due to the corn procedure described, I promise it's worth it! The sweet potatoes give it a surprising twist that make this so much more interesting than your normal corn chowder. And please don't leave out the hot sauce, it really gives this soup an acidic kick that makes it over the top good!
Sweet Potato Corn Chowder
Ingredients:

5 ears of corn, husks and silk removed
3 Tbs. unsalted butter
1/2 cup diced firm, baked smoked ham
2 1/2 cups finely chopped yellow onion
2 red bell peppers, seeded and diced
3 1/2 cups chicken broth
1 large sweet potato, about 1 lb., peeled and cut
into 1/2-inch cubes
1 tsp. salt, plus more, to taste
2/3 cup heavy cream
1/2 tsp. hot-pepper sauce, such as Tabasco
Directions:
Holding 1 of the ears of corn by its pointed end and steadying its stalk end on a cutting board, cut down along the ear with a sharp knife to strip off the kernels, turning the ear with each cut. Repeat with 2 of the ears of corn. Put the kernels in a bowl and set aside.
Score the kernels on the remaining 2 ears of corn by running the tip of a sharp knife down the length of the ear. Place each ear in a bowl and, using the back of a knife, scrape down the length of the ear to squeeze out the pulp from the scored kernels. Set the pulp aside.
In a soup pot over medium heat, melt the butter. Add the ham and cook, stirring once or twice, until lightly browned, about 10 minutes. Using a slotted spoon, transfer to a bowl.
Add the onion and bell peppers to the pot, cover and cook, stirring once or twice, until tender, about 10 minutes. Add the broth, sweet potato and the 1 tsp. salt. Reduce the heat to low, partially cover and simmer for 10 minutes. Stir in the ham and corn kernels. Cover and cook until the potato is just tender, about 10 minutes. Stir in the corn pulp, cream and hot-pepper sauce. Cook just until heated through, 3 to 4 minutes. Taste and adjust the seasonings. Serve hot. Serves 8.
 enJoy!
Sweet Potato Corn Chowder
Ingredients:
5 ears of corn, husks and silk removed
3 Tbs. unsalted butter
1/2 cup diced firm, baked smoked ham
2 1/2 cups finely chopped yellow onion
2 red bell peppers, seeded and diced
3 1/2 cups chicken broth
1 large sweet potato, about 1 lb., peeled and cut
into 1/2-inch cubes
1 tsp. salt, plus more, to taste
2/3 cup heavy cream
1/2 tsp. hot-pepper sauce, such as Tabasco
Directions:
Holding 1 of the ears of corn by its pointed end and steadying its stalk end on a cutting board, cut down along the ear with a sharp knife to strip off the kernels, turning the ear with each cut. Repeat with 2 of the ears of corn. Put the kernels in a bowl and set aside.
Score the kernels on the remaining 2 ears of corn by running the tip of a sharp knife down the length of the ear. Place each ear in a bowl and, using the back of a knife, scrape down the length of the ear to squeeze out the pulp from the scored kernels. Set the pulp aside.
In a soup pot over medium heat, melt the butter. Add the ham and cook, stirring once or twice, until lightly browned, about 10 minutes. Using a slotted spoon, transfer to a bowl.
Add the onion and bell peppers to the pot, cover and cook, stirring once or twice, until tender, about 10 minutes. Add the broth, sweet potato and the 1 tsp. salt. Reduce the heat to low, partially cover and simmer for 10 minutes. Stir in the ham and corn kernels. Cover and cook until the potato is just tender, about 10 minutes. Stir in the corn pulp, cream and hot-pepper sauce. Cook just until heated through, 3 to 4 minutes. Taste and adjust the seasonings. Serve hot. Serves 8.
Sunday, October 2, 2011
Baby it's not so cold outside!
I've talked a couple times about my love of fall, and although it's technically here, the weather thinks otherwise. So what do I do? Crank up the A/C and make chili. I know people, it's not so eco friendly, but I really needed this pick me up :-)
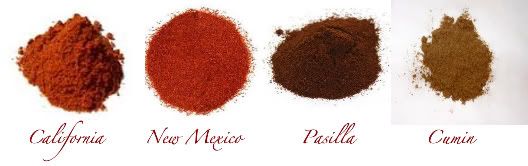
There are a 100,000 chili recipes out there, so deciding on one is truly a difficult task. My mom always just bought the chili seasoning packets, but that goes against my "scratch" philosophy of cooking so my search ensued. Here is what I came up with for today, I kind of combined three different recipes, as each of them had things that looked particularly good to me. This chili is really rich, with a nice heat level that warms you up without burning off your taste buds and is sort of a cross between classic and southwestern chili.
 Ingredients:
2 Tablespoons of Olive Oil
1 1/2 pounds ground meat ( I like ground chuck)
1 1/2 cups chopped onion (yellow or white preferably)
8 cloves of Garlic - minced
2 teaspoons California Chili powder
2 teaspoon New Mexico Chili powder
2 teaspoon Pasilla Chili powder
1/2 teaspoon paprika
2 teaspoon Ground Cumin
1 teaspoon dried Basil
1/2 teaspoon dried oregano
1/2 teaspoon dried thyme
1/2 teaspoon ground cinnamon
1/2 teaspoon salt
1, 28 ounce can crushed tomatoes
14 1/2 ounces chicken stock
3 Tablespoons tomato paste
2, 15-16 ounce cans of prepared chili beans (Pintos with jalapenos and seasoning)
1/4 cup flour or Masa Harina if you want a more southwest flavor
1/2 cup water
Directions:
Combine all of your dry seasonings in a small bowl and set aside.
In a large pot, heat your olive oil on high heat until shimmery. Add and brown your ground beef, onion and garlic together until the beef is almost cooked through. Add your dry seasonings and saute until fragrant.
Add all of your liquid ingredients and beans and bring to a simmer.
Cover and simmer on low heat for an hour to allow the spices to fully bloom. Combine the flour and water and mix until no lumps remain. Add the mixture to your chili and let simmer for another 10 minutes to allow the flour to cook through and thicken your chili.
Serve with grated cheese, sour cream, tortilla chips... really whatever your little heart desires.
enJoy!
There are a 100,000 chili recipes out there, so deciding on one is truly a difficult task. My mom always just bought the chili seasoning packets, but that goes against my "scratch" philosophy of cooking so my search ensued. Here is what I came up with for today, I kind of combined three different recipes, as each of them had things that looked particularly good to me. This chili is really rich, with a nice heat level that warms you up without burning off your taste buds and is sort of a cross between classic and southwestern chili.
2 Tablespoons of Olive Oil
1 1/2 pounds ground meat ( I like ground chuck)
1 1/2 cups chopped onion (yellow or white preferably)
8 cloves of Garlic - minced
2 teaspoons California Chili powder
2 teaspoon New Mexico Chili powder
2 teaspoon Pasilla Chili powder
1/2 teaspoon paprika
2 teaspoon Ground Cumin
1 teaspoon dried Basil
1/2 teaspoon dried oregano
1/2 teaspoon dried thyme
1/2 teaspoon ground cinnamon
1/2 teaspoon salt
1, 28 ounce can crushed tomatoes
14 1/2 ounces chicken stock
3 Tablespoons tomato paste
2, 15-16 ounce cans of prepared chili beans (Pintos with jalapenos and seasoning)
1/4 cup flour or Masa Harina if you want a more southwest flavor
1/2 cup water
Directions:
Combine all of your dry seasonings in a small bowl and set aside.
In a large pot, heat your olive oil on high heat until shimmery. Add and brown your ground beef, onion and garlic together until the beef is almost cooked through. Add your dry seasonings and saute until fragrant.
Add all of your liquid ingredients and beans and bring to a simmer.
Cover and simmer on low heat for an hour to allow the spices to fully bloom. Combine the flour and water and mix until no lumps remain. Add the mixture to your chili and let simmer for another 10 minutes to allow the flour to cook through and thicken your chili.
Serve with grated cheese, sour cream, tortilla chips... really whatever your little heart desires.
enJoy!
Monday, September 26, 2011
Welcome to Fall!
Yes!!!!! Fall is officially here. Althought the weather occasionally thinks otherwise, we are definitely headed in the right direction.
 One of my favorite parts of the season is the Pumpkin Spice Latte from Starbucks. In fact, I even became a fan of Starbucks on Facebook just so I could get the early alert that the "PSL" was available again in a Starbucks near me. I kid you not...I need help people. And now I have another little problem as well. A friend recently introduced me to the pumpkin loaf and I am now addicted to yet another non-health food. Thus I HAD to figure out how to make it myself right? I mean why limit myself to enjoying it once a week or so. That would be the healthy approach...
This recipe was the result of my search for copy cat Starbucks pumpkin loaf recipes. It's not exactly the same, but it is equally good, I promise.
Autumn Pumpkin Loaf
Ingredients:
1 (15 oz) can pumpkin puree
4 large eggs
1 cup vegetable oil
2/3 cup water
1 1/2 cups white sugar
1 1/2 cups light brown sugar
2 teaspoon baking soda
1 1/2 teaspoon salt
2 teaspoons Cinnamon
1 teaspoon Nutmeg
1/2 teaspoon ground ginger
3 1/2 cups all-purpose flour
Directions:
Preheat oven to 350 degrees. Grease three 7x3 inch loaf pans or a bundt pan and set aside.
In a large bowl, mix together pumpkin puree, eggs, oil, water and sugar until well blended. In a seperate bowl, whisk together the flour, baking soda, salt, cinnamom, nutmeg and ginger. Stir the dry ingredients into the the pumpkin mixture until just blended. Pour into prepared pans.
Bake for about 50 minutes in the preheated oven. Loaves are done when a toothpick inserted in center comes out clean.
Optional: I like to sprinkle the top with roasted salted pepitas before baking. These can be found in healthfood stores and occasionally in the mexican section of your grocery.
enJoy!
This recipe was the result of my search for copy cat Starbucks pumpkin loaf recipes. It's not exactly the same, but it is equally good, I promise.
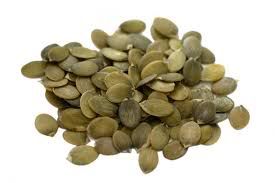 |
| These are Pumpkin seeds, also known as Pepitas |
Ingredients:
1 (15 oz) can pumpkin puree
4 large eggs
1 cup vegetable oil
2/3 cup water
1 1/2 cups white sugar
1 1/2 cups light brown sugar
2 teaspoon baking soda
1 1/2 teaspoon salt
2 teaspoons Cinnamon
1 teaspoon Nutmeg
1/2 teaspoon ground ginger
3 1/2 cups all-purpose flour
Directions:
Preheat oven to 350 degrees. Grease three 7x3 inch loaf pans or a bundt pan and set aside.
In a large bowl, mix together pumpkin puree, eggs, oil, water and sugar until well blended. In a seperate bowl, whisk together the flour, baking soda, salt, cinnamom, nutmeg and ginger. Stir the dry ingredients into the the pumpkin mixture until just blended. Pour into prepared pans.
Bake for about 50 minutes in the preheated oven. Loaves are done when a toothpick inserted in center comes out clean.
Optional: I like to sprinkle the top with roasted salted pepitas before baking. These can be found in healthfood stores and occasionally in the mexican section of your grocery.
enJoy!
Sunday, September 18, 2011
I'm Lazy!
Sorry y'all, I've been slacking :-(
I love Saturdays! I don't typically have plans, and my sister and nieces usually come over and spend a good portion of the day with me. Since I'm single, cooking for one is often challenging. More often than not, I cook enough for 4 or 5 and then end up getting so sick of the food by the 4th or 5th round of leftovers that I never make the dish again. Saturday's and Sundays are days when I can really dedicate time to cooking, and get serious about the food I'm making since I have enough company to help me "test and consume". Thank goodness for a sister and nieces that are willing to try my plethora of random and crazy recipes.

This Saturday I decided to make several things and once they're done, I'll post if they're good enough :-) However, this recipe I already know is good enough. Pretzels!!!!! They consistently fulfill my desire for fresh, warm, yeasty, salty bread. I have tried dozens of recipes for pretzels and am usually disappointed. Until I met Alton Brown... OK, I met his TV persona, but that persona really gives some great lessons and recipes to back up his culinary genius. He is amazing, and if you really want to learn how to do something like making puff pastry, or pickles, I encourage you to seek out an Alton lessons via the food network or YouTube. He always explains why and how certain recipes work, and why he does and does not do things certain ways. His lessons are always ones that you can apply to your everyday cooking and his recipes are sure to become favorites. I also appreciate that he usually tells you how to make a basic thing, like French Toast that is excellent on it's own, but that is equally suitable for additions to your taste. Like Orange juice or coconut milk (I think I may have just had a genius thought of my own right there, french toast made with coconut milk?... I'll let you know later).
Anyhow, I'm a little A.D.D. today. here goes the recipe for Pretzels!
Place the pretzels into the boiling water, 1 by 1, for 30 seconds. Remove them from the water using a large flatspatula. Return to the half sheet pan, brush the top of each pretzel with the beaten egg yolk and water mixture and sprinkle with the pretzel salt. Bake until dark golden brown in color, approximately 12 to 14 minutes. Transfer to a cooling rack for at least 5 minutes before serving.
I love Saturdays! I don't typically have plans, and my sister and nieces usually come over and spend a good portion of the day with me. Since I'm single, cooking for one is often challenging. More often than not, I cook enough for 4 or 5 and then end up getting so sick of the food by the 4th or 5th round of leftovers that I never make the dish again. Saturday's and Sundays are days when I can really dedicate time to cooking, and get serious about the food I'm making since I have enough company to help me "test and consume". Thank goodness for a sister and nieces that are willing to try my plethora of random and crazy recipes.
This Saturday I decided to make several things and once they're done, I'll post if they're good enough :-) However, this recipe I already know is good enough. Pretzels!!!!! They consistently fulfill my desire for fresh, warm, yeasty, salty bread. I have tried dozens of recipes for pretzels and am usually disappointed. Until I met Alton Brown... OK, I met his TV persona, but that persona really gives some great lessons and recipes to back up his culinary genius. He is amazing, and if you really want to learn how to do something like making puff pastry, or pickles, I encourage you to seek out an Alton lessons via the food network or YouTube. He always explains why and how certain recipes work, and why he does and does not do things certain ways. His lessons are always ones that you can apply to your everyday cooking and his recipes are sure to become favorites. I also appreciate that he usually tells you how to make a basic thing, like French Toast that is excellent on it's own, but that is equally suitable for additions to your taste. Like Orange juice or coconut milk (I think I may have just had a genius thought of my own right there, french toast made with coconut milk?... I'll let you know later).
Anyhow, I'm a little A.D.D. today. here goes the recipe for Pretzels!
Ingredients
- 1 1/2 cups warm (110 to 115 degrees F) water
- 1 tablespoon sugar
- 2 teaspoons kosher salt
- 1 package active dry yeast
- 22 ounces all-purpose flour, approximately 4 1/2 cups
- 2 ounces unsalted butter, melted
- Vegetable oil, for pan
- 10 cups water
- 2/3 cup baking soda
- 1 large egg yolk beaten with 1 tablespoon water
- Pretzel salt
Directions
Combine the water, sugar and kosher salt in the bowl of a stand mixer and sprinkle the yeast on top. Allow to sit for 5 minutes or until the mixture begins to foam. Add the flour and butter and, using the dough hook attachment, mix on low speed until well combined. Change to medium speed and knead until the dough is smooth and pulls away from the side of the bowl, approximately 4 to 5 minutes. Remove the dough from the bowl, clean the bowl and then oil it well with vegetable oil. Return the dough to the bowl, cover with plastic wrapand sit in a warm place for approximately 50 to 55 minutes or until the dough has doubled in size.
Preheat the oven to 450 degrees F. Line 2 half-sheet pans with parchment paper and lightly brush with the vegetable oil. Set aside.
Bring the 10 cups of water and the baking soda to a rolling boil in an 8-quart saucepan or roasting pan.
In the meantime, turn the dough out onto a slightly oiled work surface and divide into 8 equal pieces. Roll out each piece of dough into a 24-inch rope. Make a U-shape with the rope, holding the ends of the rope, cross them over each other and press onto the bottom of the U in order to form the shape of a pretzel. Place onto the parchment-lined half sheet pan.
Sunday, August 28, 2011
Apple Cheddar Salad with Sweet Cream Vinaigrette
Ingredients:
1 cup Pecan Halves
1 Tablespoon Butter
1 Tablespoon Sugar
1 pinch salt
1/4 cup White Vinegar
1/4 cup Olive Oil
2 Tablespoons Chives, Fresh, chopped
1 Tablespoon Sugar
1 teaspoon Salt
1/8 teaspoon Crushed red pepper flakes
1/2 cup heavy cream
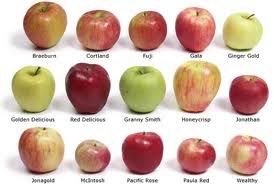
1 whole Apple, Braeburn or sweet red
10 ounces lettuce, baby greens mix
3 ounces cheddar cheese, preferably white, and shaved
 |
| My Favorite White Cheddar Well any cheddar for that matter |
1. In a saute pan, combine the pecans, sugar and butter. Heat until the sugar and butter are melted and coating the pecans.
2. Pour the pecans onto a cookie sheet, spreading out in one layer, and sprinkle with the pinch of salt. Set aside to cool.
3. In a small bowl or blender, blend together the vinegar, oil, chives, sugar, salt and red pepper flakes.
4. Add the heavy cream and stir in. Be careful not to over mix, as you could end up whipping the cream.
5. Core and slice the apples into thin wedges. Toss them into the salad mix along with the pecans and shaved cheddar cheese.
6. Dress and serve.
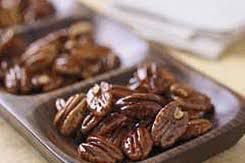
Tuesday, August 23, 2011
Dreaming of Autumn

In my dreaming of autumn, I made a pecan pie. While there is great debate about what makes the perfect pecan pie, mostly originating from north/south loyalties, I'm not a discriminator :-) It's all pretty much pecan pie to me. This recipe is a little different than the usual sweet sticky caro corn syrup concoctions, and I really love it. With a decent amount of maple in the filling, this recipe can be a wee bit more costly, but it is truly a treat for pecan pie lovers.
Maple Pecan Pie
Ingredients:
1 rolled-out round of basic pie dough
1 cup pure maple syrup
1/2 cup light corn syrup
1/2 cup dark corn syrup
2 eggs, lightly beaten
1/4 cup firmly packed light or dark brown sugar
1/8 tsp. salt
2 Tbs. unsalted butter, melted
1 tsp. vanilla extract
1 1/2 cups pecans, coarsely chopped
Directions:
Fold the dough round in half and carefully transfer to a 9-inch pie pan or dish. Unfold and ease the round into the pan, without stretching it, and pat it into the bottom and firmly up the sides of the pan. Using kitchen scissors, trim the edge of the dough, leaving 3/4 inch of overhang. Fold the overhang under itself and pinch it together to create a high edge on the pans rim. Flute the edge decoratively.
Refrigerate or freeze the pie shell until firm, about 30 minutes. Meanwhile, position a rack in the lower third of an oven and preheat to 375°F.
Line the pastry shell with aluminum foil or parchment paper and fill with pie weights or raw short-grain rice. Bake for 20 minutes, then lift an edge of the foil. If the dough looks wet, continue to bake, checking every 5 minutes, until the dough is pale gold, for a total baking time of 25 to 30 minutes. Transfer to a wire rack. Reduce the oven temperature to 350°F.
In a saucepan over medium-high heat, bring the maple syrup to a boil and boil for 8 to 10 minutes to reduce. Remove from the heat and pour into a heatproof measuring pitcher. The syrup should be reduced to 1 1/2 cups. If necessary, return the syrup to the saucepan and continue to boil until sufficiently reduced. Let cool to room temperature before proceeding.
In a bowl, stir together the eggs, brown sugar, reduced maple syrup, salt, melted butter and vanilla until well mixed. Add the pecans and stir well. Pour into the partially baked pie shell, making sure the pecans are evenly distributed.
Bake the pie until the center is slightly puffed and firm to the touch, 30 to 35 minutes. Transfer to a wire rack and let cool until just slightly warm.
Serve with whipped vanilla cream of course :-)
Thursday, August 11, 2011
The best chocolate chip cookies EVER!
I love me some cookies! I don't have a huge sweet tooth, but cookies are my weakness. I have searched high and low for a chocolate chip cookie recipe that has just the right combination of chew and crisp, and this one hits the nail square on the head. The increase amount of brown sugar aids in not only the rich flavor, but the chewy texture. The melted butter is a surprise, and the first time I've seen it called for in a cookie recipe. Whatever the purpose is, it works!
These were my dad's favorite cookies, and every time I make them, I smile at the success in finding a chocolate chip cookie recipe that truly made him happy :-) Cookie cheers to you Dad!
 Dad's favorite Chocolate Chip Cookies
2 1/8 cups of flour
1/2 teaspoon of salt
1/2 teaspoon of baking soda
12 Tablespoons of butter, melted and cooled slightly
1 cup of brown sugar
1/2 cup sugar
1 egg
1 egg yolk
2 teaspoons vanilla extract
1-2 cups of chocolate chips.
Preheat the oven to 325 degrees and place the rack in the center of the oven.
In a microwave safe bowl, melt the butter and set aside to cool slightly. In the bowl of a mixer, place both of the sugars and butter. Mix on medium high speed until slightly lighter in color and well incorporated. Add the eggs and vanilla and stir to incorporate. Add the remaining dry ingredients (except the chocolate chips) and blend well to incorporate. Remove your bowl from the mixer and fold in the chocolate chips.
Use a 1/4 cup measuring cup to scoop out the dough and place on an un greased cookie sheet. Bake for 15-18 minutes.
**Note: this is the perfect time to use your silpat baking mats as mentioned on the "tools" page.
Fun ideas:
Use one cup of chocolate chips and 1 cup nuts of your choice.
Use one cup of chocolate chips, 1/2 cup of toffee bits and 1/2 cup nuts of your choice.
Use one cup of chocolate chips, 1/2 cup of toffee bits, 1/2 cup of shredded coconut.
Use one cup of chocolate chips, 1/2 cup of caramel pieces and 1/2 cup of coconut.
Enjoy!
These were my dad's favorite cookies, and every time I make them, I smile at the success in finding a chocolate chip cookie recipe that truly made him happy :-) Cookie cheers to you Dad!
2 1/8 cups of flour
1/2 teaspoon of salt
1/2 teaspoon of baking soda
12 Tablespoons of butter, melted and cooled slightly
1 cup of brown sugar
1/2 cup sugar
1 egg
1 egg yolk
2 teaspoons vanilla extract
1-2 cups of chocolate chips.
Preheat the oven to 325 degrees and place the rack in the center of the oven.
In a microwave safe bowl, melt the butter and set aside to cool slightly. In the bowl of a mixer, place both of the sugars and butter. Mix on medium high speed until slightly lighter in color and well incorporated. Add the eggs and vanilla and stir to incorporate. Add the remaining dry ingredients (except the chocolate chips) and blend well to incorporate. Remove your bowl from the mixer and fold in the chocolate chips.
Use a 1/4 cup measuring cup to scoop out the dough and place on an un greased cookie sheet. Bake for 15-18 minutes.
**Note: this is the perfect time to use your silpat baking mats as mentioned on the "tools" page.
Fun ideas:
Use one cup of chocolate chips and 1 cup nuts of your choice.
Use one cup of chocolate chips, 1/2 cup of toffee bits and 1/2 cup nuts of your choice.
Use one cup of chocolate chips, 1/2 cup of toffee bits, 1/2 cup of shredded coconut.
Use one cup of chocolate chips, 1/2 cup of caramel pieces and 1/2 cup of coconut.
Enjoy!
Wednesday, August 10, 2011
Meatloaf? Really?
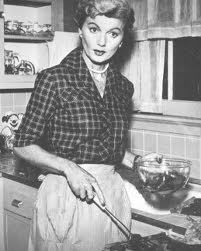 |
| Always look your best in case the mister comes home early! |
- I have never been a fan of meatloaf. I've tend to be slightly aloof to the typical American family dinners that tend to be heavy boring fare that was popular in the 50's and 60's. This is probably an opinion fostered by my childhood spent in Indonesia, where my first favorite dish as a child was an Indonesian version of Chicken soup (recipe to come later), loaded with lemon grass, ginger and tons of other ingredients. Polar opposite of your typical American family dinner, our house was not one of mediocre fare on any day of the week. Thus my opinion has always been that meatloaf and pot roast are boring dishes that usually come in a microwave container. My lovely sister ( who loves to prove me wrong :-) introduced me to this recipe. Thank goodness too, because this recipe is a true winner. I find that the addition of a few vegetables and the balsamic vinegar make this meatloaf an over the top delicious version.
-
This recipe makes a large loaf, with a total of 2 pounds of meat. If you don't have a large family, I would encourage you to either half the recipe, or make two loaves and freeze one of them for re-heating at a later date. If you choose to make and freeze, please cook it before you freeze it. Lowering the temperature of your meat and combining it with all of the ingredients, will cause the start of bacteria growth. Refreezing it without cooking is not really the safest thing to do.
This recipe also calls for three different types of meat. While this gives it an amazing well rounded flavor, please don't be afraid to use your own combination of meats. All beef, beef and veal, or even pork and beef. Be creative, it's my first rule in cooking.
Roasted Vegetable Meatloaf
3 tablespoons olive oil - 1 large zucchini, finely diced
- 1 red bell pepper, finely diced
- 1 yellow pepper, finely diced
1 small yellow onion, finely diced - 5 cloves garlic, smashed
- 1/2 teaspoon red pepper flakes, divided
- Salt and freshly ground black pepper
- 2 large eggs, lightly beaten
- 2 teaspoons finely chopped fresh thyme leaves
- 1/4 cup chopped fresh parsley leaves, plus more for garnish
- 1/2 pound ground pork
- 1/2 pound ground veal
- 1 pound ground beef chuck
- 1 cup panko (Japanese) bread crumbs
- 1/2 cup freshly grated Romano or Parmesan
- 1 cup ketchup, divided
- 1/4 cup plus 2 tablespoons balsamic vinegar
Directions
Preheat oven to 425 degrees F.
Heat the oil in a large saute pan over high heat. Add the zucchini, peppers, onion, garlic paste, 1/4 teaspoon red pepper flakes, and salt and pepper, to taste, and cook until almost soft, 5 minutes. Set aside to cool.
Whisk together the eggs and herbs in a large bowl. Add the meat, bread crumbs, cheese, 1/2 cup of the ketchup, 2 tablespoons of the balsamic vinegar, and the cooled vegetables and mix until just combined.
Mold the meatloaf on a baking sheet lined with parchment paper. Whisk together the remaining ketchup, balsamic vinegar, and red pepper flakes in a small bowl. Brush the mixture over the entire loaf. Bake themeatloaf for 1 to 1 1/4 hours. Remove from the oven and let rest for 10 minutes before slicing.
Enjoy!
Enjoy!
Subscribe to:
Posts (Atom)