Friday, March 30, 2012

Bolognese

Ok listen people. I'm not Italian, but I'll be honest and say that I kind of wish I was. Who doesn't love pasta and wine with every meal? Actually, didn't I say this about rice in my "I think I might be Asian" post? I digress... 
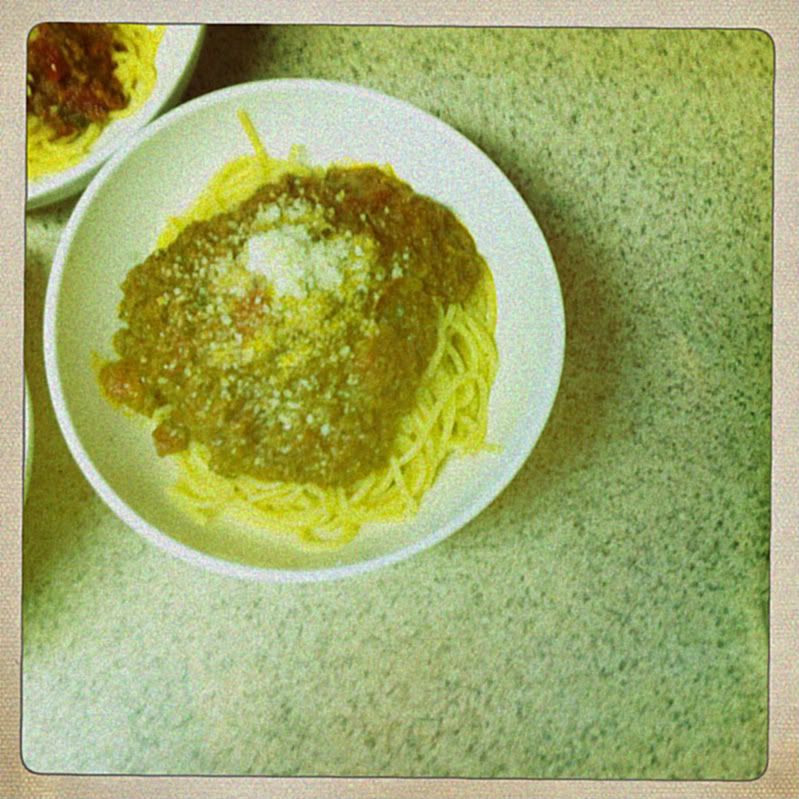
In my quest to make a good Bolognese, I looked at 100,000 recipes, and they each claimed to be the only "authentic" version on the web. *(read this in a monotone voice like the pharmaceutical commercials please...I make no claims about this being an "authentic" recipe, so if you happen to have the only authentic Bolognese recipe on earth and mine doesn't even come close to it, please don't yell at me) All I will say is that it's pretty darn yummy. 

I used Anne Burrell's recipe from the food network as a starting point, but modified it a decent amount. I also included heavy cream in my recipe as half called for some sort of cream or ricotta and half did not. I love cream, so I included it. I found that it rounded out the richness of this sauce really nicely.

I recommend making this in a large deep saute pan of sorts (see pics). The large surface area makes it easier to do all the reducing and sauteeing that is required in this recipe.

4 Carrots
3 Stalks of Celery
One large Onion
5 Cloves of Garlic
1 Pound of Ground Beef
1 Pound of Ground Pork
1 Tbs. Porcini Mushroom Powder (this is totally optional, as I realize most people will not have this on hand.
It does however add a nice earthy flavor to your sauce)
2 small cans of Tomato Paste
2 Regular cans of Diced tomatoes
1/2 cup of chopped fresh basil
3 Cups of red wine
1/4 cup of heavy cream (you don't have to add this, but why not?)
I wonder who will comment on this picture first?
Roughly chop the Carrot, Celery, onion and peel the garlic. Place all of these in a blender or food processor. Process them until a paste forms. Heat a large skillet or saucepan on high heat and place two tablespoons of Olive oil. Once the pan is hot, add your "paste". Season with Salt and cook until all of the moisture has evaporated and your paste is starting to brown. And for crying out loud (no really, you'll be crying from the onion fog in your kitchen) OPEN A WINDOW! and be patient, this is where the big flavors develop.

Add the ground beef and season again generously with salt. BROWN THE BEEF! Brown food tastes good. Don't rush this step. Cook another 15 to 20 minutes.

Add the tomato paste and cook until brown about 4 to 5 minutes. Add the red wine. Cook until the wine has reduced by half, another 4 to 5 minutes.

Add water to the pan until the water is about 1 inch above the meat. Toss in the bay leaves, thyme and half of the basil and stir to combine everything. Bring to a boil and reduce to a simmer, stirring occasionally. As the water evaporates you may need to add more, about 1 cup at a time. Don't be shy about adding water during the cooking process, you can always cook it out. This is a game of reduce and add more water. This is where big rich flavors develop. If you try to add all the water in the beginning you will have boiled meat sauce rather than a rich, thick meaty sauce. Stir and taste frequently. Season with salt, if needed (you probably will). Simmer for 3 1/2 to 4 hours.

During the last 30 minutes of cooking, bring a large pot of water to a boil over high heat to cook the spaghetti. Pasta water should ALWAYS be well salted. When the water is at a rolling boil add the spaghetti and cook as directed.

In the last 15 minutes of cooking, add the remaining basil and 1/4 of cream. Divide the pasta and sauce into serving bowls or 1 big pasta bowl. Top with remaining grated Parmigiano. Serve immediately.

Sunday, March 4, 2012

I think I might actually be asian.

Ignore the pasty white skin and strawberry blonde hair...Since I was born in Indonesia, I grew up with a great love and respect for all things asian.  Obviously there is quite a variety from Vietnamese to Thai to Chinese to Indonesian, but the spices and techniques are so similar.  Not to mention the types of vegetables available in those countries does differ a decent amount to what we naturally have here in the US.  Fortunately, I am not alone, and we can really find relatively decent substitutes here in the US for those foreign ingredients.  This recipe is one that I came up with in an attempt to copy a Vietnamese dish at a wonderful restaurant in Portand Oregan called Pho Van.  While this is not the same as thier delicious dish, it is really good.  And since I'm asian at heart, I will say that this recipe can definitley compete.

Stef's Pho Vietnamese lemongrass chicken

4 boneless skinless chicken breasts
1/2 cup honey
4 Tbs vegetable oil
2 Large cloves of garlic, minced
2 teaspoons fresh ginger, finely grated
1 teaspoon white pepper
1 teaspoon chicken bullion paste
2 stalks of lemon grass, sliced in 1/4 inch slices
juice of one lime

Directions:

Place all ingredients (except chicken) in a bowl and stire to combine well.  Place the chicken breasts in a large zip loc bag and pound each one out so that it is equal thickness all the way across the piece (about 1/2 to 3/4 of an inch).  I use my rolling pin to achieve this, but you could also use a can of soup, a heavy metal bowl or a small fry pan.  Once you have pounded out your chicken, place your marinade in the bag along with the chicken.  Squeeze out all of the excess air and seal your bag.  Let marinade for at least one hour, and preferably 4-6.

Preheat your bbq grill to medium high heat and place each chicken breast on the grill.  Cook for 3-4 minutes on each side, basting with reserved marinade every few minutes.  Once chicken is cooked through, remove from grill and let rest for 5 minutes before serving.  This ensures that the chicken retain it's juicyness.

Serve over steamed white rice

The Ultimate Man's Meal

I made this pot roast recipe a few years ago at my sisters house and while I expected it to be a hit with her husband, I have to admit I was a little skeptical myself. I do love beer, maybe it's the German, Scottish and Irish in me?  My genetics scream for meat, potatoes and copious quantities of glorious wheaty beer. My only downfall is my distaste for Guinness. However, I have finally found a way to use Guinness that pleases me oh so much!  Despite my title of this being the "Ultimate Man's Meal", this really does please everyone I've ever made it for, despite gender (including a girls weekend in the mountains).

The cut: Start with a cut of beef from the chuck (shoulder).  Since these cuts have a lot of fat marbled within the meat, first trim off the excess from the outside of the roast.

Tip:  This recipe calls for you to sear the meat in a pan on top of the stove, then add the remaining ingredients and place the whole shebang in the oven, so think carefully when choosing your pot.  Choose one with a tight fitting lid that will be oven safe. Also, when searing the meat, don’t move it around until it is ready to turn! It needs constant contact with the pot to develop that dark, rich flavorful crust.:

1 boneless chuck pot roast 3 – 3 1/2 lbs.
Salt & pepper
2 Tbs olive oil
2 Cups mushrooms, stemmed, halved (3 1/2 ox.)
1 1/2 Cup onions, diced
2/3 Cup carrot, diced
2/3 Cup celery diced
1/4 Cup garlic, thinly sliced
1/2t. red pepper flakes
2 bay leaves
3 Tbs. tomato paste
1/2 Cup pretzels, finely ground (I put them in a zip loc and pound them to a pulp with a rolling pin..Fun and stress relieving :-)
2 bottles Guinness or other dark beer (12 oz. each)
2 Cups beef broth
2 Tbs Dijon mustard
2 Tbs Worcestershire sauce


Preheat oven to 325

Trim: meat of excess fat and season with salt & pepper. Heat oil over medium-high in an ovenproof Dutch oven. Sear roast on both sides until brown, 8-10 minutes total. Remove roast from the pan.

Sweat: Mushrooms, vegetables, and seasonings in the pot for 5 minutes. Add the tomato paste, cook 2 minutes, then stir in the pretzels.

De glaze with Guinness, scraping up the brown its on the bottom of the pan; stir in broth, Dijon and Worcestershire. Return the seared roast to the pot and bring the liquid to a simmer. Cover the pot, then transfer to the oven; braise roast for 2 hours. After 2 hours, remove pot from the oven and turn the roast over.

Add: Carrot chunks, then cover and return pot to the oven. Braise another 45 minutes, or until the meat is spoon-tender. To serve, transfer roast and carrots to a platter and cut meat into chunks. Bring sauce to a simmer, skimming off fat, then spoon it over the roast.

Garnish with: parsley.  You can certainly add potatoes to this during the cooking process, but it is so good served over mashed potatoes.

enJoy!

Friday, January 6, 2012

Calling all Wino's

Chicken Braised in White Wine
 

This meal is best described as Chicken stew. This simple braised dish gets a boost from chicken demi-glace. A secret ingredient of professional chefs, demi-glace is made by simmering stock and aromatics for hours so it develops intense, complex flavors. It can be purchased at Williams Sonoma, or at a specialty grocer. I can't always afford this pricier ingredient, so I cheat! I use half Chicken bullion and half vegetable bullion, which seems to be a suitable substitute.

Ingredients:
1/3 cup all-purpose flour
Salt and freshly ground pepper, to taste
1 chicken, 3 to 4 lb., cut into 8 serving pieces
3 Tbs. extra-virgin olive oil
1 yellow onion, thinly sliced
8 oz. white button mushrooms, quartered
3 cups white wine
2 Tbs. chicken demi-glace
3 garlic cloves, crushed
4 fresh flat-leaf parsley sprigs
3 fresh thyme sprigs
1 bay leaf
1 lb. red-skinned potatoes, cut into quarters
Directions:
Preheat an oven to 375ºF.

In a large bowl, combine the flour, salt and pepper. Add the chicken and toss to coat evenly.

In a deep sauté pan or Dutch oven over medium heat, warm the olive oil. Add half of the chicken and brown on all sides, 3 to 4 minutes total. Transfer to a plate. Brown the remaining chicken and transfer to the plate.

Add the onion and mushrooms to the pan and cook, stirring occasionally, until golden, about 5 minutes. Remove the pan from the heat and add the wine and demi-glace. Set the pan over high heat and bring to a boil, stirring to dissolve the demi-glace, about 5 minutes.

Return the chicken to the pan and add the garlic, parsley, thyme, bay leaf and potatoes. Bring to a boil, cover and transfer to the oven. Cook until the chicken is very tender, about 45 minutes. Season with salt and pepper, remove the bay leaf and serve immediately.

Saturday, December 24, 2011

Arancini


I love the Holiday's. As you can guess, the food is the best and most memorable part for me. It is both what I enjoy doing and what I enjoy giving the most. Thank God for such delicious food stuffs with which to spend countless hours perfecting over the holidays. I certainly hope that my friends and family have as much fun consuming as I do creating. I think they do, there are usually smiles on faces :-) Christmas Eve at home is usually spent munching on a plethora of appetizer like things, while making more appetizer like things and wrapping gifts and just about any game you can think of that takes 4 or more people is being played.


Bare with me here while I take a time warp....A couple of years ago, part of my family took a proper voyage to Europe. My poor brother in law was the only male amongst 4 women.  He has since dubbed it estrogen fest 07'. One of the grand prizes of our trip was stumbling on "Arancini" in the Italian convenience stores. I know... strange that one of the more memorable items of Italian food was found at the gas'n'go. Oh well. They are such a cool little treat.  They are now one of our favorite appetizers, and I find myself preparing to make them this Christmas Eve.  Hopefully Neil doesn't have unpleasant memories...I wouldn't want to ruin this day...never mind, Arancini are so good they can only shade his memory so as to remember only the pleasantness of our grand journey.


These fried stuffed rice balls, or "little oranges," in Italian (due to their shape), are found all over Italy but are especially favored in the south, where oranges are a major crop. Available both in restaurants and at street stands, arancini are delicious either piping hot or at room temperature. At home, they make a satisfying first course. If you like, make them even smaller and pass them on appetizer trays. The best way to work with the sticky rice mixture is to use one hand for holding and shaping the rice, while keeping the other hand somewhat clean for handling the spoon.

Ingredients:
1/4 cup extra-virgin olive oil, plus more for frying
1 small yellow onion, finely chopped
1 celery stalk, finely chopped
1 carrot, finely chopped
1/2 lb. ground veal and/or pork
1 cup dry Marsala wine
1/2 cup shelled fresh English peas
1 cup meat stock
1 Tbs. tomato paste
2 Tbs. minced fresh flat-leaf parsley
Salt and freshly ground pepper, to taste
3 cups Baldo or Arborio rice
6 eggs
1/4 cup freshly grated Parmigiano-Reggiano cheese
Pinch of saffron threads, soaked in 2 Tbs. warm water
1 cup all-purpose flour
1 cup fine dried bread crumbs
Directions:


In a large, heavy saucepan over medium heat, warm the 1/4 cup olive oil. Add the onion, celery and carrot and sauté until softened, about 4 minutes. Add the meat, breaking it up, and cook until browned, 4 to 5 minutes. Add the wine and deglaze the pan, stirring to scrape up the browned bits from the bottom. Increase the heat to high and cook until the liquid is reduced by half. Add the peas, stock, tomato paste and parsley, reduce the heat to medium-low and cook until thickened, 15 to 20 minutes. Season with salt and pepper. Set aside.

Bring a large pot of salted water to a boil over medium heat. Add the rice and cook, stirring often, until tender to the bite but slightly firm in the center, 15 to 20 minutes, depending on the variety. Drain and spread the rice on a baking sheet to cool.

Preheat an oven to 200°F.

In a small bowl, beat 3 of the eggs. Place the cooled rice in another bowl and add the beaten eggs, the cheese and the saffron mixture. Mix well. Season with salt and pepper.

Place a large spoonful of the rice mixture in your palm, pack it lightly and make an indentation in the center. Place a tablespoonful of the meat mixture in the indentation. Cover the meat with another large spoonful of rice, sealing the meat in the center. Pack firmly into balls about 2 inches in diameter. Set aside.

In a small, deep bowl, beat the remaining 3 eggs. Put the flour and bread crumbs into separate small, deep bowls. Coat each rice ball with flour, then with egg and then crumbs. Set aside.

In a large fry pan over medium heat, pour in oil to a depth of 1 inch and heat until the oil shimmers. Working in batches, fry the rice balls, turning frequently, until golden brown, 3 to 4 minutes. Using a slotted spoon, transfer to paper towels to drain. Keep the rice balls warm in the oven while frying the remaining balls. Serve immediately. Makes about 24 balls; serves 6.

Adapted from Williams-Sonoma Collection Series, Risotto, by Pamela Sheldon Johns (Simon & Schuster, 2002).

Saturday, November 26, 2011

Creamy Turkey Verde Enchiladas

So a 25 pound turkey was definitely not made for 7 people.  But of course why would you only make enough for Thanksgiving dinner.  After all, the leftovers are just as much a ritual as the actual day of turkey feast.  This year I decided to make turkey enchiladas with some of the left over meat.  After a challenge from a friend, we decided to have a turkey enchilada off.  I'm happy to report that mine won!  I also made yellow rice to go along with them, and it's the perfect combination!

Enchilada's:

3 cups of turkey meat, cut into bite size pieces
1 Tablespoon of Oil
1/2 onion, finely chopped
1 large clove  of garlic
1 teaspoon cumin
1 cup salsa verde
1 cup sour cream
1 Tablespoon chopped jalapenos (from the can)
1 cup of cotija cheese, shredded or crumbled
1/2 cup shredded Mexican cheese blend
1/2 cup cream cheese
1/2 cup turkey or chicken stock
10 6 inch corn tortillas

Rice:

2 cups long grain rice
1 Tbs turmeric powder
4 cups water
1 tsp salt
2 bay leaves
2 garlic cloves smashed

For rice:

Combine all ingredients, over high heat.  As soon as it comes to a boil, reduce the heat and simmer for 20 minutes or until  water is absorbed.  Fluff with a fork and serve alongside the enchiladas.

For Enchiladas:

In a small bowl, combine the salsa verde, 1/2 cup of the sour cream and the chopped jalapenos.  Stir together and set aside.

In a saute pan over high heat, place 1 Tablespoon of oil, heat to shimmering and place the onions and garlic and cumin in the pan.  Reduce heat to medium and stir until the onions are soft and translucent.

Add the chopped turkey meat, half of the salsa mixture, half of the cream cheese, half of the shredded cheese and half of the cotija cheese, and turkey stock.  Heat to combine and melt the cheeses.

Grease a 9x13 inch pan.

Working with one tortilla at a time, fill with 2 heaping tablespoons of filling, roll them cigar style and lay seam side down in the casserole dish.  Continue until all of the tortillas are filled.  Pour the remaining salsa mixture over the top and top with all of the remaining cheeses and sour cream.

Place in 350 degree oven and bake for 20 minutes or until the cheese is golden and bubbly.

Serve with rice and enJoy!

Sunday, November 20, 2011

Gobble Gobble


As is evidenced by this blog, I LOVE to cook! I inherited this gift from my mother and as a result, holiday's around our house means food wars between my mother and me. Only occasionally does it get ugly. We usually manage to keep the peace. Our wars always revolve around the food choices. My mom tends to prefer the traditional and I tend to prefer the out of ordinary fare. I might make mashed potatoes, but they will have browned butter, or boursin cheese stirred in. In order to keep the peace, I have made it my goal to find ways to improve on texture and taste while keeping the traditional aspect alive. This turkey recipe is the absolute best way to make a turkey hands down. Please don't feel like you have to use the exact same flavors as I have listed here, but the basic recipe is essential. I like the flavors of classic sage, rosemary and thyme, but I don't like them to be too bold, so I have toned them down with the addition of citrus, apples and onions. But please don't skip on the brining process, it surely creates the most moist and flavorful meat possible.


Please note that you will need to plan ahead, as the brining process takes 24 hours prior to cooking your turkey.

Brine:

  • 3/4 cup salt
    1/2 cup brown sugar
    2 oranges, quartered
    2 lemons, quartered
  • 2 Apples, quartered
  • 4 sprigs thyme
    4 sprigs rosemary
  • 4 leaves of fresh sage
  • One large onion sliced thickly
  •  
  • To make the brining solution, dissolve the salt and sugar in 2 gallons of cold water in a non-reactive container (such as a clean bucket or large stockpot, or a clean, heavy-duty, plastic garbage bag.) Add the oranges, lemons, apples, thyme, rosemary, sage and onion.

    Note: if you have a big turkey and need more brine than this, use 1/2 cup salt and 1/2 cup brown sugar for every gallon of water.


    Turkey Ingredients:
    8 Tbs. (1 stick) unsalted butter, at room
    temperature
    2 tsp fresh Thyme
  • 2 teaspoons fresh rosemary
  • 1 tsp fresh sage
  • Finely grated zest of 2 oranges
    Finely grated zest of 1 lemon
    1/2 tsp. freshly ground pepper

    Directions:

    Remove the turkey from the brine, rinse well with cold water, pat dry and let the turkey stand at room temperature for 1 hour. 

Position a rack in the lower third of an oven and preheat to 400°F.

In a bowl, using a wooden spoon, beat the butter, herbs, orange zest, salt and pepper until well blended. Set aside.

Gently slide your fingers under the breast to loosen the skin and work your fingers down to the thigh, being careful not to tear the skin. Spread one-third of the butter mixture evenly under the skin. Spread one-third of the mixture inside the body cavity, then spread the remaining mixture evenly on the outside of the turkey. Truss the turkey if desired using kitchen twine.

Place the turkey, breast side up, on a rack in a large roasting pan and roast for 45 minutes. Reduce the heat to 325°F and continue roasting, basting every 30 minutes with the pan juices. After about 2 1/2 hours of total roasting time, begin testing for doneness by inserting an instant-read thermometer into the thickest part of the breast and thigh, away from the bone. The breast should register 165°F and the thigh, 175°F. If the breast begins to cook too quickly, tent it loosely with aluminum foil. Total roasting time should be 3 to 3 3/4 hours.

Transfer the turkey to a carving board, cover loosely with foil and let rest for 20 minutes before carving.

Serves 12 hungry people.