Showing posts with label Chicken. Show all posts

Wednesday, January 23, 2013

Lemon, chicken, basil, rice soup

Hey people,

It's been a while I know.  I'm sorry for the lengthy absence, but I do have a treat for you!  A delightfully light and fresh soup that will wake you up and make you feel all warm and fuzzy at the same time.  I must give my mother most of the credit for this recipe.  When we lived in California, we used to go to this great little bakery cafe that served the most amazing soups.  The idea comes from them, but they certainly were not about to share their recipes.  Mom mastered this recipe, with feedback from me of course :-)  It is so healthy, surprisingly different, and scrumptiously simple with it's bright fresh flavors.  And in case you didn't know, this is a play on a classic Greek soup with lemon and basil, but I've never seen one quite like this.  It's also a super fast and easy weeknight meal.


Lemon Chicken, Basil, Rice Soup


1 Rotisserie Chicken, or  1 pound of cooked chicken, roughly chopped 2 Tbsp. Olive Oil 1 medium Onion, diced 2 ribs of Celery, diced 4 lemons (peel the skin off of one and juice all of them, reserving the juice separately from the peel) 1 stalk of Lemon Grass, chopped into large pieces. 20 large leaves of fresh basil (no substitute), roughly chopped 5 Cups of chicken  Stock ½ cup of uncooked Rice Salt PepperDirections:Start by removing the meat from your rotisserie chicken and chopping it so that no piece is bigger than 1 inch square.  Set your chicken aside.In a large soup pot, heat the oil over high heat until it is starting to shimmer.  Add the Onion and celery  and reduce the heat to medium.  Stir until both vegetables are starting to brown slightly.Add the chicken, chicken stock and rice, lemon peel, lemon grass, half of the basil and half of the lemon juice and stir to combine.Reduce the heat to low and cover.  Let simmer on low until the rice is cooked through.At this point you will need to pull out the lemon peel and chunks of lemon grass, as best you can, and throw them away.Stir in the remaining lemon juice and basil, taste and serve.

IMPORTANT:  It has come to my attention that if you use a lemon press, you will get way more lemon juice from your lemons, making this soup way too tart.  If you use a lemon press, please cut the lemon juice in half.

*Note, the strength of chicken broth can vary greatly.  I use "Better than Bullion" to create my own broth on most occasions.  If you taste your soup and it seems a little weak, add a little more broth or bullion to create a more rich chicken flavor.  The same applies to the lemon and basil.  If you like a more lemony or basily (not sure that's a word) flavor, add more lemon juice or basil.  The success of all recipes are subjective to your own personal tastes and should be adjusted to suit your own preferences.

Serves 8

EnJoy!

Monday, August 20, 2012

Thai Pineapple Yellow Curry

I LOVE ASIAN FOOD!  If you've perused my other posts, or if you've ever eaten out with me more than once, you can't miss this fact.  It just feels like home to me.

I have several Thai restaurants that I love, each of them for different reasons (or actually dishes).  One of them makes a delicious yellow pineapple curry.  It's a little sweet, has plenty of heat (without burning off your taste buds) and make the most satisfying meal!

Here is my attempt at copying it.  I came really close and this is really easy to make.

2 Medium sized Chicken Breasts (sliced as thinly as you can)
One yellow onion (cut into 1 or 11/2 inch chunks)1 Cup of Bamboo shoots (or one can, I think they're all the same size)
Half of a yellow Bell Pepper (cut into 1 inch chunks)
Half of a red Bell Pepper (cut into 1 inch chunks

2 cans of coconut milk
2 Tbs Oil
2 Tbs Thai Yellow Curry Paste
1 Tbs. Soy Sauce
2 Tbs brown sugar (Palm if you have it, but who keeps that on hand?)
3-4 Kaffir Lime leaves (I know who keeps these either?  Go to your local Asian food store and ask for them.  They are usually kept in the freezer or refrigerator section)
1 tsp. of Lemon grass powder (also at the Asian food store)
Juice of two limes
1 Cup of pineapple chunks
1 Cup of frozen peas
8 large leaves of basil, chiffonade (or cut into ribbons)
Salt to taste

Start out this recipe by preparing all of your ingredients.  This dish goes pretty quickly, and it's important not to overcook the vegetables in this dish.  If you have all of your items washed, cut, measure and lined up, you will find that you are much more successful.

Start with your chicken:  I find it easier to get a really nice thin slice on the chicken meat if I cut it when it is slightly frozen still.  It's not so squirmy that way and tends to stay in one place easier and enables you to get a nice thin slice.  It's also important to get thin uniform slices, as your cooking time on the chicken is dependent on it.  One of the secrets to a good curry is to have tender moist chicken, and the technique I describe later is important to this dish.

Cut the remaining items and place in separate bowls for one by one addition to the pan.

In a large saute pan (or wok) over high heat, combine the oil, curry paste and Kaffir lime leaves.  Stir fry until the paste is starting to bubble and become fragrant.  It's ok if it doesn't actually bubble, you just want to make sure to toast all of the spices in the curry paste and open up their flavor a bit.  As soon as you can smell a pungent aroma of curry and lime, you are ready for the next step.

Stir in the onion and let cook for one minute.  Add the two cans of coconut milk and bring to a simmer.  Add your bell peppers, and all of the seasonings.  Stir well and bring back to a boil.  Stir in the chicken and the remaining ingredients (except the pineapple, peas and basil).  Cook until the chicken is cooked through.  This will not take long, as the chicken will cook fairly fast, depending on how thin you cut the meat.  Once the chicken is cooked, turn off the heat and stir in the pineapple, peas and basil.

Check the flavor your curry and adjust the seasonings.  If you like it a little sweeter, you might want to add more sugar.  If you like it saltier, add more soy or salt.  If it tastes dull and heavy, add more lime.

Serve over steamed white rice and enjoy!

There are a lot of ingredients you can put in this dish.  Just remember that the more ingredients you add, the more sauce you will need to make.  If you simply substitute ingredients (I.E. baby corn instead of bamboo shoots) you should be fine with the recipe as is.
Some good additions are: baby corn, potato chunks, snow peas.

P.S.  I'll add pics to this later.

Sunday, March 4, 2012

I think I might actually be asian.

Ignore the pasty white skin and strawberry blonde hair...Since I was born in Indonesia, I grew up with a great love and respect for all things asian.  Obviously there is quite a variety from Vietnamese to Thai to Chinese to Indonesian, but the spices and techniques are so similar.  Not to mention the types of vegetables available in those countries does differ a decent amount to what we naturally have here in the US.  Fortunately, I am not alone, and we can really find relatively decent substitutes here in the US for those foreign ingredients.  This recipe is one that I came up with in an attempt to copy a Vietnamese dish at a wonderful restaurant in Portand Oregan called Pho Van.  While this is not the same as thier delicious dish, it is really good.  And since I'm asian at heart, I will say that this recipe can definitley compete.

Stef's Pho Vietnamese lemongrass chicken

4 boneless skinless chicken breasts
1/2 cup honey
4 Tbs vegetable oil
2 Large cloves of garlic, minced
2 teaspoons fresh ginger, finely grated
1 teaspoon white pepper
1 teaspoon chicken bullion paste
2 stalks of lemon grass, sliced in 1/4 inch slices
juice of one lime

Directions:

Place all ingredients (except chicken) in a bowl and stire to combine well.  Place the chicken breasts in a large zip loc bag and pound each one out so that it is equal thickness all the way across the piece (about 1/2 to 3/4 of an inch).  I use my rolling pin to achieve this, but you could also use a can of soup, a heavy metal bowl or a small fry pan.  Once you have pounded out your chicken, place your marinade in the bag along with the chicken.  Squeeze out all of the excess air and seal your bag.  Let marinade for at least one hour, and preferably 4-6.

Preheat your bbq grill to medium high heat and place each chicken breast on the grill.  Cook for 3-4 minutes on each side, basting with reserved marinade every few minutes.  Once chicken is cooked through, remove from grill and let rest for 5 minutes before serving.  This ensures that the chicken retain it's juicyness.

Serve over steamed white rice

Friday, January 6, 2012

Calling all Wino's

Chicken Braised in White Wine
 

This meal is best described as Chicken stew. This simple braised dish gets a boost from chicken demi-glace. A secret ingredient of professional chefs, demi-glace is made by simmering stock and aromatics for hours so it develops intense, complex flavors. It can be purchased at Williams Sonoma, or at a specialty grocer. I can't always afford this pricier ingredient, so I cheat! I use half Chicken bullion and half vegetable bullion, which seems to be a suitable substitute.

Ingredients:
1/3 cup all-purpose flour
Salt and freshly ground pepper, to taste
1 chicken, 3 to 4 lb., cut into 8 serving pieces
3 Tbs. extra-virgin olive oil
1 yellow onion, thinly sliced
8 oz. white button mushrooms, quartered
3 cups white wine
2 Tbs. chicken demi-glace
3 garlic cloves, crushed
4 fresh flat-leaf parsley sprigs
3 fresh thyme sprigs
1 bay leaf
1 lb. red-skinned potatoes, cut into quarters
Directions:
Preheat an oven to 375ºF.

In a large bowl, combine the flour, salt and pepper. Add the chicken and toss to coat evenly.

In a deep sauté pan or Dutch oven over medium heat, warm the olive oil. Add half of the chicken and brown on all sides, 3 to 4 minutes total. Transfer to a plate. Brown the remaining chicken and transfer to the plate.

Add the onion and mushrooms to the pan and cook, stirring occasionally, until golden, about 5 minutes. Remove the pan from the heat and add the wine and demi-glace. Set the pan over high heat and bring to a boil, stirring to dissolve the demi-glace, about 5 minutes.

Return the chicken to the pan and add the garlic, parsley, thyme, bay leaf and potatoes. Bring to a boil, cover and transfer to the oven. Cook until the chicken is very tender, about 45 minutes. Season with salt and pepper, remove the bay leaf and serve immediately.

Monday, November 7, 2011

Simple Herb Roast Chicken

There is something very warm and comforting about a simple roasted chicken on a chilly autumn evening.  It need not be complicated in flavor or preparation, but there are a few key points to getting it just right.  Start with a high-quality bird, season it correctly, cook it at a high temperature for the ideal amount of time for its weight and let it rest before you carve it.

The herbs listed here are ones that make a good simple roast chicken, but of course you can add any of your favorite herbs.  I sometimes add lemon or orange slices as well.  Slice them very thinly and slip a few slices under the skin with your herbs, and don't forget to stick a few in the cavity as well.  The juices from the citrus will steam on the inside, infusing the chicken with even more flavor.

This can be served with just about anything from mashed potatoes to buttered noodles and of course the leftovers are just as versatile.  Use them for soup, chicken tacos, sandwiches, pasta... Be creative!


This is my niece Elisa in Versailles in 2007
I know this has nothing to do with Roast Chicken, but I'm feeling nostalgic.
France is incredibly beautiful in the fall.
 Ingredients:
1 roasting chicken, 4 to 5 lb.
2 teaspoons chopped fresh rosemary, plus one 4-inch sprig
1 Tablespoon chopped fresh thyme, plus 3 bushy sprigs
1 Tablespoon chopped parsley (preferably Italian Flat leaf)
1/4 cup extra-virgin olive oil, plus more for rubbing
Freshly ground pepper, to taste
2 tsp. kosher salt, plus more, to taste
1/2 small yellow onion
3 large garlic cloves
Directions:


Preheat the oven to 425°F. Cut off the chicken’s tail with kitchen scissors. Remove the giblets and remove the excess skin and fat from the cavity and neck.

In a small bowl, stir together the chopped rosemary, thyme and parsley and the 1/4 cup olive oil and season with pepper. Gently separate the chicken skin from the meat with your fingers, being careful not to tear the skin. Loosen the skin above the cavity the same way, reaching in as far as possible to loosen the skin on the tops of the thighs and legs. Slip the herb mixture between the skin and flesh, and rub it evenly over the exposed meat, covering it as much as possible. Pat the skin back into place and tuck the wing tips under.

Season the cavity with the 2 tsp. salt, then stuff with the herb sprigs, onion and garlic, pushing them in as far as they will go. Tie the legs together with kitchen string.

Rub the outside of the chicken with olive oil and season well with salt. Place, breast side up, in a roasting pan. Roast the chicken until the juices run clear when the thigh is pierced, about 1 hour and 10 minutes (12 to 15 minutes per pound), or a thermometer inserted in the thickest part of the thigh (not touching bone) registers 165°F. THIS IS VERY IMPORTANT:  Let the chicken rest for 15 minutes before carving.  This will allow the juices in the chicken to re-distribute into the meat, making it stay moist, tender and flavorful.

enJoy!

Wednesday, October 26, 2011

Hot Tamale!

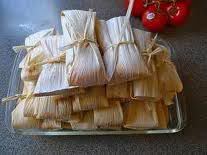
I LOVE me some tamales!  My best friend is half Mexican and as is Mexican tradition, tamales were always served at the Christmas festivities in her house. Man, I loved going over there on Christmas eve to partake in the treat! One year I asked her mom how she made her tamales and she looked at me (like I was crazy), laughed and said "I'm not stupid, I order them from Cuca's!" (Cuca's being the local taco stand in town). She told me that they were way too labor intensive for her and that Cuca made them perfectly already. After hearing this, I concluded that tamale making was not going to be in my future and was best left to Cuca's.

As my cooking skills and love of food grew over the years, I decided to take on the
challenge. I made them once at home and decided that although they are time consuming, they really are not difficult and the reward is awesome. A few years ago, I mentioned to one of my lady friends that I wanted to make them again. She quickly invited herself to join, we added another friend to the party and began a new tradition of our own. Although we do not reserve this adventure for holidays, we do always have an adventure! Tamale day is sort of like Las Vegas for us (much less glamorours of course)...what happens or is said on tamale day, stays on tamale day!  It's an awesome opportunity to have some quality friend time. ***Due to this motto, I don't have pictures of the assembly process, but will get some posted soon***

All that said, while tamales are not hard to make, they are quite time consuming, so be prepared for a half day adventure. This recipe will yield 24-30 tamales, depending on how heavy handed you are with the dough. Even if you only want a few, I recommend that you go ahead and make a whole recipe, as they freeze beautifully!  And while your at it, double the recipe and keep the extras frozen for a nice afternoon treat, or a quick weekday lunch.

Ingredients:

For the Meat Filling:
2 Pounds of boneless skinless chicken breasts
8 dried California chili peppers (can be found in the Mexican aisle of your grocery store)
1/2 teaspoon chili powder
1 teaspoons ground cumin
1/2 teaspoon ground coriander
1/4 teaspoon cayenne pepper
1 teaspoon kosher salt
1 small yellow onion, finely chopped
3 cloves of garlic, minced
1/2 cup of chicken stock
1/4 cup of juice from canned jalapenos

For the wrappers:
One bag of dried corn husks (can be found in the Mexican aisle of your local grocer)

For the dough:
4 cups of masa harina
2 1/4 teaspoons baking powder
1 teaspoon of cumin
2/3 cup of lard
2 to 4 cups chicken broth
Salt to taste

Directions:

For the wrappers:
About an hour prior to the start of your adventure, place the husks in a large bowl or pot and cover completely in hot water. Soak the husks until they are soft and pliable, at least 45 minutes and up to 2 hours.

For the Meat:
Place the chicken breasts in a pot and cover with water.  Bring it to a boil, reduce the heat to keep them simmering and let cook until the chicken is cooked through (approx 20 minutes).

While this is happening, place your dried chili peppers in a small pan and cover with water.  Bring the water to a boil and turn off the heat.  Cover the pan and let the chili's steep for 15 minutes to soften them.  Once they have softened, remove the stems and place them in a blender (reserving the liquid).  Add the remaining "filling" ingredients and blend, adding the reserved chili liquid, one Tablespoon at a time, until a thick sauce is formed (about the same thickness as a gravy).

Remove the chicken from the hot liquid and let cool until handleable.  Shred the chicken and toss it with the red chili sauce.  Season to taste with salt and pepper.  Remember that this is the main source of flavor for your tamale, so make sure it is slightly hotter and more seasoned than you think it should be.  The bland flavor of the masa will tone down the flavor of the chicken mixture once it is combined.

For the dough:
In the bowl of a mixer, place the lard and mix on high speed until it is slightly fluffy looking.  Add the masa, cumin, and baking powder and mix to combine. Gradually add enough of the reserved cooking liquid, 2 to 4 cups to create a dough that is like thick mashed potatoes. The dough should be moist but not wet. Cover the bowl with a damp towel and set aside until ready to use.

To assemble the tamales:

Remove two corn husk from the water and pat to remove excess water. Lay them together with the wide sides overlapping each other.  Spread about 1/3 of a cup of the dough in an even layer across the middle of the husk to within 1/2-inch of the edges. Spoon about a heaping Tablespoon of the meat mixture in a line down the center of the dough. Roll the husk so the dough surrounds the meat and fold the ends under to finish creating the tamale.  Use a string or a thin strip of the corn husks to tie aournd the middle of the tamale, holding the loose ends in place.  Repeat until all the husks, dough and filling are used.

To steam the tamales:

Place a steamer basket in the bottom of an 11-quart pot and add enough water to come to the bottom of the basket. Layer the tamales on top of the steamer basket.  Bring the water to a boil over medium heat, then cover and reduce the heat to maintain a simmer. Check the water level every 15 to 20 minutes, and add boiling water by pouring down the side of the pot, if necessary. Steam until the dough is firm and pulls away from the husk easily, 1 to 1 1/2 hours.

Serve warm. Store leftover tamales, tightly wrapped in plastic wrap, in the freezer, for up to a month. To reheat, remove the plastic wrap and steam until heated through.

Friday, July 22, 2011

Keri's Birthday dinner...I think it was pretty successful

Keri is one of my dearest and closest friends, and her birthday was the perfect time for me to show her my love through food.  I personally believe that every celebratory event cannot be truly successful without great food.  I know that people and conversation are equally important in creating memories, but my gift is making happy tummies, and I'm always ready and hopeful of making that happen :-)

When I asked Keri if she had any requests for her birthday, this is what she said:  pasta with white sauce, chicken, artichokes, asparagus and mushrooms.  Great, there are 100 ways to do this, what will make this one special?  So off my imagination goes....Here is what I came up with;  you will want to plan ahead, as this requires the chicken to brine for 8 hours or overnight, but it's worth it.

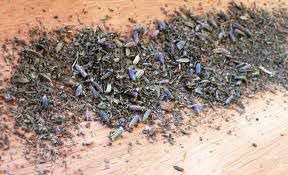
Herbes de Provence


Let's call it "Pasta A'La Keri"
Linguine with grilled chicken in a white wine cream sauce.


 Ingredients:
3 boneless skinless chicken breasts
1 Tbs Herbs De Provence 
2 tsp Salt

Cream Sauce (can be made ahead and refrigerated):
4 cups of heavy cream
4 cups of your favorite chardonnay (don't cheap out here, the flavor is important)
2 shallots (small dice)
2 cloves garlic (sliced)
1 Tbs butter
1/2 tsp salt
1 tsp lemon juice (preferably fresh, as it has a more subtle flavor than bottled)


1 bundle fresh asparagus (trimmed)
1 Tbs Olive oil
salt and pepper to taste

1 pkg of baby Bella mushrooms (sliced, and of course you can substitute any mushroom of your choice)
1 Tbs butter

1 lb fresh pasta (I used Butonni fresh linguine that can be found in the refrigerator section of your local grocery)
1 can of artichoke hearts (preferably in water and drained)


Procedure:
Place your chicken breasts in a large zip loc bag.  Add enough water to cover them along with your herbs De Provence and salt.  Refrigerate for 8-24 hours.

For the cream sauce: Place the Tbs of butter in a medium sized skillet or saucepan and place over medium heat.  Once the butter has melted, add your shallots and garlic.  Saute until the onions are transparent.  Add the wine and bring to a boil.  Reduce the wine until it there is about a 1/2 cup of liquid left in the pan.  Add your cream and bring slowly to a simmer.  Let reduce until the sauce clings to the back of your spoon.  Should be the consistency of gravy, but not as thick as an Alfredo sauce.  Add the lemon juice and salt and set aside.

Remove the chicken and pat dry.  There should be some of the herbs still clinging to the meat, do not wipe them all away.  Prepare your asparagus by trimming, washing and coating with olive oil, salt and pepper.

Grill chicken and asparagus over a medium heat grill until cooked through.

Fill a large pan with water and bring to a boil.  Add your pasta and cook as directed.

Saute the mushrooms in a small saute pan with butter and salt until the mushrooms are soft and slightly browned.

Here comes the magic:

Plate your meal by making a nest of pasta, lay your chicken breast off to the side and garnish with the asparagus, mushrooms and artichokes.  Top with sauce and enjoy!
This is where we should have
been eating this meal