Hey everyone,
Sorry it's been a while since I've posted. However, there's new goodies on my NEW blog over at www.thedirtydishblog.com. Check it out!

Monday, August 19, 2013


Wednesday, January 23, 2013
Lemon, chicken, basil, rice soup
Hey people,
It's been a while I know. I'm sorry for the lengthy absence, but I do have a treat for you! A delightfully light and fresh soup that will wake you up and make you feel all warm and fuzzy at the same time. I must give my mother most of the credit for this recipe. When we lived in California, we used to go to this great little bakery cafe that served the most amazing soups. The idea comes from them, but they certainly were not about to share their recipes. Mom mastered this recipe, with feedback from me of course :-) It is so healthy, surprisingly different, and scrumptiously simple with it's bright fresh flavors. And in case you didn't know, this is a play on a classic Greek soup with lemon and basil, but I've never seen one quite like this. It's also a super fast and easy weeknight meal.
IMPORTANT: It has come to my attention that if you use a lemon press, you will get way more lemon juice from your lemons, making this soup way too tart. If you use a lemon press, please cut the lemon juice in half.
It's been a while I know. I'm sorry for the lengthy absence, but I do have a treat for you! A delightfully light and fresh soup that will wake you up and make you feel all warm and fuzzy at the same time. I must give my mother most of the credit for this recipe. When we lived in California, we used to go to this great little bakery cafe that served the most amazing soups. The idea comes from them, but they certainly were not about to share their recipes. Mom mastered this recipe, with feedback from me of course :-) It is so healthy, surprisingly different, and scrumptiously simple with it's bright fresh flavors. And in case you didn't know, this is a play on a classic Greek soup with lemon and basil, but I've never seen one quite like this. It's also a super fast and easy weeknight meal.
Lemon Chicken, Basil, Rice Soup
1 Rotisserie Chicken, or
1 pound of cooked chicken, roughly chopped
2 Tbsp. Olive Oil
1 medium Onion, diced
2 ribs of Celery, diced
4 lemons (peel the skin off of one and juice all of them, reserving the juice
separately from the peel)
1 stalk of Lemon Grass, chopped into large pieces.
20 large leaves of fresh basil (no substitute), roughly chopped
5 Cups of chicken Stock
½ cup of uncooked Rice
Salt
PepperDirections:Start by removing the meat from your rotisserie chicken and
chopping it so that no piece is bigger than 1 inch square. Set your chicken aside.In a large soup pot, heat the oil over high heat until it is
starting to shimmer. Add the Onion and
celery and reduce the heat to
medium. Stir until both vegetables are
starting to brown slightly.Add the chicken, chicken stock and rice, lemon peel, lemon grass,
half of the basil and half of the lemon juice and stir to combine.Reduce the heat to low and cover. Let simmer on low until the rice is cooked
through.At this point you will need to pull out the lemon peel and
chunks of lemon grass, as best you can, and throw them away.Stir in the remaining lemon juice and basil, taste and serve.
IMPORTANT: It has come to my attention that if you use a lemon press, you will get way more lemon juice from your lemons, making this soup way too tart. If you use a lemon press, please cut the lemon juice in half.
*Note, the strength of chicken broth can vary greatly. I use "Better than Bullion" to create my own broth on most occasions. If you taste your soup and it seems a little weak, add a little more broth or bullion to create a more rich chicken flavor. The same applies to the lemon and basil. If you like a more lemony or basily (not sure that's a word) flavor, add more lemon juice or basil. The success of all recipes are subjective to your own personal tastes and should be adjusted to suit your own preferences.
Serves 8
EnJoy!
Thursday, September 13, 2012
Sweet Potato Muffins
Ah! Fall is in the air again. How I love it so. Pumpkin Spice latte's are back on tap at your local Starbucks and all things pumpkin are here again. There's a crispness in the air that makes me feel oddly awake and sleepy at the same time. And of course this begins the fall winter baking spree that I go on every year. Lucky for you guys, I like sharing :-) Here's my recipe for Sweet Potato muffins, that are brushed with butter and rolled in cinnamon sugar. I have had similar muffins (not sweet potato) called donut muffins. They are moist, not too sweet on the inside, but have a sweet sugar coating on the outside to balance it out. It's a beautiful thing the donut muffin! I have also made these with pumpkin puree before and they are equally delicious, although I will caution you to make sure you get pumpkin puree and not pumpkin pie filling. They are different.
Sweet potato puree can be found in cans at the grocery store. It is usually in a similar place as the pureed pumpkin. If in doubt, ask a store attendant, as they can both be a little challenging to find. Don't give up though! These are sooo good.
For the muffins:
2-1/2 cups all-purpose flour
1-1/2 teaspoons baking powder
1/2 teaspoon table salt
1/4 teaspoon baking soda
1/4 teaspoon ground nutmeg
1/3 cup buttermilk
1/3 cup whole milk
1/2 cup sweet potato puree (from 1 baked potato)
1 teaspoon vanilla extract
1 stick unsalted butter, room temperature
3/4 cup brown sugar
2 eggs
For the topping:
1/2 cup sugar
2 teaspoons ground cinnamon
1/4 teaspoon ground nutmeg
1 stick unsalted butter, melted
Preheat oven to 350*
For the muffins:
2-1/2 cups all-purpose flour
1-1/2 teaspoons baking powder
1/2 teaspoon table salt
1/4 teaspoon baking soda
1/4 teaspoon ground nutmeg
1/3 cup buttermilk
1/3 cup whole milk
1/2 cup sweet potato puree (from 1 baked potato)
1 teaspoon vanilla extract
1 stick unsalted butter, room temperature
3/4 cup brown sugar
2 eggs
For the topping:
1/2 cup sugar
2 teaspoons ground cinnamon
1/4 teaspoon ground nutmeg
1 stick unsalted butter, melted
Preheat oven to 350*
In a medium bowl, combine all purpose flour, baking powder, salt, baking soda and ground nutmeg. Set aside.
In a large pour-able measuring cup combine whole milk, buttermilk, sweet potato puree and vanilla extract. Set aside.
In a large bowl, cream unsalted butter and brown sugar with an electric mixer, until fluffy. Add eggs, one at a time, beating well after each addition. Alternately mix in dry and wet ingredients into the butter, starting and ending with the dry; mix only until each addition is incorporated, being careful not to overmix.
Coat a muffin pan with nonstick spray and fill muffin cups 1/2 full. Bake for 20-25 minutes, or until a toothpick inserted into the center of the muffin comes out clean.
While muffins are baking, in a shallow bowl, combine granulated sugar, ground cinnamon and ground nutmeg. In a separate bowl, melt 1 stick of unsalted butter.
When the muffins are cool enough to handle, yet still warm, remove muffins from the pan, brush them completely with the melted butter, and roll in the sugar mixture to coat.
In a large pour-able measuring cup combine whole milk, buttermilk, sweet potato puree and vanilla extract. Set aside.
In a large bowl, cream unsalted butter and brown sugar with an electric mixer, until fluffy. Add eggs, one at a time, beating well after each addition. Alternately mix in dry and wet ingredients into the butter, starting and ending with the dry; mix only until each addition is incorporated, being careful not to overmix.
Coat a muffin pan with nonstick spray and fill muffin cups 1/2 full. Bake for 20-25 minutes, or until a toothpick inserted into the center of the muffin comes out clean.
While muffins are baking, in a shallow bowl, combine granulated sugar, ground cinnamon and ground nutmeg. In a separate bowl, melt 1 stick of unsalted butter.
When the muffins are cool enough to handle, yet still warm, remove muffins from the pan, brush them completely with the melted butter, and roll in the sugar mixture to coat.
Thursday, August 23, 2012
Dark Chocolate, Pistachio, Smoked Sea Salt Cookies
When I was making the bacon chocolate chip cookies in my previous post, I decided to take advantage of the process and make these cookies as well. My friend Jenn sent me a link to Joythebaker's recipe, which served as inspiration. I'll giver her credit for the flavor combo, but I'll take credit for the cookie recipe :-)
These were my favorite of the two. They are deliciously sweet and savory!
2 1/8 cups of flour
1/2 teaspoon of salt
1/2 teaspoon of baking soda
12 Tablespoons of butter, melted and cooled slightly
1 cup of brown sugar
1/2 cup sugar
1 egg
1 egg yolk
2 teaspoons vanilla extract
1 cup of dark chocolate chunks
1 1/2 cups chopped pistachio (shelled of course)
2 tsp of smoked sea salt (mine was alder wood smoked, but any kind will work)
Preheat the oven to 325 degrees and place the rack in the center of the oven.
In a microwave safe bowl, melt the butter and set aside to cool slightly. In the bowl of a mixer, place both of the sugars and butter. Mix on medium high speed until slightly lighter in color and well incorporated. Add the eggs and vanilla and stir to incorporate. Add the remaining dry ingredients (except the chocolate chunks) and blend well to incorporate. Remove your bowl from the mixer and fold in the chocolate chunks. **I buy the large bars of dark chocolate from Trader Joes and cut my own chunks from the bar.
Use a 1/4 cup measuring cup to scoop out the dough and place on an un greased cookie sheet. Sprinkle each cookie with a couple of pinches of the smoked salt and bake for 15-18 minutes.
******Please note that I have had reports of people making these regular chocolate chip cookies and having them go flat. Two things: Firstly, check your baking soda, it does go bad over time and can effect the rise of your cookie. Secondly, these cookies do best when you make them big. If you use less than a 1/4 cup of dough per cookie, you need to crank up the heat to 350 and start checking them for doneness at 10 minutes. The baking temperature and time noted above are designed for a larger cookie.
These were my favorite of the two. They are deliciously sweet and savory!
2 1/8 cups of flour
1/2 teaspoon of salt
1/2 teaspoon of baking soda
12 Tablespoons of butter, melted and cooled slightly
1 cup of brown sugar
1/2 cup sugar
1 egg
1 egg yolk
2 teaspoons vanilla extract
1 cup of dark chocolate chunks
1 1/2 cups chopped pistachio (shelled of course)
2 tsp of smoked sea salt (mine was alder wood smoked, but any kind will work)
Preheat the oven to 325 degrees and place the rack in the center of the oven.
In a microwave safe bowl, melt the butter and set aside to cool slightly. In the bowl of a mixer, place both of the sugars and butter. Mix on medium high speed until slightly lighter in color and well incorporated. Add the eggs and vanilla and stir to incorporate. Add the remaining dry ingredients (except the chocolate chunks) and blend well to incorporate. Remove your bowl from the mixer and fold in the chocolate chunks. **I buy the large bars of dark chocolate from Trader Joes and cut my own chunks from the bar.
Use a 1/4 cup measuring cup to scoop out the dough and place on an un greased cookie sheet. Sprinkle each cookie with a couple of pinches of the smoked salt and bake for 15-18 minutes.
******Please note that I have had reports of people making these regular chocolate chip cookies and having them go flat. Two things: Firstly, check your baking soda, it does go bad over time and can effect the rise of your cookie. Secondly, these cookies do best when you make them big. If you use less than a 1/4 cup of dough per cookie, you need to crank up the heat to 350 and start checking them for doneness at 10 minutes. The baking temperature and time noted above are designed for a larger cookie.
Bacon, Chocolate Chip Cookies...Yep you heard me.
In order to convince a couple of co-workers to get something fairly important taken care of, in a somewhat timely manner (meaning on my time line :-)), I bribed them with cookies. Of course in my desire to please, I asked what kind of cookie they would like. Since they are three men, one of them says "I don't care, something with bacon". Ah ha! A challenge? Yes please!
I vacillated between a peanut butter/bacon cookie and this one, but eventually settled on the bacon chocolate chip. It received rave reviews (especially from the guys), and I have even adjusted my recipe below based on a few suggestions and my own opinions. Mine didn't have enough bacon :-)
2 1/8 cups of flour
1/2 teaspoon of salt
1/2 teaspoon of baking soda
12 Tablespoons of butter, melted and cooled slightly
1 cup of brown sugar
1/2 cup sugar
1 egg
1 egg yolk
2 teaspoons vanilla extract
1 cup of dark chocolate chunks
1 lb of bacon
Preheat the oven to 325 degrees and place the rack in the center of the oven.
Chop the bacon into a semi small dice, and place in a frying pan over high heat. Fry until the bits are light golden brown (remember that once they are cooking in the dough, they will brown a bit more as well, so don't over do them). Remove from the pan and drain on a paper towel. Set aside until cool.
In a microwave safe bowl, melt the butter and set aside to cool slightly. In the bowl of a mixer, place both of the sugars and butter. Mix on medium high speed until slightly lighter in color and well incorporated. Add the eggs and vanilla and stir to incorporate. Add the remaining dry ingredients (except the chocolate chunks) and blend well to incorporate. Remove your bowl from the mixer and fold in the chocolate chunks. **I buy the large bars of dark chocolate from Trader Joes and cut my own chunks from the bar.
Use a 1/4 cup measuring cup to scoop out the dough and place on an un greased cookie sheet. Bake for 15-18 minutes.
******Please note that I have had reports of people making these regular chocolate chip cookies and having them go flat. Two things: Firstly, check your baking soda, it does go bad over time and can effect the rise of your cookie. Secondly, these cookies do best when you make them big. If you use less than a 1/4 cup of dough per cookie, you need to crank up the heat to 350 and start checking them for doneness at 10 minutes. The baking temperature and time noted above are designed for a larger cookie.
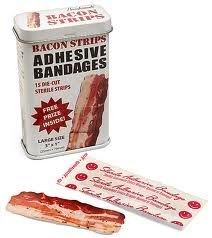 |
| Everything's better with Bacon, even your owies! |
I vacillated between a peanut butter/bacon cookie and this one, but eventually settled on the bacon chocolate chip. It received rave reviews (especially from the guys), and I have even adjusted my recipe below based on a few suggestions and my own opinions. Mine didn't have enough bacon :-)
2 1/8 cups of flour
1/2 teaspoon of salt
1/2 teaspoon of baking soda
12 Tablespoons of butter, melted and cooled slightly
1 cup of brown sugar
1/2 cup sugar
1 egg
1 egg yolk
2 teaspoons vanilla extract
1 cup of dark chocolate chunks
1 lb of bacon
Preheat the oven to 325 degrees and place the rack in the center of the oven.
Chop the bacon into a semi small dice, and place in a frying pan over high heat. Fry until the bits are light golden brown (remember that once they are cooking in the dough, they will brown a bit more as well, so don't over do them). Remove from the pan and drain on a paper towel. Set aside until cool.
In a microwave safe bowl, melt the butter and set aside to cool slightly. In the bowl of a mixer, place both of the sugars and butter. Mix on medium high speed until slightly lighter in color and well incorporated. Add the eggs and vanilla and stir to incorporate. Add the remaining dry ingredients (except the chocolate chunks) and blend well to incorporate. Remove your bowl from the mixer and fold in the chocolate chunks. **I buy the large bars of dark chocolate from Trader Joes and cut my own chunks from the bar.
Use a 1/4 cup measuring cup to scoop out the dough and place on an un greased cookie sheet. Bake for 15-18 minutes.
******Please note that I have had reports of people making these regular chocolate chip cookies and having them go flat. Two things: Firstly, check your baking soda, it does go bad over time and can effect the rise of your cookie. Secondly, these cookies do best when you make them big. If you use less than a 1/4 cup of dough per cookie, you need to crank up the heat to 350 and start checking them for doneness at 10 minutes. The baking temperature and time noted above are designed for a larger cookie.
Monday, August 20, 2012
Thai Pineapple Yellow Curry
I LOVE ASIAN FOOD! If you've perused my other posts, or if you've ever eaten out with me more than once, you can't miss this fact. It just feels like home to me.
I have several Thai restaurants that I love, each of them for different reasons (or actually dishes). One of them makes a delicious yellow pineapple curry. It's a little sweet, has plenty of heat (without burning off your taste buds) and make the most satisfying meal!
Here is my attempt at copying it. I came really close and this is really easy to make.
2 Medium sized Chicken Breasts (sliced as thinly as you can)
One yellow onion (cut into 1 or 11/2 inch chunks)1 Cup of Bamboo shoots (or one can, I think they're all the same size)
Half of a yellow Bell Pepper (cut into 1 inch chunks)
Half of a red Bell Pepper (cut into 1 inch chunks
2 cans of coconut milk
2 Tbs Oil
2 Tbs Thai Yellow Curry Paste
1 Tbs. Soy Sauce
2 Tbs brown sugar (Palm if you have it, but who keeps that on hand?)
3-4 Kaffir Lime leaves (I know who keeps these either? Go to your local Asian food store and ask for them. They are usually kept in the freezer or refrigerator section)
1 tsp. of Lemon grass powder (also at the Asian food store)
Juice of two limes
1 Cup of pineapple chunks
1 Cup of frozen peas
8 large leaves of basil, chiffonade (or cut into ribbons)
Salt to taste
Start out this recipe by preparing all of your ingredients. This dish goes pretty quickly, and it's important not to overcook the vegetables in this dish. If you have all of your items washed, cut, measure and lined up, you will find that you are much more successful.
Start with your chicken: I find it easier to get a really nice thin slice on the chicken meat if I cut it when it is slightly frozen still. It's not so squirmy that way and tends to stay in one place easier and enables you to get a nice thin slice. It's also important to get thin uniform slices, as your cooking time on the chicken is dependent on it. One of the secrets to a good curry is to have tender moist chicken, and the technique I describe later is important to this dish.
Cut the remaining items and place in separate bowls for one by one addition to the pan.
In a large saute pan (or wok) over high heat, combine the oil, curry paste and Kaffir lime leaves. Stir fry until the paste is starting to bubble and become fragrant. It's ok if it doesn't actually bubble, you just want to make sure to toast all of the spices in the curry paste and open up their flavor a bit. As soon as you can smell a pungent aroma of curry and lime, you are ready for the next step.
Stir in the onion and let cook for one minute. Add the two cans of coconut milk and bring to a simmer. Add your bell peppers, and all of the seasonings. Stir well and bring back to a boil. Stir in the chicken and the remaining ingredients (except the pineapple, peas and basil). Cook until the chicken is cooked through. This will not take long, as the chicken will cook fairly fast, depending on how thin you cut the meat. Once the chicken is cooked, turn off the heat and stir in the pineapple, peas and basil.
Check the flavor your curry and adjust the seasonings. If you like it a little sweeter, you might want to add more sugar. If you like it saltier, add more soy or salt. If it tastes dull and heavy, add more lime.
Serve over steamed white rice and enjoy!
There are a lot of ingredients you can put in this dish. Just remember that the more ingredients you add, the more sauce you will need to make. If you simply substitute ingredients (I.E. baby corn instead of bamboo shoots) you should be fine with the recipe as is.
Some good additions are: baby corn, potato chunks, snow peas.
P.S. I'll add pics to this later.
I have several Thai restaurants that I love, each of them for different reasons (or actually dishes). One of them makes a delicious yellow pineapple curry. It's a little sweet, has plenty of heat (without burning off your taste buds) and make the most satisfying meal!
Here is my attempt at copying it. I came really close and this is really easy to make.
2 Medium sized Chicken Breasts (sliced as thinly as you can)
One yellow onion (cut into 1 or 11/2 inch chunks)1 Cup of Bamboo shoots (or one can, I think they're all the same size)
Half of a yellow Bell Pepper (cut into 1 inch chunks)
Half of a red Bell Pepper (cut into 1 inch chunks
2 cans of coconut milk
2 Tbs Oil
2 Tbs Thai Yellow Curry Paste
1 Tbs. Soy Sauce
2 Tbs brown sugar (Palm if you have it, but who keeps that on hand?)
3-4 Kaffir Lime leaves (I know who keeps these either? Go to your local Asian food store and ask for them. They are usually kept in the freezer or refrigerator section)
1 tsp. of Lemon grass powder (also at the Asian food store)
Juice of two limes
1 Cup of pineapple chunks
1 Cup of frozen peas
8 large leaves of basil, chiffonade (or cut into ribbons)
Salt to taste
Start out this recipe by preparing all of your ingredients. This dish goes pretty quickly, and it's important not to overcook the vegetables in this dish. If you have all of your items washed, cut, measure and lined up, you will find that you are much more successful.
Start with your chicken: I find it easier to get a really nice thin slice on the chicken meat if I cut it when it is slightly frozen still. It's not so squirmy that way and tends to stay in one place easier and enables you to get a nice thin slice. It's also important to get thin uniform slices, as your cooking time on the chicken is dependent on it. One of the secrets to a good curry is to have tender moist chicken, and the technique I describe later is important to this dish.
Cut the remaining items and place in separate bowls for one by one addition to the pan.
In a large saute pan (or wok) over high heat, combine the oil, curry paste and Kaffir lime leaves. Stir fry until the paste is starting to bubble and become fragrant. It's ok if it doesn't actually bubble, you just want to make sure to toast all of the spices in the curry paste and open up their flavor a bit. As soon as you can smell a pungent aroma of curry and lime, you are ready for the next step.
Stir in the onion and let cook for one minute. Add the two cans of coconut milk and bring to a simmer. Add your bell peppers, and all of the seasonings. Stir well and bring back to a boil. Stir in the chicken and the remaining ingredients (except the pineapple, peas and basil). Cook until the chicken is cooked through. This will not take long, as the chicken will cook fairly fast, depending on how thin you cut the meat. Once the chicken is cooked, turn off the heat and stir in the pineapple, peas and basil.
Check the flavor your curry and adjust the seasonings. If you like it a little sweeter, you might want to add more sugar. If you like it saltier, add more soy or salt. If it tastes dull and heavy, add more lime.
Serve over steamed white rice and enjoy!
There are a lot of ingredients you can put in this dish. Just remember that the more ingredients you add, the more sauce you will need to make. If you simply substitute ingredients (I.E. baby corn instead of bamboo shoots) you should be fine with the recipe as is.
Some good additions are: baby corn, potato chunks, snow peas.
P.S. I'll add pics to this later.
Wednesday, August 15, 2012
Summer Halibut
I made a recipe this last week, of halibut, roasted with sweet onions, citrus and fresh herbs. It was so delicious and simple, that it felt slightly sinful to eat. Remember that fresh (truly fresh) fish will not have that unpleasant "fishy" flavor, so if yours has that, you may want to seek a more reputable fish monger. Alternately, you could visit a lake or stream near you. After doing a little research, check out what I found out about the health benefits of halibut:
Just Two Servings of Omega-3-rich Fish a Week Can Lower Triglycerides
Protection against Fatal Heart Arrhythmia
Help Prevent and Control High Blood Pressure
Stroke Prevention
Eating Fish Daily Provides Substantially More Protection against Heart Attack
Fish, Fruit and Vegetables Protective against Deep Vein Thrombosis, Pulmonary Embolism
Promote Detoxification
Cancer Protection
Lower Your Risk of Leukemia, Multiple Myeloma, and Non-Hodgkin Lymphoma
Halibut and Other Fatty Fish Highly Protective against Kidney Cancer
Fish -- Food for Better Thought as We Age
Omega-3 Fat, DHA, Destroys Alzheimer's Plaques
Omega-3-Rich Diet Improves Mood, Reduces Depression

Just Two Servings of Omega-3-rich Fish a Week Can Lower Triglycerides
Protection against Fatal Heart Arrhythmia
Help Prevent and Control High Blood Pressure
Stroke Prevention
Eating Fish Daily Provides Substantially More Protection against Heart Attack
Fish, Fruit and Vegetables Protective against Deep Vein Thrombosis, Pulmonary Embolism
Promote Detoxification
Cancer Protection
Lower Your Risk of Leukemia, Multiple Myeloma, and Non-Hodgkin Lymphoma
Halibut and Other Fatty Fish Highly Protective against Kidney Cancer
Fish -- Food for Better Thought as We Age
Omega-3 Fat, DHA, Destroys Alzheimer's Plaques
Omega-3-Rich Diet Improves Mood, Reduces Depression
Who knew eating something so delicious would be so good for you?
I recommend serving this fresh steamed or sauteed green beans, and roasted potatoes or quinoa.
I recommend serving this fresh steamed or sauteed green beans, and roasted potatoes or quinoa.
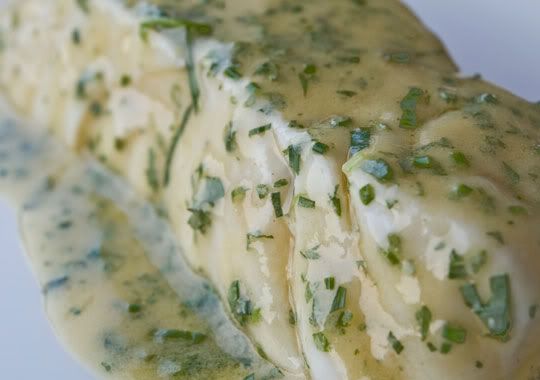
4 (approximately) 6oz pieces of fresh Halibut
1 Tbs. Olive Oil
One sweet onion (white or yellow)
1tsp. garlic powder
2 Tbs. butter
2 tsp. fresh thyme
1 Tbs. fresh chives
2 lemons
Salt and Pepper
Preheat your oven to 400*
Slice the onion into thin rings and arrange them in the bottom of a 9x13 casserole dish. Drizzle them with the Olive Oil and sprinkle lightly with salt and pepper. Place the pan in the oven to roast for 15 minutes.
In the mean time, season the fish with salt and pepper, garlic powder, half of the herbs, and the zest of one of the lemons and the juice of one lemon. Lay each fillet in the pan on top of the onions and place in the oven to roast. You should roast it for 10 minutes per inch of thickness on your halibut steaks.
While your fish is roasting, combine the remaining herbs and juice of the lemon along with the 2Tbs of butter. Stir to combine.
Once your fish is done roasting, remove it from the oven. Divide the herb butter in 4ths, and spread each portion over the fish fillets.
Plate, serve and EnJoy!
Monday, June 11, 2012
Fire roasted Artichokes
Three artichokes
4 large sprigs of basil, or about 20 leaves (fresh only please)
4 sprigs of thyme (fresh only please)
Three medium lemons
1 cup of mayonnaise
1/3 cup Olive Oil
2 tsps garlic powder
½ tsp onion powder
Dash of seasoned salt (or regular if you prefer)
Cut your artichoke(s) in half the long way. I recommend using a sharp knife, as this can be a bit hard to do without sacrificing one or two of your fingers. Ok, I exaggerate, just be careful is all I’m saying. Place your artichoke(s) in a pan (whatever size is appropriate for your quantity of artichokes you have chosen) Fill with water just to cover the artichokes. Place 2 sprigs of basil, all of the thyme and one lemon in the water with your artichoke (squeeze the lemon first, but go ahead and throw the whole thing in there as well. Bring this to a boil and simmer on medium heat until the stem and heart of the artichoke are tender when you insert a knife in them.
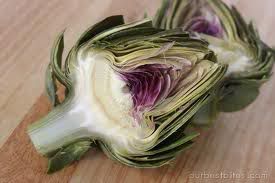 |
| The purple part and the small white area under it is the "choke". It is not enjoyable to eat. |
Meanwhile, combine the olive oil, garlic powder, onion powder, seasoned salt and set aside.
Now make your dipping sauce by chopping the remaining basil leaves (finely). Combine the basil, mayonnaise, juice from one lemon and stir to combine. Remember that you have another half a lemon to use if you desire, this part is all about personal preference. Taste the dipping sauce and see if it’s lemony enough for you. I prefer mine super tart, so I go all the way with my lemon, but you might prefer a little less.
Drain the artichoke(s) and place on a cookie sheet. Take each half and scrape out the choke (the weird hairy part in the center), leaving a little well in the middle. Be careful not to remove the heart, that would be tragic. Brush each half on both sides with the oil/garlic powder mixture and place on a hot grill or under the broiler for about 3 minutes per side. The goal is to get the edges slightly charred all the way around. Char equals flavor, so please feel free to be liberal with your broiling. Once you have a liberal amount of charrage ( I know it’s not a word), remove them from the heat and let cool slightly before serving.
Suggestion: You may want to double the dipping sauce. I know it seems like a lot, but people tend to be extra generous in their dipping on this one.
Monday, May 14, 2012
Italian Cream Cupcakes...These are not overrated. Yummm!
I have a strange relationship with baked goods I learned to cook before I learned to bake, so my cooking skills have always been a step ahead of my baking ones. Which at some point made me really angry. Why can I cook a pretty okay four course meal but fail miserably at making a decent cookie? Good baking contains some sort of magic ingredient, which arguably is different for every baker and every baked good. Sometimes it's patience, sometimes it's extra cinnamon, who knows? Here's the most important thing I learned along the way. Great and inspired cooking requires flexibility and willingness to experiment with flavor and ingredients, but great baking is a precise science, you HAVE to learn the science before you can get creative with the "extras". My recommendation: Subscribe to America's test Kitchen online and really pay attention to the articles. Then, start making their recipes and you'll start to understand what their lessons are really talking about.
On the other side of the coin, I don't really have a sweet tooth. I will bake all day long in an attempt to make the prefect cookie, but I will only actually end up eating one or maybe two of them. I typically give the rest away. So if I can actually manage to bake something that I want to eat more than one of, I know it's a success. My least favorite baked good is cake. Which means cupcakes are in the same category. They're just too much sweetness...Until I met this recipe. It is adapted from a recipe out of Cuisine at Home magazine (not sure of the issue).
Despite my non-favor of cake, I'll eat at least two of these!
Ingredients
3 cups all-purpose flour
1 teaspoon baking powder
1/2 teaspoon baking soda
1/2 teaspoon table salt
2 cups sugar
1 1/2 cups unsalted butter, softened ( 1 1/2 c)
6 eggs, separated
2 tablespoons hazelnut syrup
1 1/2 teaspoons vanilla extract
1 cup buttermilk
2 cups sweetened flaked coconut, toasted
1 cup hazelnuts, toasted, skinned, chopped
Cream Cheese Icing
16 ounces cream cheese, softened
1 1/2 cups unsalted butter, softened ( 1 1/ c)
3 tablespoons hazelnut syrup
3 tablespoons heavy cream
1 lb powdered sugar, sifted
Directions
Preheat oven to 325F
Line two 12 cup muffin pans with paper liners and coat with nonstick spray.
Separate the egg, placing the whites in a mixing bowl with wire whips. Whip the egg whites in a mixing bowl until stiff peaks form. Set aside for later use.
Whisk together flour, baking powder, baking soda and salt in a bowl; set aside.
Cream sugar and butter in a stand mixer with a paddle attachment on medium speed until white and fluffy; about 5 minutes. Add egg yolks, 1 at a time, beating well after each addition; mix in syrup and vanilla until incorporated. Mix 1/2 the dry ingredients into butter mixture, followed by the buttermilk, then remaining dry ingredients; blend until just incorporated. Fold in the egg whites, coconut and hazelnuts. Fill each muffin cup to the top and bake for 20-25 minutes or until a toothpick inserted into the center comes out clean. Remove from the oven and let cool for 20 minutes then remove from the pan and let cool the rest of the way.
Cream sugar and butter in a stand mixer with a paddle attachment on medium speed until white and fluffy; about 5 minutes. Add egg yolks, 1 at a time, beating well after each addition; mix in syrup and vanilla until incorporated. Mix 1/2 the dry ingredients into butter mixture, followed by the buttermilk, then remaining dry ingredients; blend until just incorporated. Fold in the egg whites, coconut and hazelnuts. Fill each muffin cup to the top and bake for 20-25 minutes or until a toothpick inserted into the center comes out clean. Remove from the oven and let cool for 20 minutes then remove from the pan and let cool the rest of the way.
For the icing:
Place butter and cream cheese and cream in a mixer and stir until well combined and slightly fluffy. Add the remaining ingredients and stir until well combined and stiff enough to hold it's shape on your cupcakes. Adding powdered sugar as necessary.
Top each cupcake with toasted coconut and sprinkle with hazelnuts.
Friday, April 27, 2012
Arancini Chapter Two
I hosted a Bridal Shower recently and one of the requests was for these (to die for) little Italian treats. I've posted about Arancini before, so I will spare you the story (go here to read my adventure).
Arancini is a delish little Italian treat (directly translated to mean "little orange").
This is simply one of the most perfect appetizers ever. There are endless combinations of what you can stir into these little bites. I got this recipe from Williams Sonoma but made it my own, as I really always try to do when cooking. I personally find deep reward in re-writing something to suit either my taste buds in the moment, or sometimes just to fit the ingredients I happen to have on hand.
2 1/2 cups chicken broth
1 cup medium-grain white rice such as Arborio
1 Tbs. unsalted butter
Pinch of sea salt
1/2 cup grated Parmigiano-Reggiano cheese
1 whole egg
2 cups fine dried bread crumbs (preferably Panko)
2 oz. Salami
2 oz. fresh mozzarella cheese, chopped into 1/2-3/4 inch cubes
1/2 cup of fresh basil, roughly chopped
Olive or canola oil for deep-frying
2 1/2 cups chicken broth
1 cup medium-grain white rice such as Arborio
1 Tbs. unsalted butter
Pinch of sea salt
1/2 cup grated Parmigiano-Reggiano cheese
1 whole egg
2 cups fine dried bread crumbs (preferably Panko)
2 oz. Salami
2 oz. fresh mozzarella cheese, chopped into 1/2-3/4 inch cubes
1/2 cup of fresh basil, roughly chopped
Olive or canola oil for deep-frying
Directions:
In a saucepan over high heat, bring the broth to a boil. Stir in the rice, butter and salt. Cover, reduce the heat to low and cook until the liquid is absorbed and the rice is tender, 18 to 20 minutes.
Transfer the rice to a bowl and stir in the Parmigiano-Reggiano and salami. Let cool slightly, then stir in the whole egg, and basil. Let cool completely. This is an important step. Don't cheat and try doing it while the rice is still warm. Disaster will ensue...
Spread the bread crumbs on a dinner plate.
Moisten your hands with water. Scoop up 1/4 cup of the rice mixture and place it in the cupped palm of one hand. Flatten out the mixture slightly and place 1 piece of the mozzarella in the center. Mold the rice over the cheese, adding a bit more rice if needed to cover it completely. Shape the rice into a ball. Roll the ball in the bread crumbs and place on a rack. Continue with the remaining ingredients to make 12 balls total. Rinse your hands frequently to prevent the rice from sticking to them. Let the balls dry on the rack for at least 15 minutes before frying, or refrigerate the balls for up to 24 hours.
Position a rack in the middle of an oven and preheat to 200°F. Line a large baking sheet with paper towels and set it next to the stove. Pour the olive oil to a depth of 3 inches into a deep, heavy fry pan and heat to 375°F on a deep-frying thermometer. The oil must cover the balls by at least 1 inch so they will cook evenly and not burst.
Using a slotted spoon or wire skimmer, gently lower a few of the rice balls into the hot oil, being careful not to crowd the pan. Fry until golden brown and crisp all over, about 2 minutes. Using the slotted spoon, transfer the arancini to the prepared baking sheet and place in the oven to keep warm. Fry the remaining arancini in the same way, allowing the oil to return to the original frying temperature before adding the next batch.
Arrange the arancini on a warmed platter and serve immediately, or hold in the warm oven for up to 1 hour before serving.
In a saucepan over high heat, bring the broth to a boil. Stir in the rice, butter and salt. Cover, reduce the heat to low and cook until the liquid is absorbed and the rice is tender, 18 to 20 minutes.
Transfer the rice to a bowl and stir in the Parmigiano-Reggiano and salami. Let cool slightly, then stir in the whole egg, and basil. Let cool completely. This is an important step. Don't cheat and try doing it while the rice is still warm. Disaster will ensue...
Spread the bread crumbs on a dinner plate.
Moisten your hands with water. Scoop up 1/4 cup of the rice mixture and place it in the cupped palm of one hand. Flatten out the mixture slightly and place 1 piece of the mozzarella in the center. Mold the rice over the cheese, adding a bit more rice if needed to cover it completely. Shape the rice into a ball. Roll the ball in the bread crumbs and place on a rack. Continue with the remaining ingredients to make 12 balls total. Rinse your hands frequently to prevent the rice from sticking to them. Let the balls dry on the rack for at least 15 minutes before frying, or refrigerate the balls for up to 24 hours.
Position a rack in the middle of an oven and preheat to 200°F. Line a large baking sheet with paper towels and set it next to the stove. Pour the olive oil to a depth of 3 inches into a deep, heavy fry pan and heat to 375°F on a deep-frying thermometer. The oil must cover the balls by at least 1 inch so they will cook evenly and not burst.
Using a slotted spoon or wire skimmer, gently lower a few of the rice balls into the hot oil, being careful not to crowd the pan. Fry until golden brown and crisp all over, about 2 minutes. Using the slotted spoon, transfer the arancini to the prepared baking sheet and place in the oven to keep warm. Fry the remaining arancini in the same way, allowing the oil to return to the original frying temperature before adding the next batch.
Arrange the arancini on a warmed platter and serve immediately, or hold in the warm oven for up to 1 hour before serving.
Friday, March 30, 2012
Bolognese
Ok listen people. I'm not Italian, but I'll be honest and say that I kind of wish I was. Who doesn't love pasta and wine with every meal? Actually, didn't I say this about rice in my "I think I might be Asian" post? I digress...
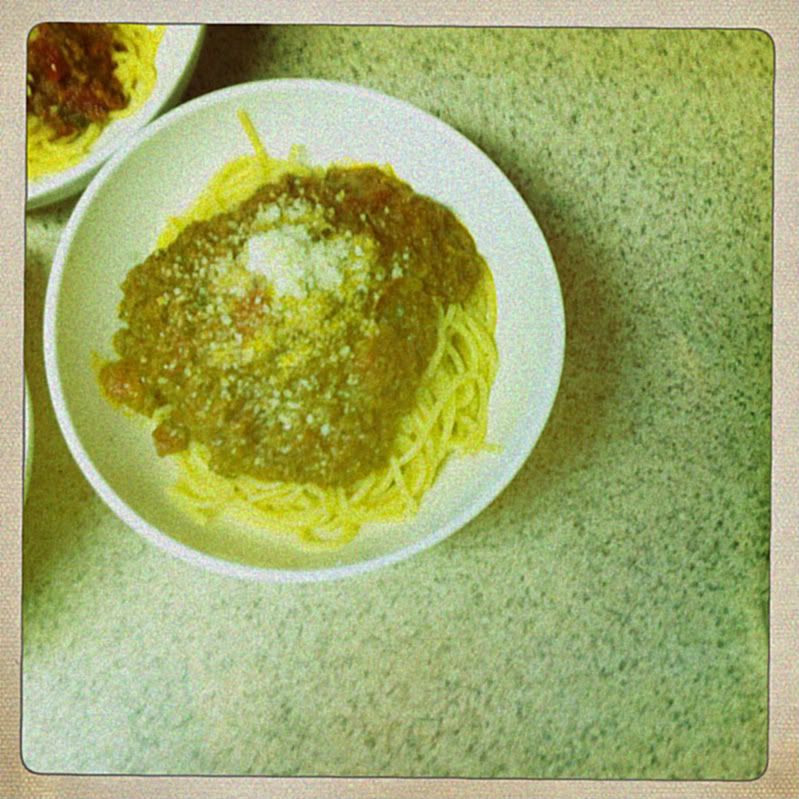 In my quest to make a good Bolognese, I looked at 100,000 recipes, and they each claimed to be the only "authentic" version on the web. *(read this in a monotone voice like the pharmaceutical commercials please...I make no claims about this being an "authentic" recipe, so if you happen to have the only authentic Bolognese recipe on earth and mine doesn't even come close to it, please don't yell at me) All I will say is that it's pretty darn yummy.
 I used Anne Burrell's recipe from the food network as a starting point, but modified it a decent amount. I also included heavy cream in my recipe as half called for some sort of cream or ricotta and half did not. I love cream, so I included it. I found that it rounded out the richness of this sauce really nicely.
I recommend making this in a large deep saute pan of sorts (see pics). The large surface area makes it easier to do all the reducing and sauteeing that is required in this recipe.
4 Carrots
3 Stalks of Celery
One large Onion
5 Cloves of Garlic
1 Pound of Ground Beef
1 Pound of Ground Pork
1 Tbs. Porcini Mushroom Powder (this is totally optional, as I realize most people will not have this on hand.
It does however add a nice earthy flavor to your sauce)
2 small cans of Tomato Paste
2 Regular cans of Diced tomatoes
1/2 cup of chopped fresh basil
3 Cups of red wine
1/4 cup of heavy cream (you don't have to add this, but why not?)
2 small cans of Tomato Paste
2 Regular cans of Diced tomatoes
1/2 cup of chopped fresh basil
3 Cups of red wine
1/4 cup of heavy cream (you don't have to add this, but why not?)
 |
| I wonder who will comment on this picture first? |
Add the ground beef and season again generously with salt. BROWN THE BEEF! Brown food tastes good. Don't rush this step. Cook another 15 to 20 minutes.
Add the tomato paste and cook until brown about 4 to 5 minutes. Add the red wine. Cook until the wine has reduced by half, another 4 to 5 minutes.
Add water to the pan until the water is about 1 inch above the meat. Toss in the bay leaves, thyme and half of the basil and stir to combine everything. Bring to a boil and reduce to a simmer, stirring occasionally. As the water evaporates you may need to add more, about 1 cup at a time. Don't be shy about adding water during the cooking process, you can always cook it out. This is a game of reduce and add more water. This is where big rich flavors develop. If you try to add all the water in the beginning you will have boiled meat sauce rather than a rich, thick meaty sauce. Stir and taste frequently. Season with salt, if needed (you probably will). Simmer for 3 1/2 to 4 hours.
During the last 30 minutes of cooking, bring a large pot of water to a boil over high heat to cook the spaghetti. Pasta water should ALWAYS be well salted. When the water is at a rolling boil add the spaghetti and cook as directed.
In the last 15 minutes of cooking, add the remaining basil and 1/4 of cream. Divide the pasta and sauce into serving bowls or 1 big pasta bowl. Top with remaining grated Parmigiano. Serve immediately.
Sunday, March 4, 2012
I think I might actually be asian.
Ignore the pasty white skin and strawberry blonde hair...Since I was born in Indonesia, I grew up with a great love and respect for all things asian. Obviously there is quite a variety from Vietnamese to Thai to Chinese to Indonesian, but the spices and techniques are so similar. Not to mention the types of vegetables available in those countries does differ a decent amount to what we naturally have here in the US. Fortunately, I am not alone, and we can really find relatively decent substitutes here in the US for those foreign ingredients. This recipe is one that I came up with in an attempt to copy a Vietnamese dish at a wonderful restaurant in Portand Oregan called Pho Van. While this is not the same as thier delicious dish, it is really good. And since I'm asian at heart, I will say that this recipe can definitley compete.
Stef's Pho Vietnamese lemongrass chicken
4 boneless skinless chicken breasts
1/2 cup honey
4 Tbs vegetable oil
2 Large cloves of garlic, minced
2 teaspoons fresh ginger, finely grated
1 teaspoon white pepper
1 teaspoon chicken bullion paste
2 stalks of lemon grass, sliced in 1/4 inch slices
juice of one lime
Directions:
Place all ingredients (except chicken) in a bowl and stire to combine well. Place the chicken breasts in a large zip loc bag and pound each one out so that it is equal thickness all the way across the piece (about 1/2 to 3/4 of an inch). I use my rolling pin to achieve this, but you could also use a can of soup, a heavy metal bowl or a small fry pan. Once you have pounded out your chicken, place your marinade in the bag along with the chicken. Squeeze out all of the excess air and seal your bag. Let marinade for at least one hour, and preferably 4-6.
Preheat your bbq grill to medium high heat and place each chicken breast on the grill. Cook for 3-4 minutes on each side, basting with reserved marinade every few minutes. Once chicken is cooked through, remove from grill and let rest for 5 minutes before serving. This ensures that the chicken retain it's juicyness.
Serve over steamed white rice
Stef's Pho Vietnamese lemongrass chicken
4 boneless skinless chicken breasts
1/2 cup honey
4 Tbs vegetable oil
2 Large cloves of garlic, minced
2 teaspoons fresh ginger, finely grated
1 teaspoon white pepper
1 teaspoon chicken bullion paste
2 stalks of lemon grass, sliced in 1/4 inch slices
juice of one lime
Directions:
Place all ingredients (except chicken) in a bowl and stire to combine well. Place the chicken breasts in a large zip loc bag and pound each one out so that it is equal thickness all the way across the piece (about 1/2 to 3/4 of an inch). I use my rolling pin to achieve this, but you could also use a can of soup, a heavy metal bowl or a small fry pan. Once you have pounded out your chicken, place your marinade in the bag along with the chicken. Squeeze out all of the excess air and seal your bag. Let marinade for at least one hour, and preferably 4-6.
Preheat your bbq grill to medium high heat and place each chicken breast on the grill. Cook for 3-4 minutes on each side, basting with reserved marinade every few minutes. Once chicken is cooked through, remove from grill and let rest for 5 minutes before serving. This ensures that the chicken retain it's juicyness.
Serve over steamed white rice
The Ultimate Man's Meal
I made this pot roast recipe a few years ago at my sisters house and while I expected it to be a hit with her husband, I have to admit I was a little skeptical myself. I do love beer, maybe it's the German, Scottish and Irish in me? My genetics scream for meat, potatoes and copious quantities of glorious wheaty beer. My only downfall is my distaste for Guinness. However, I have finally found a way to use Guinness that pleases me oh so much! Despite my title of this being the "Ultimate Man's Meal", this really does please everyone I've ever made it for, despite gender (including a girls weekend in the mountains).
The cut: Start with a cut of beef from the chuck (shoulder). Since these cuts have a lot of fat marbled within the meat, first trim off the excess from the outside of the roast.
Tip: This recipe calls for you to sear the meat in a pan on top of the stove, then add the remaining ingredients and place the whole shebang in the oven, so think carefully when choosing your pot. Choose one with a tight fitting lid that will be oven safe. Also, when searing the meat, don’t move it around until it is ready to turn! It needs constant contact with the pot to develop that dark, rich flavorful crust.:
1 boneless chuck pot roast 3 – 3 1/2 lbs.
Salt & pepper
2 Tbs olive oil
2 Cups mushrooms, stemmed, halved (3 1/2 ox.)
1 1/2 Cup onions, diced
2/3 Cup carrot, diced
2/3 Cup celery diced
1/4 Cup garlic, thinly sliced
1/2t. red pepper flakes
2 bay leaves
3 Tbs. tomato paste
1/2 Cup pretzels, finely ground (I put them in a zip loc and pound them to a pulp with a rolling pin..Fun and stress relieving :-)
2 bottles Guinness or other dark beer (12 oz. each)
2 Cups beef broth
2 Tbs Dijon mustard
2 Tbs Worcestershire sauce
Preheat oven to 325
Trim: meat of excess fat and season with salt & pepper. Heat oil over medium-high in an ovenproof Dutch oven. Sear roast on both sides until brown, 8-10 minutes total. Remove roast from the pan.
Sweat: Mushrooms, vegetables, and seasonings in the pot for 5 minutes. Add the tomato paste, cook 2 minutes, then stir in the pretzels.
De glaze with Guinness, scraping up the brown its on the bottom of the pan; stir in broth, Dijon and Worcestershire. Return the seared roast to the pot and bring the liquid to a simmer. Cover the pot, then transfer to the oven; braise roast for 2 hours. After 2 hours, remove pot from the oven and turn the roast over.
Add: Carrot chunks, then cover and return pot to the oven. Braise another 45 minutes, or until the meat is spoon-tender. To serve, transfer roast and carrots to a platter and cut meat into chunks. Bring sauce to a simmer, skimming off fat, then spoon it over the roast.
Garnish with: parsley. You can certainly add potatoes to this during the cooking process, but it is so good served over mashed potatoes.
enJoy!
The cut: Start with a cut of beef from the chuck (shoulder). Since these cuts have a lot of fat marbled within the meat, first trim off the excess from the outside of the roast.
Tip: This recipe calls for you to sear the meat in a pan on top of the stove, then add the remaining ingredients and place the whole shebang in the oven, so think carefully when choosing your pot. Choose one with a tight fitting lid that will be oven safe. Also, when searing the meat, don’t move it around until it is ready to turn! It needs constant contact with the pot to develop that dark, rich flavorful crust.:
1 boneless chuck pot roast 3 – 3 1/2 lbs.
Salt & pepper
2 Tbs olive oil
2 Cups mushrooms, stemmed, halved (3 1/2 ox.)
1 1/2 Cup onions, diced
2/3 Cup carrot, diced
2/3 Cup celery diced
1/4 Cup garlic, thinly sliced
1/2t. red pepper flakes
2 bay leaves
3 Tbs. tomato paste
1/2 Cup pretzels, finely ground (I put them in a zip loc and pound them to a pulp with a rolling pin..Fun and stress relieving :-)
2 bottles Guinness or other dark beer (12 oz. each)
2 Cups beef broth
2 Tbs Dijon mustard
2 Tbs Worcestershire sauce
Preheat oven to 325
Trim: meat of excess fat and season with salt & pepper. Heat oil over medium-high in an ovenproof Dutch oven. Sear roast on both sides until brown, 8-10 minutes total. Remove roast from the pan.
Sweat: Mushrooms, vegetables, and seasonings in the pot for 5 minutes. Add the tomato paste, cook 2 minutes, then stir in the pretzels.
De glaze with Guinness, scraping up the brown its on the bottom of the pan; stir in broth, Dijon and Worcestershire. Return the seared roast to the pot and bring the liquid to a simmer. Cover the pot, then transfer to the oven; braise roast for 2 hours. After 2 hours, remove pot from the oven and turn the roast over.
Add: Carrot chunks, then cover and return pot to the oven. Braise another 45 minutes, or until the meat is spoon-tender. To serve, transfer roast and carrots to a platter and cut meat into chunks. Bring sauce to a simmer, skimming off fat, then spoon it over the roast.
Garnish with: parsley. You can certainly add potatoes to this during the cooking process, but it is so good served over mashed potatoes.
enJoy!
Friday, January 6, 2012
Calling all Wino's
Chicken Braised in White Wine
This meal is best described as Chicken stew. This simple braised dish gets a boost from chicken demi-glace. A secret ingredient of professional chefs, demi-glace is made by simmering stock and aromatics for hours so it develops intense, complex flavors. It can be purchased at Williams Sonoma, or at a specialty grocer. I can't always afford this pricier ingredient, so I cheat! I use half Chicken bullion and half vegetable bullion, which seems to be a suitable substitute.
Ingredients:
1/3 cup all-purpose flour
Salt and freshly ground pepper, to taste
1 chicken, 3 to 4 lb., cut into 8 serving pieces
3 Tbs. extra-virgin olive oil
1 yellow onion, thinly sliced
8 oz. white button mushrooms, quartered
3 cups white wine
2 Tbs. chicken demi-glace
3 garlic cloves, crushed
4 fresh flat-leaf parsley sprigs
3 fresh thyme sprigs
1 bay leaf
1 lb. red-skinned potatoes, cut into quarters
Directions:
Preheat an oven to 375ºF.
In a large bowl, combine the flour, salt and pepper. Add the chicken and toss to coat evenly.
In a deep sauté pan or Dutch oven over medium heat, warm the olive oil. Add half of the chicken and brown on all sides, 3 to 4 minutes total. Transfer to a plate. Brown the remaining chicken and transfer to the plate.
Add the onion and mushrooms to the pan and cook, stirring occasionally, until golden, about 5 minutes. Remove the pan from the heat and add the wine and demi-glace. Set the pan over high heat and bring to a boil, stirring to dissolve the demi-glace, about 5 minutes.
Return the chicken to the pan and add the garlic, parsley, thyme, bay leaf and potatoes. Bring to a boil, cover and transfer to the oven. Cook until the chicken is very tender, about 45 minutes. Season with salt and pepper, remove the bay leaf and serve immediately.
Saturday, December 24, 2011
Arancini
I love the Holiday's. As you can guess, the food is the best and most memorable part for me. It is both what I enjoy doing and what I enjoy giving the most. Thank God for such delicious food stuffs with which to spend countless hours perfecting over the holidays. I certainly hope that my friends and family have as much fun consuming as I do creating. I think they do, there are usually smiles on faces :-) Christmas Eve at home is usually spent munching on a plethora of appetizer like things, while making more appetizer like things and wrapping gifts and just about any game you can think of that takes 4 or more people is being played.
Bare with me here while I take a time warp....A couple of years ago, part of my family took a proper voyage to Europe. My poor brother in law was the only male amongst 4 women. He has since dubbed it estrogen fest 07'. One of the grand prizes of our trip was stumbling on "Arancini" in the Italian convenience stores. I know... strange that one of the more memorable items of Italian food was found at the gas'n'go. Oh well. They are such a cool little treat. They are now one of our favorite appetizers, and I find myself preparing to make them this Christmas Eve. Hopefully Neil doesn't have unpleasant memories...I wouldn't want to ruin this day...never mind, Arancini are so good they can only shade his memory so as to remember only the pleasantness of our grand journey.
These fried stuffed rice balls, or "little oranges," in Italian (due to their shape), are found all over Italy but are especially favored in the south, where oranges are a major crop. Available both in restaurants and at street stands, arancini are delicious either piping hot or at room temperature. At home, they make a satisfying first course. If you like, make them even smaller and pass them on appetizer trays. The best way to work with the sticky rice mixture is to use one hand for holding and shaping the rice, while keeping the other hand somewhat clean for handling the spoon.
Ingredients:
1/4 cup extra-virgin olive oil, plus more for frying
1 small yellow onion, finely chopped
1 celery stalk, finely chopped
1 carrot, finely chopped
1/2 lb. ground veal and/or pork
1 cup dry Marsala wine
1/2 cup shelled fresh English peas
1 cup meat stock
1 Tbs. tomato paste
2 Tbs. minced fresh flat-leaf parsley
Salt and freshly ground pepper, to taste
3 cups Baldo or Arborio rice
6 eggs
1/4 cup freshly grated Parmigiano-Reggiano cheese
Pinch of saffron threads, soaked in 2 Tbs. warm water
1 cup all-purpose flour
1 cup fine dried bread crumbs
Directions:
In a large, heavy saucepan over medium heat, warm the 1/4 cup olive oil. Add the onion, celery and carrot and sauté until softened, about 4 minutes. Add the meat, breaking it up, and cook until browned, 4 to 5 minutes. Add the wine and deglaze the pan, stirring to scrape up the browned bits from the bottom. Increase the heat to high and cook until the liquid is reduced by half. Add the peas, stock, tomato paste and parsley, reduce the heat to medium-low and cook until thickened, 15 to 20 minutes. Season with salt and pepper. Set aside.
Bring a large pot of salted water to a boil over medium heat. Add the rice and cook, stirring often, until tender to the bite but slightly firm in the center, 15 to 20 minutes, depending on the variety. Drain and spread the rice on a baking sheet to cool.
Preheat an oven to 200°F.
In a small bowl, beat 3 of the eggs. Place the cooled rice in another bowl and add the beaten eggs, the cheese and the saffron mixture. Mix well. Season with salt and pepper.
Place a large spoonful of the rice mixture in your palm, pack it lightly and make an indentation in the center. Place a tablespoonful of the meat mixture in the indentation. Cover the meat with another large spoonful of rice, sealing the meat in the center. Pack firmly into balls about 2 inches in diameter. Set aside.
In a small, deep bowl, beat the remaining 3 eggs. Put the flour and bread crumbs into separate small, deep bowls. Coat each rice ball with flour, then with egg and then crumbs. Set aside.
In a large fry pan over medium heat, pour in oil to a depth of 1 inch and heat until the oil shimmers. Working in batches, fry the rice balls, turning frequently, until golden brown, 3 to 4 minutes. Using a slotted spoon, transfer to paper towels to drain. Keep the rice balls warm in the oven while frying the remaining balls. Serve immediately. Makes about 24 balls; serves 6.
Adapted from Williams-Sonoma Collection Series, Risotto, by Pamela Sheldon Johns (Simon & Schuster, 2002).
Saturday, November 26, 2011
Creamy Turkey Verde Enchiladas
So a 25 pound turkey was definitely not made for 7 people. But of course why would you only make enough for Thanksgiving dinner. After all, the leftovers are just as much a ritual as the actual day of turkey feast. This year I decided to make turkey enchiladas with some of the left over meat. After a challenge from a friend, we decided to have a turkey enchilada off. I'm happy to report that mine won! I also made yellow rice to go along with them, and it's the perfect combination!
Enchilada's:
3 cups of turkey meat, cut into bite size pieces
1 Tablespoon of Oil
1/2 onion, finely chopped
1 large clove of garlic
1 teaspoon cumin
1 cup salsa verde
1 cup sour cream
1 Tablespoon chopped jalapenos (from the can)
1 cup of cotija cheese, shredded or crumbled
1/2 cup shredded Mexican cheese blend
1/2 cup cream cheese
1/2 cup turkey or chicken stock
10 6 inch corn tortillas
Rice:
2 cups long grain rice
1 Tbs turmeric powder
4 cups water
1 tsp salt
2 bay leaves
2 garlic cloves smashed
For rice:
Combine all ingredients, over high heat. As soon as it comes to a boil, reduce the heat and simmer for 20 minutes or until water is absorbed. Fluff with a fork and serve alongside the enchiladas.
For Enchiladas:
In a small bowl, combine the salsa verde, 1/2 cup of the sour cream and the chopped jalapenos. Stir together and set aside.
In a saute pan over high heat, place 1 Tablespoon of oil, heat to shimmering and place the onions and garlic and cumin in the pan. Reduce heat to medium and stir until the onions are soft and translucent.
Add the chopped turkey meat, half of the salsa mixture, half of the cream cheese, half of the shredded cheese and half of the cotija cheese, and turkey stock. Heat to combine and melt the cheeses.
Grease a 9x13 inch pan.
Working with one tortilla at a time, fill with 2 heaping tablespoons of filling, roll them cigar style and lay seam side down in the casserole dish. Continue until all of the tortillas are filled. Pour the remaining salsa mixture over the top and top with all of the remaining cheeses and sour cream.
Place in 350 degree oven and bake for 20 minutes or until the cheese is golden and bubbly.
Serve with rice and enJoy!
Enchilada's:
3 cups of turkey meat, cut into bite size pieces
1 Tablespoon of Oil
1/2 onion, finely chopped
1 large clove of garlic
1 teaspoon cumin
1 cup salsa verde
1 cup sour cream
1 Tablespoon chopped jalapenos (from the can)
1 cup of cotija cheese, shredded or crumbled
1/2 cup shredded Mexican cheese blend
1/2 cup cream cheese
1/2 cup turkey or chicken stock
10 6 inch corn tortillas
Rice:
2 cups long grain rice
1 Tbs turmeric powder
4 cups water
1 tsp salt
2 bay leaves
2 garlic cloves smashed
For rice:
Combine all ingredients, over high heat. As soon as it comes to a boil, reduce the heat and simmer for 20 minutes or until water is absorbed. Fluff with a fork and serve alongside the enchiladas.
For Enchiladas:
In a small bowl, combine the salsa verde, 1/2 cup of the sour cream and the chopped jalapenos. Stir together and set aside.
In a saute pan over high heat, place 1 Tablespoon of oil, heat to shimmering and place the onions and garlic and cumin in the pan. Reduce heat to medium and stir until the onions are soft and translucent.
Add the chopped turkey meat, half of the salsa mixture, half of the cream cheese, half of the shredded cheese and half of the cotija cheese, and turkey stock. Heat to combine and melt the cheeses.
Grease a 9x13 inch pan.
Working with one tortilla at a time, fill with 2 heaping tablespoons of filling, roll them cigar style and lay seam side down in the casserole dish. Continue until all of the tortillas are filled. Pour the remaining salsa mixture over the top and top with all of the remaining cheeses and sour cream.
Place in 350 degree oven and bake for 20 minutes or until the cheese is golden and bubbly.
Serve with rice and enJoy!
Sunday, November 20, 2011
Gobble Gobble
As is evidenced by this blog, I LOVE to cook! I inherited this gift from my mother and as a result, holiday's around our house means food wars between my mother and me. Only occasionally does it get ugly. We usually manage to keep the peace. Our wars always revolve around the food choices. My mom tends to prefer the traditional and I tend to prefer the out of ordinary fare. I might make mashed potatoes, but they will have browned butter, or boursin cheese stirred in. In order to keep the peace, I have made it my goal to find ways to improve on texture and taste while keeping the traditional aspect alive. This turkey recipe is the absolute best way to make a turkey hands down. Please don't feel like you have to use the exact same flavors as I have listed here, but the basic recipe is essential. I like the flavors of classic sage, rosemary and thyme, but I don't like them to be too bold, so I have toned them down with the addition of citrus, apples and onions. But please don't skip on the brining process, it surely creates the most moist and flavorful meat possible.
Please note that you will need to plan ahead, as the brining process takes 24 hours prior to cooking your turkey.
Brine:
Position a rack in the lower third of an oven and preheat to 400°F.
In a bowl, using a wooden spoon, beat the butter, herbs, orange zest, salt and pepper until well blended. Set aside.
Gently slide your fingers under the breast to loosen the skin and work your fingers down to the thigh, being careful not to tear the skin. Spread one-third of the butter mixture evenly under the skin. Spread one-third of the mixture inside the body cavity, then spread the remaining mixture evenly on the outside of the turkey. Truss the turkey if desired using kitchen twine.
Place the turkey, breast side up, on a rack in a large roasting pan and roast for 45 minutes. Reduce the heat to 325°F and continue roasting, basting every 30 minutes with the pan juices. After about 2 1/2 hours of total roasting time, begin testing for doneness by inserting an instant-read thermometer into the thickest part of the breast and thigh, away from the bone. The breast should register 165°F and the thigh, 175°F. If the breast begins to cook too quickly, tent it loosely with aluminum foil. Total roasting time should be 3 to 3 3/4 hours.
Transfer the turkey to a carving board, cover loosely with foil and let rest for 20 minutes before carving.
Serves 12 hungry people.
Please note that you will need to plan ahead, as the brining process takes 24 hours prior to cooking your turkey.
Brine:
- 3/4 cup salt
1/2 cup brown sugar
2 oranges, quartered
2 lemons, quartered - 2 Apples, quartered
- 4 sprigs thyme
4 sprigs rosemary - 4 leaves of fresh sage
- One large onion sliced thickly
- To make the brining solution, dissolve the salt and sugar in 2 gallons of cold water in a non-reactive container (such as a clean bucket or large stockpot, or a clean, heavy-duty, plastic garbage bag.) Add the oranges, lemons, apples, thyme, rosemary, sage and onion.
Note: if you have a big turkey and need more brine than this, use 1/2 cup salt and 1/2 cup brown sugar for every gallon of water.
Turkey Ingredients:
8 Tbs. (1 stick) unsalted butter, at room
temperature
2 tsp fresh Thyme - 2 teaspoons fresh rosemary
- 1 tsp fresh sage
- Finely grated zest of 2 oranges
Finely grated zest of 1 lemon
1/2 tsp. freshly ground pepper
Directions:
Remove the turkey from the brine, rinse well with cold water, pat dry and let the turkey stand at room temperature for 1 hour.
Position a rack in the lower third of an oven and preheat to 400°F.
In a bowl, using a wooden spoon, beat the butter, herbs, orange zest, salt and pepper until well blended. Set aside.
Gently slide your fingers under the breast to loosen the skin and work your fingers down to the thigh, being careful not to tear the skin. Spread one-third of the butter mixture evenly under the skin. Spread one-third of the mixture inside the body cavity, then spread the remaining mixture evenly on the outside of the turkey. Truss the turkey if desired using kitchen twine.
Place the turkey, breast side up, on a rack in a large roasting pan and roast for 45 minutes. Reduce the heat to 325°F and continue roasting, basting every 30 minutes with the pan juices. After about 2 1/2 hours of total roasting time, begin testing for doneness by inserting an instant-read thermometer into the thickest part of the breast and thigh, away from the bone. The breast should register 165°F and the thigh, 175°F. If the breast begins to cook too quickly, tent it loosely with aluminum foil. Total roasting time should be 3 to 3 3/4 hours.
Transfer the turkey to a carving board, cover loosely with foil and let rest for 20 minutes before carving.
Serves 12 hungry people.
Monday, November 7, 2011
Simple Herb Roast Chicken
There is something very warm and comforting about a simple roasted chicken on a chilly autumn evening. It need not be complicated in flavor or preparation, but there are a few key points to getting it just right. Start with a high-quality bird, season it correctly, cook it at a high temperature for the ideal amount of time for its weight and let it rest before you carve it.
The herbs listed here are ones that make a good simple roast chicken, but of course you can add any of your favorite herbs. I sometimes add lemon or orange slices as well. Slice them very thinly and slip a few slices under the skin with your herbs, and don't forget to stick a few in the cavity as well. The juices from the citrus will steam on the inside, infusing the chicken with even more flavor.
This can be served with just about anything from mashed potatoes to buttered noodles and of course the leftovers are just as versatile. Use them for soup, chicken tacos, sandwiches, pasta... Be creative!
Ingredients:
1 roasting chicken, 4 to 5 lb.
2 teaspoons chopped fresh rosemary, plus one 4-inch sprig
1 Tablespoon chopped fresh thyme, plus 3 bushy sprigs
1 Tablespoon chopped parsley (preferably Italian Flat leaf)
1/4 cup extra-virgin olive oil, plus more for rubbing
Freshly ground pepper, to taste
2 tsp. kosher salt, plus more, to taste
1/2 small yellow onion
3 large garlic cloves
Directions:
Preheat the oven to 425°F. Cut off the chicken’s tail with kitchen scissors. Remove the giblets and remove the excess skin and fat from the cavity and neck.
In a small bowl, stir together the chopped rosemary, thyme and parsley and the 1/4 cup olive oil and season with pepper. Gently separate the chicken skin from the meat with your fingers, being careful not to tear the skin. Loosen the skin above the cavity the same way, reaching in as far as possible to loosen the skin on the tops of the thighs and legs. Slip the herb mixture between the skin and flesh, and rub it evenly over the exposed meat, covering it as much as possible. Pat the skin back into place and tuck the wing tips under.
Season the cavity with the 2 tsp. salt, then stuff with the herb sprigs, onion and garlic, pushing them in as far as they will go. Tie the legs together with kitchen string.
Rub the outside of the chicken with olive oil and season well with salt. Place, breast side up, in a roasting pan. Roast the chicken until the juices run clear when the thigh is pierced, about 1 hour and 10 minutes (12 to 15 minutes per pound), or a thermometer inserted in the thickest part of the thigh (not touching bone) registers 165°F. THIS IS VERY IMPORTANT: Let the chicken rest for 15 minutes before carving. This will allow the juices in the chicken to re-distribute into the meat, making it stay moist, tender and flavorful.
enJoy!
The herbs listed here are ones that make a good simple roast chicken, but of course you can add any of your favorite herbs. I sometimes add lemon or orange slices as well. Slice them very thinly and slip a few slices under the skin with your herbs, and don't forget to stick a few in the cavity as well. The juices from the citrus will steam on the inside, infusing the chicken with even more flavor.
This can be served with just about anything from mashed potatoes to buttered noodles and of course the leftovers are just as versatile. Use them for soup, chicken tacos, sandwiches, pasta... Be creative!
 |
| This is my niece Elisa in Versailles in 2007 I know this has nothing to do with Roast Chicken, but I'm feeling nostalgic. France is incredibly beautiful in the fall. |
1 roasting chicken, 4 to 5 lb.
2 teaspoons chopped fresh rosemary, plus one 4-inch sprig
1 Tablespoon chopped fresh thyme, plus 3 bushy sprigs
1 Tablespoon chopped parsley (preferably Italian Flat leaf)
1/4 cup extra-virgin olive oil, plus more for rubbing
Freshly ground pepper, to taste
2 tsp. kosher salt, plus more, to taste
1/2 small yellow onion
3 large garlic cloves
Directions:
Preheat the oven to 425°F. Cut off the chicken’s tail with kitchen scissors. Remove the giblets and remove the excess skin and fat from the cavity and neck.
In a small bowl, stir together the chopped rosemary, thyme and parsley and the 1/4 cup olive oil and season with pepper. Gently separate the chicken skin from the meat with your fingers, being careful not to tear the skin. Loosen the skin above the cavity the same way, reaching in as far as possible to loosen the skin on the tops of the thighs and legs. Slip the herb mixture between the skin and flesh, and rub it evenly over the exposed meat, covering it as much as possible. Pat the skin back into place and tuck the wing tips under.
Season the cavity with the 2 tsp. salt, then stuff with the herb sprigs, onion and garlic, pushing them in as far as they will go. Tie the legs together with kitchen string.
Rub the outside of the chicken with olive oil and season well with salt. Place, breast side up, in a roasting pan. Roast the chicken until the juices run clear when the thigh is pierced, about 1 hour and 10 minutes (12 to 15 minutes per pound), or a thermometer inserted in the thickest part of the thigh (not touching bone) registers 165°F. THIS IS VERY IMPORTANT: Let the chicken rest for 15 minutes before carving. This will allow the juices in the chicken to re-distribute into the meat, making it stay moist, tender and flavorful.
enJoy!
Wednesday, October 26, 2011
Hot Tamale!
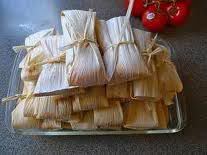
As my cooking skills and love of food grew over the years, I decided to take on the

All that said, while tamales are not hard to make, they are quite time consuming, so be prepared for a half day adventure. This recipe will yield 24-30 tamales, depending on how heavy handed you are with the dough. Even if you only want a few, I recommend that you go ahead and make a whole recipe, as they freeze beautifully! And while your at it, double the recipe and keep the extras frozen for a nice afternoon treat, or a quick weekday lunch.
Ingredients:
For the Meat Filling:
2 Pounds of boneless skinless chicken breasts
8 dried California chili peppers (can be found in the Mexican aisle of your grocery store)
1/2 teaspoon chili powder
1 teaspoons ground cumin
1/2 teaspoon ground coriander
1/4 teaspoon cayenne pepper
1 teaspoon kosher salt
1 small yellow onion, finely chopped
3 cloves of garlic, minced
1/2 cup of chicken stock
1/4 cup of juice from canned jalapenos
For the wrappers:
One bag of dried corn husks (can be found in the Mexican aisle of your local grocer)
For the dough:
4 cups of masa harina
2 1/4 teaspoons baking powder
1 teaspoon of cumin
2/3 cup of lard
2 to 4 cups chicken broth
Salt to taste
Directions:
For the wrappers:
About an hour prior to the start of your adventure, place the husks in a large bowl or pot and cover completely in hot water. Soak the husks until they are soft and pliable, at least 45 minutes and up to 2 hours.
For the Meat:
Place the chicken breasts in a pot and cover with water. Bring it to a boil, reduce the heat to keep them simmering and let cook until the chicken is cooked through (approx 20 minutes).
While this is happening, place your dried chili peppers in a small pan and cover with water. Bring the water to a boil and turn off the heat. Cover the pan and let the chili's steep for 15 minutes to soften them. Once they have softened, remove the stems and place them in a blender (reserving the liquid). Add the remaining "filling" ingredients and blend, adding the reserved chili liquid, one Tablespoon at a time, until a thick sauce is formed (about the same thickness as a gravy).
Remove the chicken from the hot liquid and let cool until handleable. Shred the chicken and toss it with the red chili sauce. Season to taste with salt and pepper. Remember that this is the main source of flavor for your tamale, so make sure it is slightly hotter and more seasoned than you think it should be. The bland flavor of the masa will tone down the flavor of the chicken mixture once it is combined.
For the dough:
In the bowl of a mixer, place the lard and mix on high speed until it is slightly fluffy looking. Add the masa, cumin, and baking powder and mix to combine. Gradually add enough of the reserved cooking liquid, 2 to 4 cups to create a dough that is like thick mashed potatoes. The dough should be moist but not wet. Cover the bowl with a damp towel and set aside until ready to use.
To assemble the tamales:
Remove two corn husk from the water and pat to remove excess water. Lay them together with the wide sides overlapping each other. Spread about 1/3 of a cup of the dough in an even layer across the middle of the husk to within 1/2-inch of the edges. Spoon about a heaping Tablespoon of the meat mixture in a line down the center of the dough. Roll the husk so the dough surrounds the meat and fold the ends under to finish creating the tamale. Use a string or a thin strip of the corn husks to tie aournd the middle of the tamale, holding the loose ends in place. Repeat until all the husks, dough and filling are used.
To steam the tamales:
Place a steamer basket in the bottom of an 11-quart pot and add enough water to come to the bottom of the basket. Layer the tamales on top of the steamer basket. Bring the water to a boil over medium heat, then cover and reduce the heat to maintain a simmer. Check the water level every 15 to 20 minutes, and add boiling water by pouring down the side of the pot, if necessary. Steam until the dough is firm and pulls away from the husk easily, 1 to 1 1/2 hours.
Serve warm. Store leftover tamales, tightly wrapped in plastic wrap, in the freezer, for up to a month. To reheat, remove the plastic wrap and steam until heated through.
Tuesday, October 25, 2011
Beef, It's what's for dinner
One of my favorite meals is Beef Stroganoff. I've taken years to perfect it with just the right amount of rich beefy flavor and creamy goodness in the sauce. The beauty of this dish is that you can use almost any cut of beef and while I have never done it with ground beef, I know it would be just as good. There are not a lot of ingredients in it either, making for a nice "on the fly" meal. This is delicious enough to serve for a dinner party, but easy enough to prepare on any hurried evening. Although this is traditionally served over noodles, it is excellent served over steamed white rice.

Beef Stroganoff
Ingredients:
1 Pound of Wide Egg Noodles
2 Tablespoons of Butter
1 pound of beef (sirloin and rib eye are my favorites)
1 Tablespoon of flour
1 tsp salt
1/2 teaspoon pepper
1 pound of white mushrooms (although any kind would be good)
1 Medium yellow or white onion
2 cloves of garlic
1/2 cup white wine (optional)
3 cups of beef broth
1 teaspoon of dill
1 cup of sour cream
Directions:
 Prepare the noodles as directed on the packaging.
While the noodles are cooking, slice the beef across the grain in as thin of slices as possible. The thinner you slice, the more tender the beef will be once cooked and of course the faster it will cook. To make this easier, I like to put my beef in the freezer for about 15 minutes prior to slicing it. This will firm it up enough to make your slicing much easier.
Toss the sliced meat with the flour, salt and pepper to lightly coat your meat. This is called dredging. Set this aside while you prepare the remaining ingredients.
Chop the onion in medium dice
Slice the mushrooms (whatever thickness you like)
Crush the garlic cloves
Place a large skillet over high heat and put the butter in the pan. As soon as it melts, add the beef and fry until it starts to brown and cooked through. Add the mushrooms, onions and garlic and continue to cook until the onions and mushrooms are starting to soften. Don't be afraid to get some good browning on your ingredients at this point. The more you brown, the more flavor you get. Although, be careful not to actually burn. That flavor is not such a good one!
Reduce the heat to medium and add the white wine. Cook until the wine is reduced in half.
Add the beef broth, increase heat to medium high and bring to a boil. Add the dill and continue to cook until the broth is reduced by about half (approximately 5 minutes). ***Alternately, you can add one and a half cups of water and 1 Tbs of beef bullion paste and skip the reducing process, but do make sure to bring the liquid to a boil before proceeding***
Turn the heat off and stir in the sour cream.
Do not bring the stroganoff back to a boil once you have added in the sour cream, this will likely cause it to separate and create an unappealing texture to your sauce.
Serve piping hot over the warm egg noodles.
enJoy!
Beef Stroganoff
Ingredients:
1 Pound of Wide Egg Noodles
2 Tablespoons of Butter
1 pound of beef (sirloin and rib eye are my favorites)
1 Tablespoon of flour
1 tsp salt
1/2 teaspoon pepper
1 pound of white mushrooms (although any kind would be good)
1 Medium yellow or white onion
2 cloves of garlic
1/2 cup white wine (optional)
3 cups of beef broth
1 teaspoon of dill
1 cup of sour cream
Directions:
While the noodles are cooking, slice the beef across the grain in as thin of slices as possible. The thinner you slice, the more tender the beef will be once cooked and of course the faster it will cook. To make this easier, I like to put my beef in the freezer for about 15 minutes prior to slicing it. This will firm it up enough to make your slicing much easier.
Toss the sliced meat with the flour, salt and pepper to lightly coat your meat. This is called dredging. Set this aside while you prepare the remaining ingredients.
Chop the onion in medium dice
Slice the mushrooms (whatever thickness you like)
Crush the garlic cloves
Place a large skillet over high heat and put the butter in the pan. As soon as it melts, add the beef and fry until it starts to brown and cooked through. Add the mushrooms, onions and garlic and continue to cook until the onions and mushrooms are starting to soften. Don't be afraid to get some good browning on your ingredients at this point. The more you brown, the more flavor you get. Although, be careful not to actually burn. That flavor is not such a good one!
Reduce the heat to medium and add the white wine. Cook until the wine is reduced in half.
Add the beef broth, increase heat to medium high and bring to a boil. Add the dill and continue to cook until the broth is reduced by about half (approximately 5 minutes). ***Alternately, you can add one and a half cups of water and 1 Tbs of beef bullion paste and skip the reducing process, but do make sure to bring the liquid to a boil before proceeding***
Turn the heat off and stir in the sour cream.
Do not bring the stroganoff back to a boil once you have added in the sour cream, this will likely cause it to separate and create an unappealing texture to your sauce.
Serve piping hot over the warm egg noodles.
enJoy!
Subscribe to:
Posts (Atom)